When testing various features in my Homelab I always try to keep things easy. One approach is to keep the number of virtual machines as low as possible. The vCenter Server Appliance can reduce the number of required VMs by running additional mandatory services. In this post I am going to describe how to use the VCSA as DNS Server.
VMware vCenter Server Appliance is a openSUSE Linux based virtual appliance. It comes with zypper, the packet management tool from the SuSE distribution.
Installing additional Software can change system libraries required by the vCenter. Don't do that in a production environment. This is for Lab use only!
DNS Server Installation
To install additional software you have to add a repository to zypper. A detailed description of the process can be found here. For this post, I am using VCSA 5.5 which uses SUSE 11.2. So I add the appropriate repository:
vc:~ # zypper addrepo -f http://download.opensuse.org/distribution/11.2/repo/oss/opensuse
vc:~ # zypper refresh
Press a to trust the Key
Install DNS Server software bind and the management component yast2-dns-server. You have to downgrade bind-libs and bind-utils to get bind running. Choose Solution 1 when asked:
vc:~ zypper install yast2-dns-server bind

Problem: bind-9.6.1P1-3.3.x86_64 requires libdns.so.50()(64bit), but this requirement cannot be provided
  uninstallable providers: bind-libs-9.6.1P1-3.3.x86_64[opensuse]
 Solution 1: Following actions will be done:
  downgrade of bind-libs-9.9.3P2-0.5.1.x86_64 to bind-libs-9.6.1P1-3.3.x86_64
  downgrade of bind-utils-9.9.3P2-0.5.1.x86_64 to bind-utils-9.6.1P1-3.3.x86_64
 Solution 2: do not install bind-9.6.1P1-3.3.x86_64
 Solution 3: break bind-9.6.1P1-3.3.x86_64 by ignoring some of its dependencies

Choose from above solutions by number or cancel [1/2/3/c] (c): 1

Initial Configuration
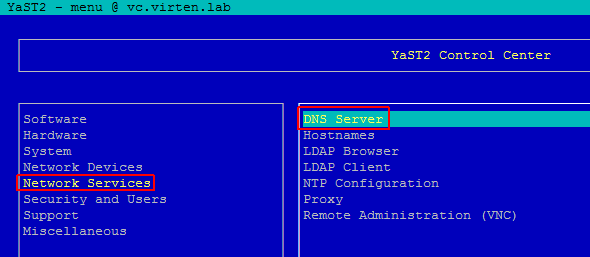
YaST is an easy-to-use tools to initially configure the DNS Server and change the configuration later. To navigate in YaST use the cursor keys and TAB.
1. Open YaST
vc:~ yast2
2. Navigate to Network Services > DNS Server
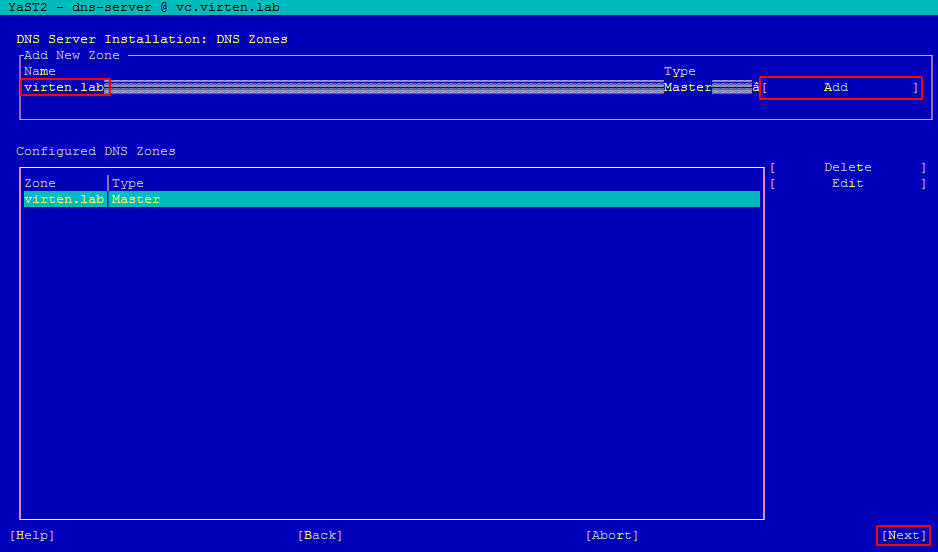
3. Enter a DNS Forwarder (This is used to resolve names that are not part of your Lab.)
4. Press Add
5. Press Next

6. Enter your Labs DNS name (If your Hostname is vc.virten.lab, your DNS Name is virten.lab)
7. Press Add
8. Press Next
9. Set the Start-Up Behavior to On
10. Press Finish
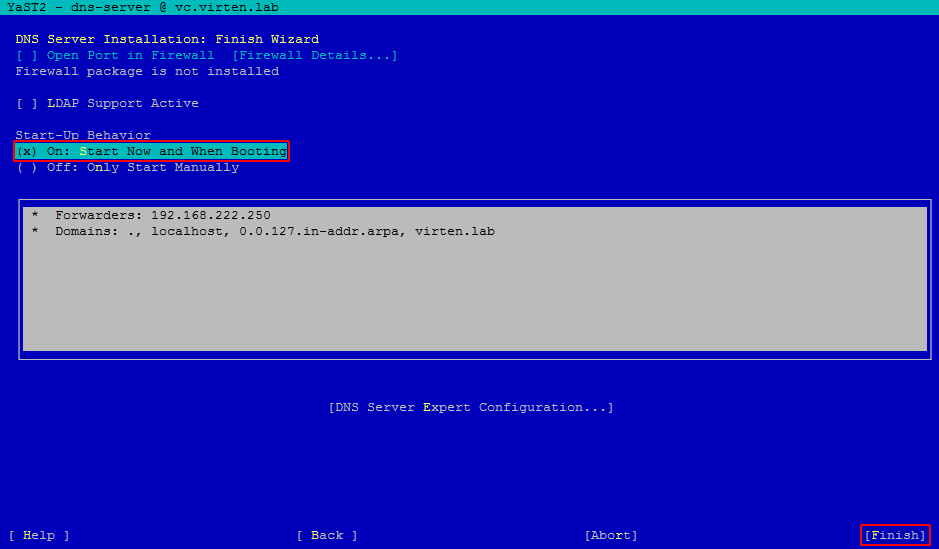
11. Ignore the error message (we will fix that later)
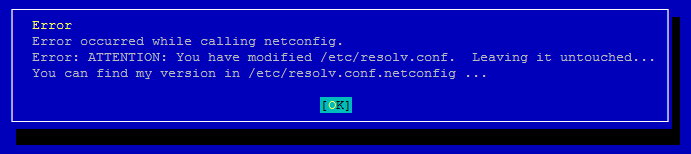
12. To fix the error message and use the correct resolv.conf we have to replace the modified version of /etc/resolv.conf with /etc/resolv.conf.netconfig:
vc:~ # mv /etc/resolv.conf /etc/resolv.conf.old
vc:~ # mv /etc/resolv.conf.netconfig /etc/resolv.conf
The installation is now finished and the DNS Server is up and running.
Add Host Records
To use the DNS server you have to configure A records for all hosts in your lab:
1. Open YaST
vc:~ yast2
2. Navigate to Network Services > DNS Server
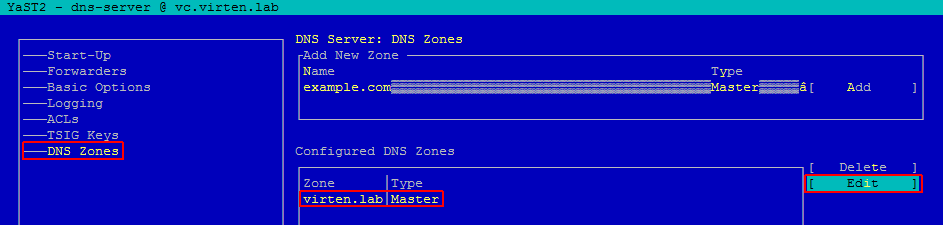
3. The menu has slightly changed. Navigate to DNS Zones
4. Select your Zone
5. Press Edit
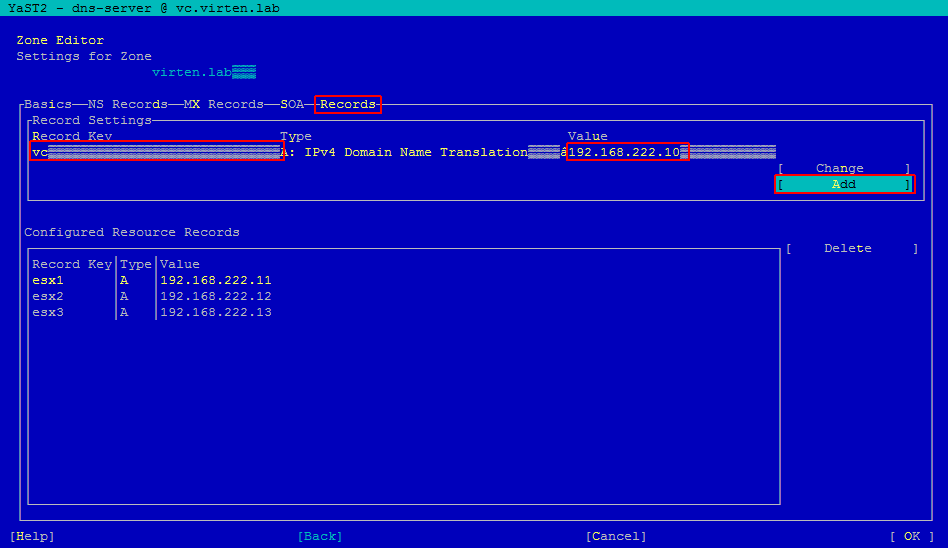
6. Navigate to Records
7. Enter Hostname (Record Key)
8. Enter IP address (Value)
9. Press Add
10. Repeat Step 7-9 to add all hosts
11. Press OK
12. Use nslookup to verify the dns resolution:
vc:~ # nslookup
> esx1.virten.lab
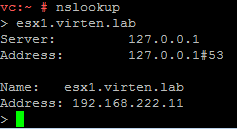
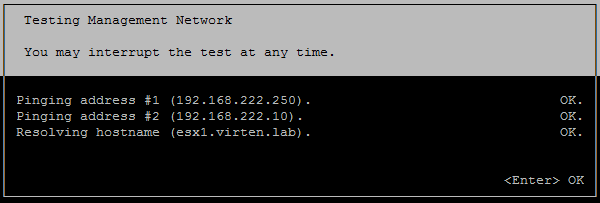
That's it. The DNS Server is now ready to be used from all hosts in your lab:
Pingback: Newsletter: December 28 | Notes from MWhite
Great tip, hoping to use this in my lab.
But when using vCSA 5.5 Build 2063318 (5.5U2), in a PuTTY session, I am unable to get the command to complete without a syntax warning error:
vcenter:~ # zypper addrepo -f http://download.opensuse.org/distribution/11.2/repo/oss/opensuse
If only one argument is used, it must be a URI pointing to a .repo file.
addrepo (ar) [options]
addrepo (ar) [options]
Have you by any chance tried this with later versions of the appliance?
Not sure why it is missing in my post, but you have to specify an alias. There is also an issue with 11.2, which is no longer available.
You might try:
vcenter:~ # zypper addrepo -f http://download.opensuse.org/distribution/11.4/repo/oss suse11
You can see all available versions here: http://download.opensuse.org/distribution/
I'm going to test and fix the post with a current version.
:?: Good post , you can enable inverse dns (NX) and how?