Extend Storage Capacity with USB Datastores
If you need more storage capacity, use external USB drives. You can also use old M.2 or PCIe SSDs by buying an USB3.0 adapter. Make sure to use USB 3 and performance will be fine. Installation is explained here. You can also use USB Disks with VSAN.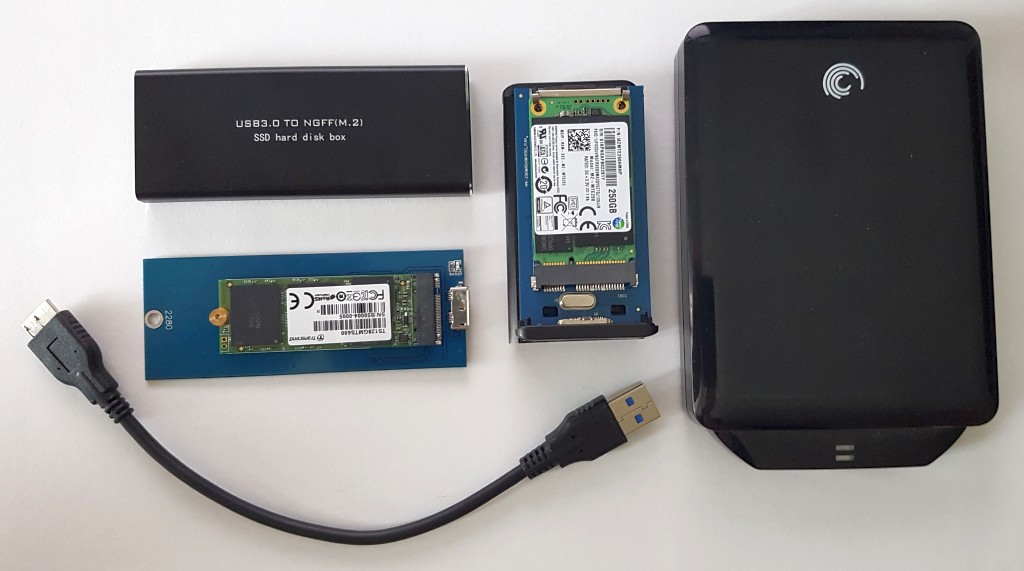
Get USB Network adapters
A single network adapter per host is not sufficient for most homelabs. Buy additional USB3 network adapters to expand the possibilities. Installation instructions and recommended adapters are explained in more detail here: Additional USB NIC for Intel NUCs running ESXi.
Activate AMT Remote Management (vPRO only)
If you have the NUC5i5MYHE with vPRO technology, you can activate remote management including KVM with VNC. The remote management uses the NUCs network port and can be shared with ESXi.
- Press STRG + P during the first boot screen to access MEBX
- Login with the default Password (admin) and change it (8 characters required)
- Navigate to Network Setup > TCP/IP Settings and set a static IP address
- Back to the main AMT Configuration page and press Activate Network Access
- Set User Consent > User Opt-in to NONE
The AMT Web interface is available at http://<ADDRESS>:16992/
To use KVM download the AMT SDK, open \Windows\Intel_AMT\Bin\KVM\KVMControlApplication.exe and set KVM Status to "Enable - all ports":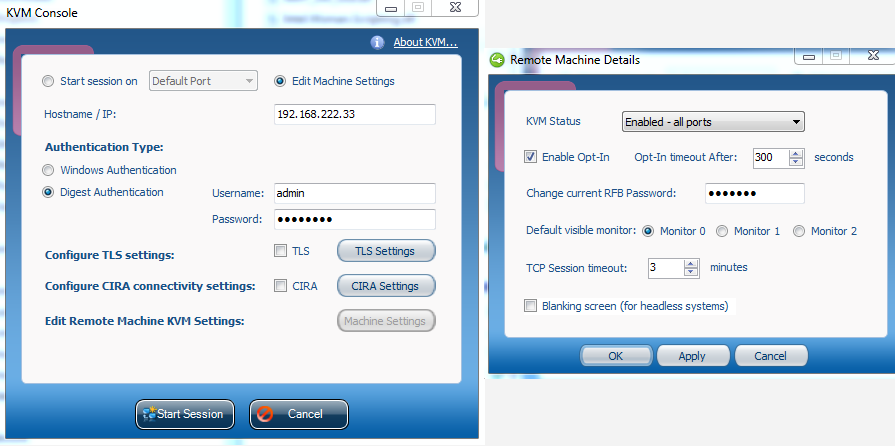
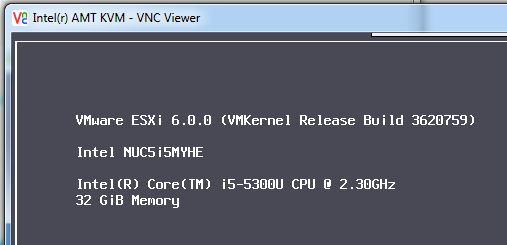
You can no access the remote console with any VNC viewer on port 5900:
Use Wake on LAN
If you don't want your Intel NUC to run 24/7 but you want to power it on without physical access you can use WOL (Wake on LAN) to power it on remotely. Enter the BIOS to verify that WOL is enabled:
Power > Secondary Power Settings > Wake on LAN: Power On
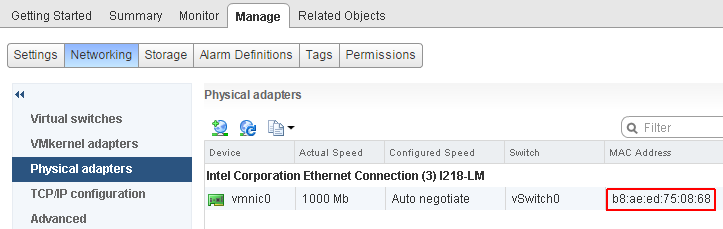
To use WOL you need the physical network adapters MAC address. You can identify the MAC address in the ESXi Configuration within Manage > Networking > Physical Adapters
When you want to power on the NUC you have to send a Magic Packet to the MAC address. This can be done from any system in the same L2 network segment. Software is available for Windows or most Linux distributions, for examaple a debian based Raspberry Pi:
root@pi:~# apt-get install wakeonlan
root@pi:~# wakeonlan b8:ae:ed:75:08:68
Sending magic packet to 255.255.255.255:9 with b8:ae:ed:75:08:68
Get a Raspberry Pi
Integrate a Raspberry Pi to you homelab to have a static always on system. You can use it as DNS server, jumphost, for monitoring, as backup host or anything else that you want to have outside your platform.
Edit Power Policy Settings
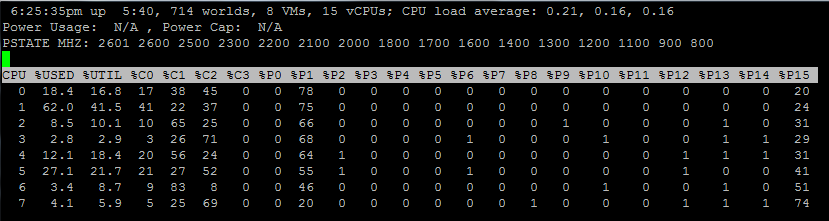
Intel NUC supports ACPI P-states and C-states. P States set the CPU to a lower frequency and C states are power saving modes. The default mode is Balanced, which is good for most systems. This will allow the ESXi to lower the core frequency and set idle Cores to stop (C2). Cores in C2 will require about 10% less energy, but going back to operating mode requires about 50µs.
If you need full performance, set the policy to High performance, which will disable any P/C states.

ESXTOP in the power screen (p) reveals information about P and C states:
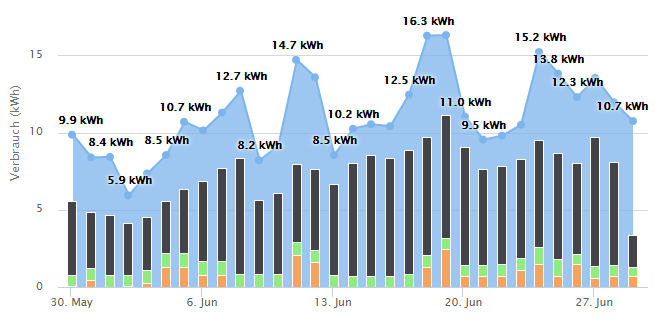
Measure Power Consumption
Depending on your location, your power bill when running a homelab can increase drastically so keep an eye on your power consumption. You can either buy a cheap pluggable power meter to measure your homelab or integrate it into your home automation. I'm using a HomeMatic based power measurement system with a Graphite backend.
VMUG Advantage
EVALExperience, part of VMUG Advantage enables you to use evaluation licenses for all main VMware products required to run a VMware bases homelab. Subscription is avilable for $200 per year and includes other goodies.