vSAN 6.6 RVC Guide
|
The "vSAN 6.6 RVC Guide" series explains how to manage your VMware Virtual SAN environment with the Ruby vSphere Console. RVC is an interactive command line tool to control and automate your platform. If you are new to RVC, make sure to read the Getting Started with Ruby vSphere Console Guide. All commands are from the latest vSAN 6.6 version.
The second part explains commands related to vSAN cluster administration tasks. These commands are required to gather information about ESXi hosts and the cluster itself. They also provide important information when you want to maintain your vSAN cluster or configure a stretched cluster:
- vsan.host_info
- vsan.cluster_info
- vsan.check_limits
- vsan.whatif_host_failures
- vsan.enter_maintenance_mode
- vsan.resync_dashboard
- vsan.proactive_rebalance
- vsan.proactive_rebalance_info
- vsan.host_evacuate_data
- vsan.host_exit_evacuation
- vsan.ondisk_upgrade
- vsan.v2_ondisk_upgrade
- vsan.upgrade_status
- vsan.stretchedcluster.config_witness
- vsan.stretchedcluster.remove_witness
- vsan.stretchedcluster.witness_info
To shorten commands I've used marks for the vSAN enabled Cluster, a Virtual Machine and an ESXi Hosts participating in the vSAN. This enables me to use ~cluster, ~vm and ~esx in examples:
/localhost/DC> mark cluster ~/computers/VSAN-Cluster/
/localhost/DC> mark vm ~/vms/vma.virten.lab
/localhost/DC> mark esx ~/computers/VSAN-Cluster/hosts/esx1.virten.lab/
Cluster Administration
vsan.host_info ~host
Prints VSAN related information about an ESXi host. This command retains information about:
- Cluster role (master, backup or agent)
- Cluster UUID
- Node UUID
- Member UUIDs
- Auto claim (yes or no)
- Disk Mappings: Disks that are claimed by VSAN
- FaultDomainInfo: Information about the fault domain
- NetworkInfo: VSAN traffic activated vmk adapters
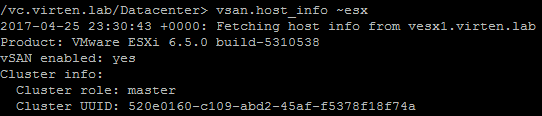
Example 1 - Print VSAN host Information:
/localhost/DC> vsan.host_info ~esx
Fetching host info from vesx1.virten.lab (may take a moment) ...
Product: VMware ESXi 6.5.0 build-5310538
VSAN enabled: yes
Cluster info:
  Cluster role: master
  Cluster UUID: 52bcd891-92ce-2de3-1dfd-2a41a96dc99e
  Node UUID: 57c31851-3589-813e-71ca-005056bb0438
  Member UUIDs: ["57c31851-3589-813e-71ca-005056bb0438", "57c31b5a-3501-74e0-d719-005056bbaf1d", "57c31aee-2b9b-789e-ff4f-005056bbefe7"] (3)
Node evacuated: no
Storage info:
  Auto claim: no
  Disk Mappings:
    SSD: Local VMware Disk (mpx.vmhba1:C0:T1:L0) - 10 GB, v3
    MD: Local VMware Disk (mpx.vmhba1:C0:T2:L0) - 25 GB, v3
    MD: Local VMware Disk (mpx.vmhba1:C0:T3:L0) - 25 GB, v3
FaultDomainInfo:
  Not configured
NetworkInfo:
  Adapter: vmk1 (10.0.222.121)
vsan.cluster_info ~cluster
Prints VSAN related information about all ESXi hosts. This command provides the same information as vsan.host_info:
Example 1 – Disable VSAN on an HA enabled Cluster:
/localhost/DC> vsan.cluster_info ~cluster/
Fetching host info from vesx2.virten.lab (may take a moment) ...
Fetching host info from vesx3.virten.lab (may take a moment) ...
Fetching host info from vesx1.virten.lab (may take a moment) ...
Host: vesx2.virten.lab
  Product: VMware ESXi 6.5.0 build-5310538
  VSAN enabled: yes
  Cluster info:
    Cluster role: agent
[...]

Host: vesx3.virten.lab
  Product: VMware ESXi 6.5.0 build-5310538
  VSAN enabled: yes
  Cluster info:
    Cluster role: backup
[...]

Host: vesx1.virten.lab
  Product: VMware ESXi 6.5.0 build-5310538
  VSAN enabled: yes
  Cluster info:
    Cluster role: master
[...]

No Fault Domains configured in this cluster
vsan.check_limits ~cluster|~host
Gathers and checks various VSAN related counters like components or disk utilization against their limits. This command can be used against a single ESXi host or a Cluster.
Example 1 - Check VSAN limits from from all host in a VSAN enabled Cluster:
/localhost/DC> vsan.check_limits ~cluster
Gathering stats from all hosts ...
Gathering disks info ...
+-------------------+-------------------+------------------------+
| Host              | RDT               | Disks                  |
+-------------------+-------------------+------------------------+
| esx1.virten.local | Assocs: 51/20000  | Components: 45/750     |
|                   | Sockets: 26/10000 | WDC_WD3000HLFS: 44%    |
|                   | Clients: 4        | WDC_WD3000HLFS: 32%    |
|                   | Owners: 11        | WDC_WD3000HLFS: 28%    |
|                   |                   | SanDisk_SDSSDP064G: 0% |
| esx2.virten.local | Assocs: 72/20000  | Components: 45/750     |
|                   | Sockets: 24/10000 | WDC_WD3000HLFS: 29%    |
|                   | Clients: 5        | WDC_WD3000HLFS: 31%    |
|                   | Owners: 12        | WDC_WD3000HLFS: 43%    |
|                   |                   | SanDisk_SDSSDP064G: 0% |
| esx3.virten.local | Assocs: 88/20000  | Components: 45/750     |
|                   | Sockets: 31/10000 | WDC_WD3000HLFS: 42%    |
|                   | Clients: 6        | WDC_WD3000HLFS: 44%    |
|                   | Owners: 9         | WDC_WD3000HLFS: 38%    |
|                   |                   | SanDisk_SDSSDP064G: 0% |
+-------------------+-------------------+------------------------+
vsan.whatif_host_failures [-n|-s] ~cluster
Simulates how host failures would impact VSAN resource usage. The command shows the current VSAN disk usage and the calculated disk usage after a host has failed. The simulation assumes that all objects would be brought back to full policy compliance by bringing up new mirrors of existing data.
- -n, --num-host-failures-to-simulate=: Number of host failures to simulate (default: 1)
- -s, --show-current-usage-per-host: Show current resources used per host
Example 1 - Simulate 1 host failure:
/localhost/DC> vsan.whatif_host_failures ~cluster
Simulating 1 host failures:

+-----------------+-----------------------------+-----------------------------------+
| Resource        | Usage right now             | Usage after failure/re-protection |
+-----------------+-----------------------------+-----------------------------------+
| HDD capacity    |   7% used (1128.55 GB free) |  15% used (477.05 GB free)        |
| Components      |   2% used (2025 available)  |   3% used (1275 available)        |
| RC reservations |   0% used (90.47 GB free)   |   0% used (48.73 GB free)         |
+-----------------+-----------------------------+-----------------------------------+
Example 2 - Show utilization and simulate 1 host failure:
/localhost/DC> vsan.whatif_host_failures -s ~cluster
Current utilization of hosts:
+------------+---------+--------------+------+----------+----------------+--------------+
|            |         | HDD Capacity |      |          | Components     | SSD Capacity |
| Host       | NumHDDs | Total        | Used | Reserved | Used           | Reserved     |
+------------+---------+--------------+------+----------+----------------+--------------+
| 10.0.0.1   | 2       | 299.50 GB    | 6 %  | 5 %      |    4/562 (1 %) | 0 %          |
| 10.0.0.2   | 2       | 299.50 GB    | 10 % | 9 %      |   11/562 (2 %) | 0 %          |
| 10.0.0.3   | 2       | 299.50 GB    | 10 % | 9 %      |    6/562 (1 %) | 0 %          |
| 10.0.0.4   | 2       | 299.50 GB    | 14 % | 13 %     |    7/562 (1 %) | 0 %          |
+------------+---------+--------------+------+----------+----------------+--------------+

Simulating 1 host failures:

+-----------------+-----------------------------+-----------------------------------+
| Resource        | Usage right now             | Usage after failure/re-protection |
+-----------------+-----------------------------+-----------------------------------+
| HDD capacity    |  10% used (1079.73 GB free) |  13% used (780.23 GB free)        |
| Components      |   1% used (2220 available)  |   2% used (1658 available)        |
| RC reservations |   0% used (55.99 GB free)   |   0% used (41.99 GB free)         |
+-----------------+-----------------------------+-----------------------------------+
vsan.enter_maintenance_mode [-t|-e|-n|-v] ~host
Put the host into maintenance mode. This command is VSAN aware and can migrate VSAN data to another host like the vSphere Web Client does. It also migrates running virtual machines when DRS is enabled.
- -t, --timeout=: Set a timeout for the process to complete. When the host can not enter maintenance mode in X seconds, the process is canceled. (default: 0)
- -e, --evacuate-powered-off-vms: Moves powered off virtual machines to other hosts in the cluster.
- -n, --no-wait: The command returns immediately without waiting for the task to complete.
- -v, --vsan-mode=: Actions to take for VSAN components. Options:
- ensureObjectAccessibility (default)
- evacuateAllData
- noAction
Example 1 - Put the host into maintenance mode. Do not copy any VSAN components (Fast but with reduced redundancy):
/localhost/DC> vsan.enter_maintenance_mode ~esx
EnterMaintenanceMode esx1.virten.local: success
Example 2 - Put the host into maintenance mode. Copy all VSAN components to other hosts in the cluster:
/localhost/DC> vsan.enter_maintenance_mode ~esx -v evacuateAllData
EnterMaintenanceMode esx1.virten.local: success
Example 3 - Put the host into maintenance mode. Copy all VSAN components to other hosts in the cluster. Cancel the process when it takes longer than 10 minutes:
/localhost/DC> vsan.enter_maintenance_mode ~esx -v evacuateAllData -t 600
EnterMaintenanceMode esx1.virten.local: success
Example 4 - Put the host into maintenance mode. Do not track the process (Batch mode):
/localhost/DC> vsan.enter_maintenance_mode ~esx -n
/localhost/DC>
vsan.resync_dashboard [-r] ~cluster
This command shows what happens when a mirror resync is in progress. If a host fails or is going into maintenance mode, you should watch the resync status here. The command can be run once or with a refresh interval.
- -r, --refresh-rate=: Refresh interval (in sec). Default is no refresh
Example 1 - Resync Dashboard where nothing happens:
/localhost/DC>  vsan.resync_dashboard ~cluster
Querying all VMs on VSAN ...
Querying all objects in the system from esx1.virten.lab ...
Got all the info, computing table ...
+-----------+-----------------+---------------+
| VM/Object | Syncing objects | Bytes to sync |
+-----------+-----------------+---------------+
+-----------+-----------------+---------------+
| Total     | 0               | 0.00 GB       |
+-----------+-----------------+---------------+
Example 2 - Resync Dashboard after a host has been put into maintenance mode. Refreshed every 10 seconds:
/localhost/DC>  vsan.resync_dashboard ~cluster --refresh-rate 10
Querying all VMs on VSAN ...
Querying all objects in the system from esx1.virten.local ...
Got all the info, computing table ...
+-----------+-----------------+---------------+
| VM/Object | Syncing objects | Bytes to sync |
+-----------+-----------------+---------------+
+-----------+-----------------+---------------+
| Total     | 0               | 0.00 GB       |
+-----------+-----------------+---------------+
Querying all objects in the system from esx1.virten.local ...
Got all the info, computing table ...
+-----------------------------------------------------------------+-----------------+---------------+
| VM/Object                                                       | Syncing objects | Bytes to sync |
+-----------------------------------------------------------------+-----------------+---------------+
| vm1                                                             | 1               |               |
|    [vsanDatastore] 5078bd52-2977-8cf9-107c-00505687439c/vm1.vmx |                 | 0.17 GB       |
+-----------------------------------------------------------------+-----------------+---------------+
| Total                                                           | 1               | 0.17 GB       |
+-----------------------------------------------------------------+-----------------+---------------+
Querying all objects in the system from esx1.virten.local ...
Got all the info, computing table ...
+--------------------------------------------------------------------+-----------------+---------------+
| VM/Object                                                          | Syncing objects | Bytes to sync |
+--------------------------------------------------------------------+-----------------+---------------+
| vm1                                                                | 1               |               |
|    [vsanDatastore] 5078bd52-2977-8cf9-107c-00505687439c/vm1.vmx    |                 | 0.34 GB       |
| debian                                                             | 1               |               |
|    [vsanDatastore] 6978bd52-4d92-05ed-dad2-005056871792/debian.vmx |                 | 0.35 GB       |
+--------------------------------------------------------------------+-----------------+---------------+
| Total                                                              | 2               | 0.69 GB       |
+--------------------------------------------------------------------+-----------------+---------------+
[...]
vsan.proactive_rebalance [-s|-t|-v|-i|-r|-o] ~cluster
Starts a proactive rebalance that looks at the distribution of components in the cluster and will proactively begin to balance the distribution of components across ESXi Hosts.
- -s, --start: Start proactive rebalance
- -t, --time-span=: Determine how long this proactive rebalance lasts in seconds, only be valid when option 'start' is specified
- -v, --variance-threshold=: Configure the threshold, that only if disk's used_capacity/disk_capacity exceeds this threshold(comparing to the disk with the least fullness in the cluster), disk is qualified for proactive rebalance, only be valid when option 'start' is specified
- -i, --time-threshold=: Threshold in seconds, that only when variance threshold continuously exceeds this threshold, the corresponding disk will be involved to proactive rebalance, only be valid when option 'start' is specified
- -r, --rate-threshold=: Determine how many data in MB could be moved per hour for each node, only be valid when option 'start' is specified
- -o, --stop: Stop proactive rebalance
Example 1 – Start proactive rebalance:
/localhost/DC> vsan.proactive_rebalance -s ~cluster/
Processing Virtual SAN proactive rebalance on host vesx2.virten.lab ...
Processing Virtual SAN proactive rebalance on host vesx3.virten.lab ...
Processing Virtual SAN proactive rebalance on host vesx1.virten.lab ...
Proactive rebalance has been started!
Example 2 – Stop proactive rebalance:
/localhost/DC> vsan.proactive_rebalance -o ~cluster/
Processing Virtual SAN proactive rebalance on host vesx2.virten.lab ...
Processing Virtual SAN proactive rebalance on host vesx1.virten.lab ...
Processing Virtual SAN proactive rebalance on host vesx3.virten.lab ...
Proactive rebalance has been stopped!
Example 3 – Start proactive rebalance but limit the bandwidth to 100MB per hour:
/localhost/DC> vsan.proactive_rebalance -s -r 100 ~cluster/
Processing Virtual SAN proactive rebalance on host vesx2.virten.lab ...
Processing Virtual SAN proactive rebalance on host vesx1.virten.lab ...
Processing Virtual SAN proactive rebalance on host vesx3.virten.lab ...
Proactive rebalance has been started!
vsan.proactive_rebalance_info ~cluster
Displays information about proactive rebalancing activities, including disk usage statistics and whether or not proactive rebalance is running.
Example 1 – Display proactive rebalance status:
/localhost/DC> vsan.proactive_rebalance_info ~cluster
Retrieving proactive rebalance information from host vesx2.virten.lab ...
Retrieving proactive rebalance information from host vesx3.virten.lab ...
Retrieving proactive rebalance information from host vesx1.virten.lab ...

Proactive rebalance start: 2016-11-03 11:12:04 UTC
Proactive rebalance stop: 2016-11-04 11:12:06 UTC
Max usage difference triggering rebalancing: 30.00%
Average disk usage: 2.00%
Maximum disk usage: 3.00% (3.00% above minimum disk usage)
Imbalance index: 2.00%
No disk detected to be rebalanced
vsan.host_evacuate_data [-a|-n|-t] ~host
This command is the data evacuation part of entering maintenance mode but without any of the vMotion tasks. The command evacuates data from the host and ensures that VM objects are rebuilt elsewhere in the cluster to maintain full redundancy.
- -a, --allow-reduced-redundancy: Removes the need for nodes worth of free space, by allowing reduced redundancy
- -n, --no-action: Do not evacuate data during host evacuation
- -t, --time-out=: Time out for single node evacuation (default: 0)
Example 1 – Evacuate data with allowed reduced redundancy:
/localhost/DC> vsan.host_evacuate_data -a ~esx/
Data evacuation mode ensureObjectAccessibility
Data evacuation time out 0

Start to evacuate data for host vesx1.virten.lab
EvacuateVsanNode vesx1.virten.lab: success
Done evacuate data for host vesx1.virten.lab

Hosts remain evacuation state until explicily exit evacuation
through command vsan.host_exit_evacuation
vsan.host_exit_evacuation ~host
This commands exits the host evacuation state, and allows the disks on the host to be reused for virtual machine objects.
Example 1 – Exit host evacuation state:
/localhost/DC> vsan.host_exit_evacuation ~esx/

Start to exit evacuation for host vesx1.virten.lab
RecommissionVsanNode vesx1.virten.lab: success
Done exit evacuation for host vesx1.virten.lab
vsan.ondisk_upgrade [-a|-f] ~cluster
The command rotates through all ESXi hosts in the cluster, performs pre-checks and upgrades the on-disk format to the latest version. The command performs a rolling upgrade by doing several verification checks prior to evacuate components from each of the disk groups.
The allow-reduced-redundancy allows upgrades when there are not enough resources in the cluster to accommodate disk evacuations.
- -a, --allow-reduced-redundancy: Removes the need for one disk group worth of free space, by allowing reduced redundancy during disk upgrade
- -f, --force: Automatically answer all confirmation questions with 'proceed'
Example 1 – Upgrade VSAN to the latest on-disk format:
/localhost/DC> vsan.ondisk_upgrade ~cluster
+------------------+-----------+-------------+----------------+----------------+------------------+----------------+----------------+
| Host             | State     | ESX version | v1 Disk groups | v2 Disk groups | v2.5 Disk groups | v3 Disk groups | v5 Disk groups |
+------------------+-----------+-------------+----------------+----------------+------------------+----------------+----------------+
| vesx1.virten.lab | connected | 6.5.0       | 0              | 0              | 0                | 1              | 0              |
| vesx2.virten.lab | connected | 6.5.0       | 0              | 0              | 0                | 1              | 0              |
| vesx3.virten.lab | connected | 6.5.0       | 0              | 0              | 0                | 1              | 0              |
+------------------+-----------+-------------+----------------+----------------+------------------+----------------+----------------+

Running precondition checks ...
Passed precondition checks

Target file system version: v5
Disk mapping decommission mode: evacuateAllData
Check cluster status for disk format conversion.
Update vSAN system settings.
No disk conversion performed, all mounted disk groups on host are compliant
Check cluster status for disk format conversion.
Update vSAN system settings.
No disk conversion performed, all mounted disk groups on host are compliant
Check cluster status for disk format conversion.
Update vSAN system settings.
No disk conversion performed, all mounted disk groups on host are compliant
Disk format conversion is done.
Check existing objects on vSAN.
Object conversion is done.
Waiting for upgrade task to finish
Done vSAN upgrade
vsan.v2_ondisk_upgrade [-a|-f] ~cluster
The command rotates through all ESXi hosts in the cluster, performs pre-checks and upgrades the on-disk format to the latest version. The command performs a rolling upgrade by doing several verification checks prior to evacuate components from each of the disk groups.
The allow-reduced-redundancy allows upgrades when there are not enough resources in the cluster to accommodate disk evacuations.
- -a, --allow-reduced-redundancy: Removes the need for one disk group worth of free space, by allowing reduced redundancy during disk upgrade
- -f, --force: Automatically answer all confirmation questions with 'proceed'
Example 1 – Upgrade VSAN to the latest on-disk format:
/localhost/DC> vsan.v2_ondisk_upgrade ~cluster
+------------------+-----------+-------------+----------------+----------------+------------------+----------------+----------------+
| Host             | State     | ESX version | v1 Disk groups | v2 Disk groups | v2.5 Disk groups | v3 Disk groups | v5 Disk groups |
+------------------+-----------+-------------+----------------+----------------+------------------+----------------+----------------+
| vesx1.virten.lab | connected | 6.5.0       | 0              | 0              | 0                | 1              | 0              |
| vesx2.virten.lab | connected | 6.5.0       | 0              | 0              | 0                | 1              | 0              |
| vesx3.virten.lab | connected | 6.5.0       | 0              | 0              | 0                | 1              | 0              |
+------------------+-----------+-------------+----------------+----------------+------------------+----------------+----------------+

Running precondition checks ...
Passed precondition checks

Target file system version: v5
Disk mapping decommission mode: evacuateAllData
Check cluster status for disk format conversion.
Update vSAN system settings.
No disk conversion performed, all mounted disk groups on host are compliant
Check cluster status for disk format conversion.
Update vSAN system settings.
No disk conversion performed, all mounted disk groups on host are compliant
Check cluster status for disk format conversion.
Update vSAN system settings.
No disk conversion performed, all mounted disk groups on host are compliant
Disk format conversion is done.
Check existing objects on vSAN.
Object conversion is done.
Waiting for upgrade task to finish
Done vSAN upgrade
vsan.upgrade_status [-r] ~cluster
Provide pre-flight and during information about the number of objects left to ugprade.
- -r, --refresh-rate=: removes the need for nodes worth of free space, by allowing reduced redundanc
Example 1 – Display upgrade status with a refresh rate of 60 seconds
/localhost/DC> vsan.upgrade_status -r 60 ~cluster
Showing upgrade status every 60 seconds. Ctrl + c to stop.
No upgrade in progress
0 objects in which will need realignment process
0 objects with new alignment
0 objects ready for v3 features
5 objects ready for v5 features
vsan.stretchedcluster.config_witness ~cluster ~witness_host ~preferred_fault_domain
Configure a witness host to form a vSAN Stretched Cluster. The name of the cluster, the witness host (path to the host object in RVC) and the preferred fault domain (label) are mandatory. Please note that this command does neither create nor assign ESXi hosts to fault domains. You can use the esxcli vsan faultdomain set command to set failure domains from the RVC.
- cluster: A cluster with vSAN enabled
- witness_host: Witness host for the stretched cluster
- preferred_fault_domain: Preferred fault domain for witness host
Example 1 – Configure a witness host and assign fault domains:
/localhost/DC> vsan.stretchedcluster.config_witness ~cluster computers/wit.virten.lab/host/ Hamburg
Configuring witness host for the cluster...
Task: Add witness host
New progress: 1%
Task result: success
/localhost/DC> esxcli ~esx vsan faultdomain set -f "Hamburg"
/localhost/DC> esxcli ~esx vsan faultdomain get
faultDomainId: "35d7df6e-d3d9-3be2-927d-14acc5f1fc9a"
faultDomainName: "Hamburg"
vsan.stretchedcluster.witness_info ~cluster
Displays witness host information for a vSAN Stretched Cluster.
Example 1 – Show witness information
/localhost/DC> vsan.stretchedcluster.witness_info ~cluster
Found witness host for vSAN stretched cluster.
+------------------------+--------------------------------------+
| Stretched Cluster      | vSAN65                               |
+------------------------+--------------------------------------+
| Witness Host Name      | wit.virten.lab                       |
| Witness Host UUID      | 58ffd0d6-4edd-3b92-636e-005056b98a68 |
| Preferred Fault Domain | Hamburg                              |
| Unicast Agent Address  | 10.100.0.4                           |
+------------------------+--------------------------------------+
vsan.stretchedcluster.remove_witness ~cluster
Removes the witness host from a vSAN Stretched Cluster.
Example 1 – Show witness information
/localhost/DC> vsan.stretchedcluster.remove_witness ~cluster/
Found witness host for vSAN stretched cluster.
+------------------------+--------------------------------------+
| Stretched Cluster      | vSAN65                               |
+------------------------+--------------------------------------+
| Witness Host Name      | wit.virten.lab                       |
| Witness Host UUID      | 58ffd0d6-4edd-3b92-636e-005056b98a68 |
| Preferred Fault Domain | Hamburg                              |
| Unicast Agent Address  | 10.100.0.4                           |
+------------------------+--------------------------------------+
Removing witness host from the cluster...
Task: Remove witness host
New progress: 1%
New progress: 30%
Task result: success