Veeam has recently published a new version of its Backup Software: Veeam Backup & Replication Version 6.1. The last version I evaluated was around 2010. Back then it was definitely a great tool, but as my main environment is Linux based and veeam was lacking some features there I decided to stick with my old backup strategy.
Today I want to renew my view and test their current product. Please note that this review is focused on backing up Linux guests. Nevertheless if you are a Windows Admin, feel free to read on if you want to know why it sometimes could be a pain to backup Linux guests with VMware.
The first thing I am going to do is to just download the software and check out how intuitive the installation and configuration process will be. Later I am going to dig deeper into the functionality.
Part 1 – First Backup Job
Before we can start the installation we need to download the software. Downloading is very easy as veeam only provides one package, so the only decision is whether you need the 32-bit or the 64-bit version. Go to www.veam.com > Products > Veeam Backup & Replication > Download and select your architecture. You need to register to download anything, but it is free and quite quick.
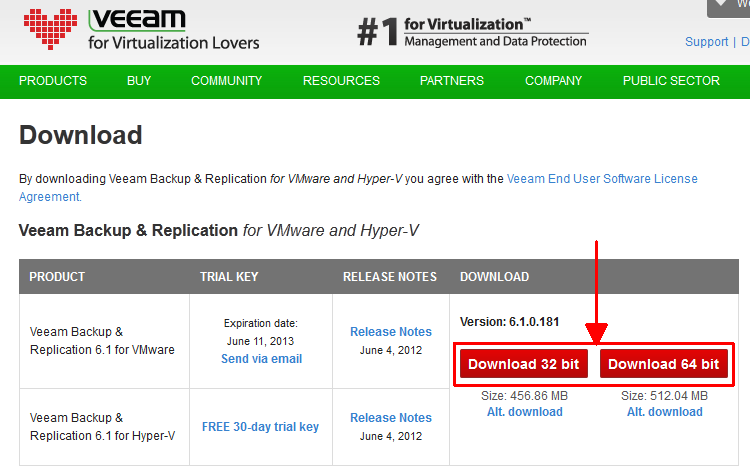
To start the Installation you need to unzip the package which contains three files. The setup file we need is: Veeam_B&R_Setup_x64.exe. You should also get a license file sent by mail. This key is required during the installation. I am going to install the Backup client on my vCenter Server, so I copy both Files on my desktop and start the installation process. The installation is pretty straight forward. You just have to select the .lic file and enter your credentials. I leave everything else at its standard.
Before I start to prepare my guest I want to have a short look at veeams user interface. There is only one central interface, so I start Veeam Backup & Replication which is automatically placed on my desktop. First impressions can be quite important, right? The surface is absolutely neat. I remember other backup products which are full of buttons which might decrease the usability. Without knowing the software or reading any documentation I can anticipate what happens with every button. Make yourself a picture: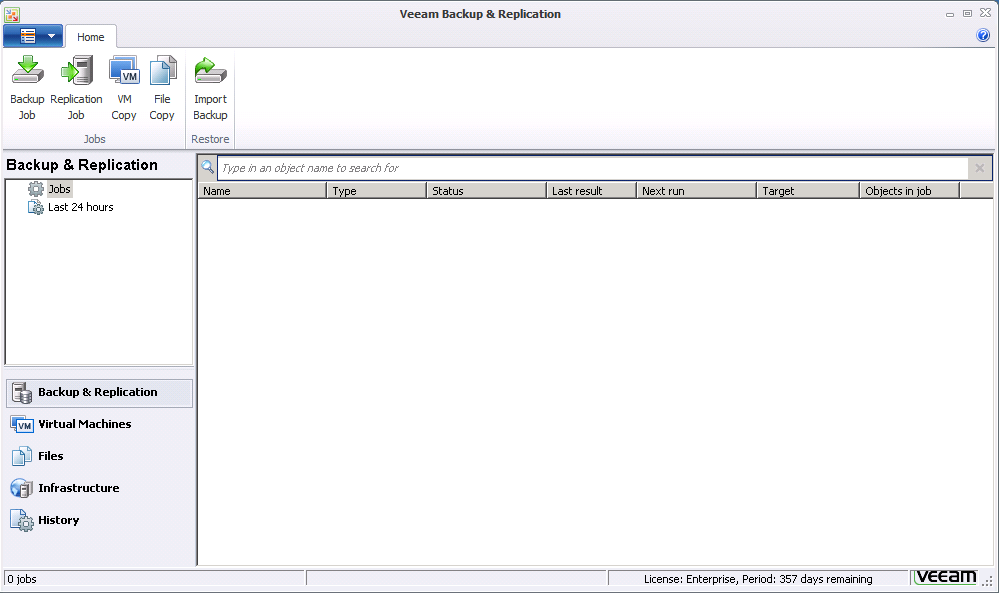
As mentioned earlier I want to backup Linux guests, so I create a new virtual machine and install a current Ubuntu Server 12.04. I am using the following configuration:
- Standard Installation
- One large partition (no LVM)
- One user with encrypted homedir
- VMware Tools with default configuration
- OpenSSH for remote access
For now I am not going to install any application because I want to test filesystem backups only. To make the backup more challenging I add a couple of virtual disks to the VM and create several filesystems:
- /dev/sda: System Disk (Swap and ext4)
- /dev/sdb with ext3 filesystem
- /dev/sdc with ext2 filesystem
- /dev/sdd: LVM (VG01)
- /dev/sde: LVM (VG01)
- Two Volumes inside VG01: lvmext3 & lvmext4
- /dev/sdf + /dev/sdg: Softraid (/dev/md0) with ext4 filesystem
Each filesystem is added to the fstab and mounted. To verify the restore I simply create a textfile on each mountpoint containing a small note. This is my final setup: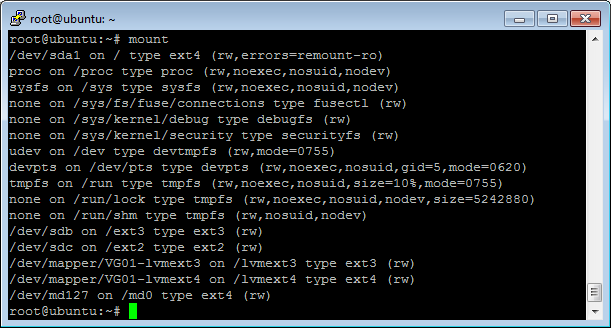
Back to veeam and create the first backup job. The first step is to add a server. This window automatically pops ups when clicking Backup Job without having anything configured. I select VMware vSphere which can be a vCenter server, or a standalone ESXi host.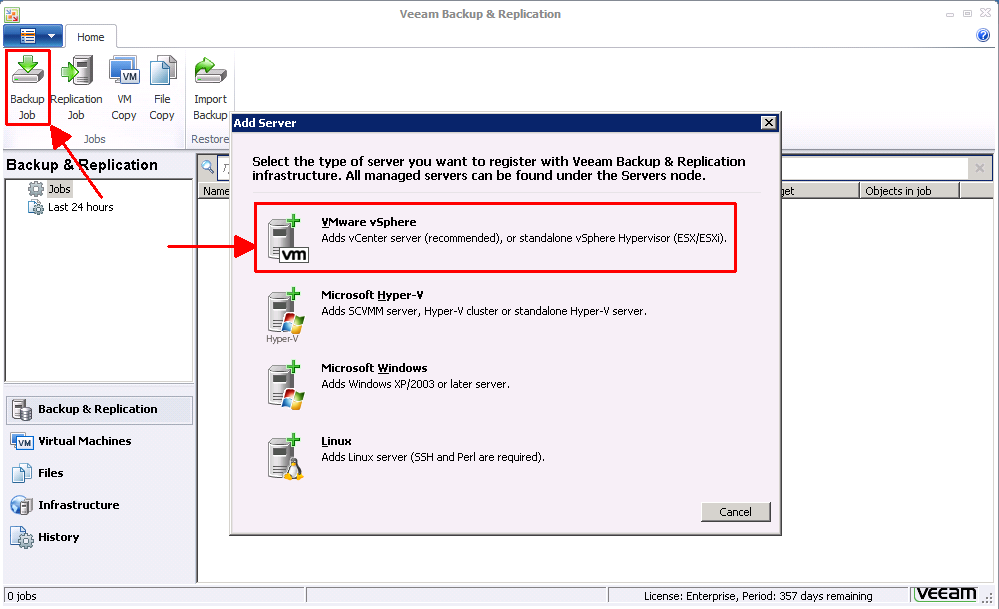
Enter vCenter Server IP address or DNS name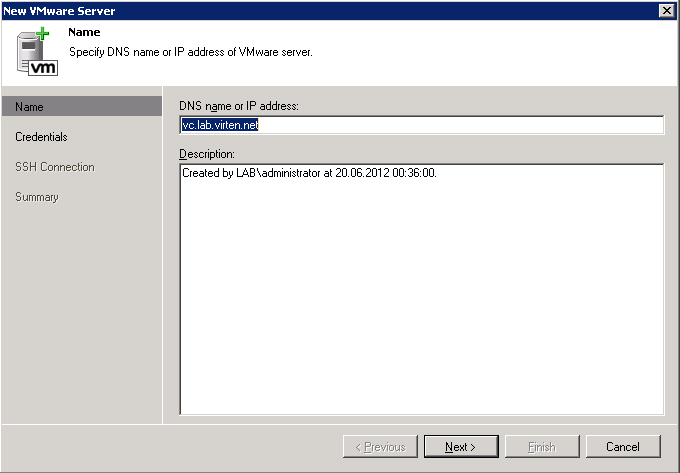
Enter vCenter credentials. Using administrator is not a good idea, but fine for testing purposes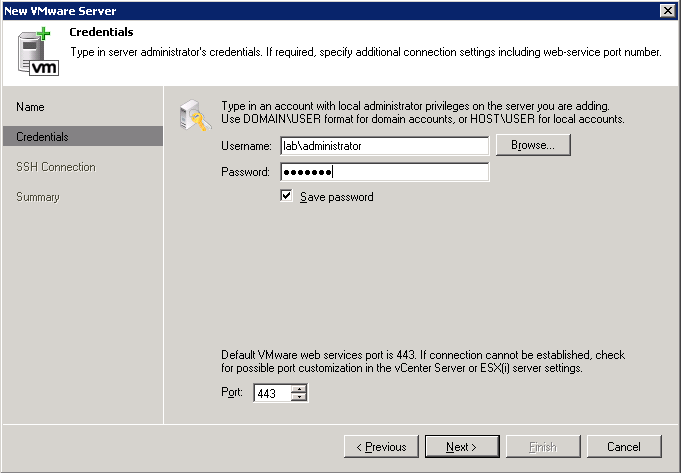
It takes a while, but the connection was successfully created. Click Backup Job again to create the first job and enter a name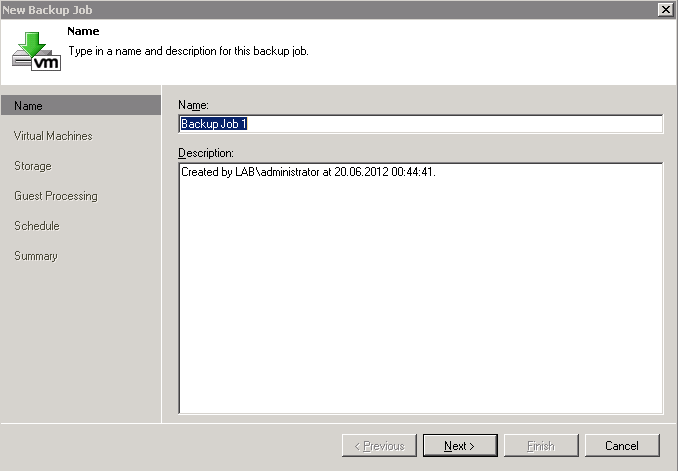
Now the virtual machine needs to be added. Click Add… and select the machine from inventory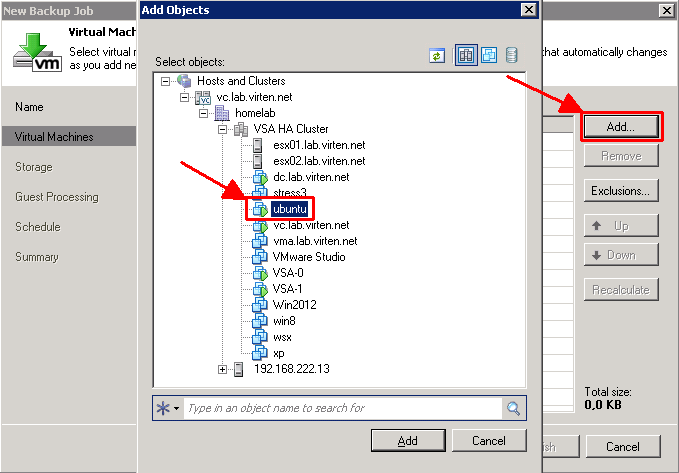
Veeam automatically creates a backup repository which is selected here. Leave this as it is, click Advanced and select the vSphere tab. To get consistent backups enable VMware Tools quiescence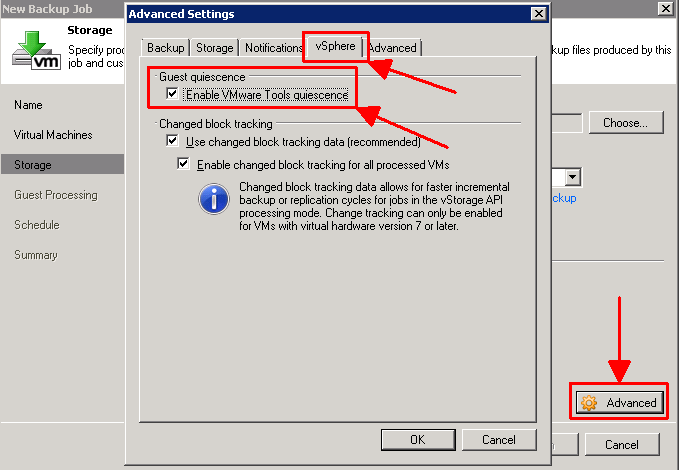
Skip the next two steps. On the final Page, select Run the job when I click Finish and click Finish. You should end up at the main screen with a new backup job which has already started. Right-Click the Backup Job and select Statistics.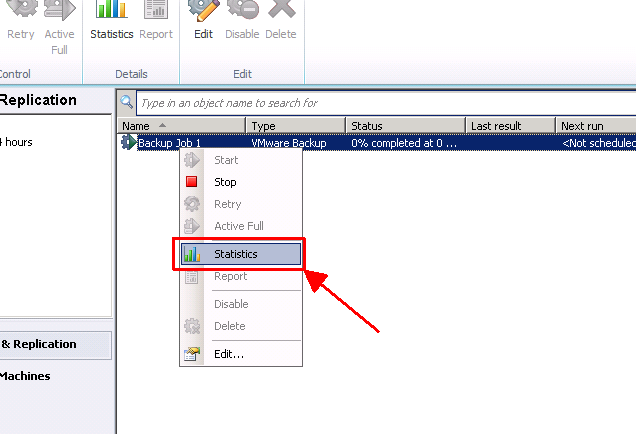
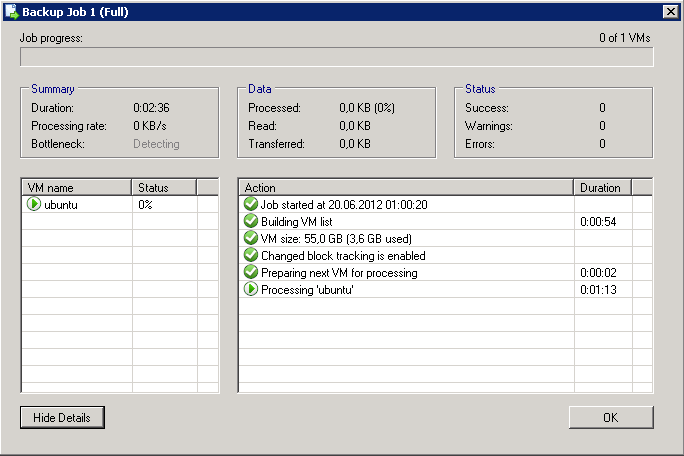
During the backup a snapshot is created. This is normal behavior as veeam uses the vStorage API for Data Protection (VADP).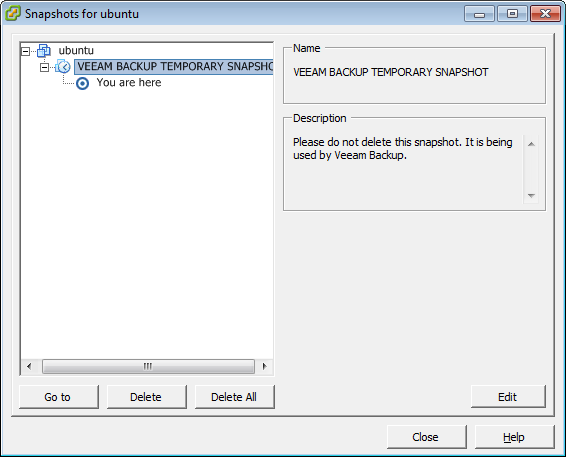
Backup finished. That was quite easy…
Part 2 – Restore the entire Virtual Machine
Having a Backup is nice. But a backup is worth nothing if you can’t restore it. Veeam inspires confidence due to its simplicity. So I don’t bother checking any backup logs. I just delete the entire virtual machine from my datastore and try to restore it:
A Restore Wizard appears and asks what I like to do. As mentioned I want to restore the entire VM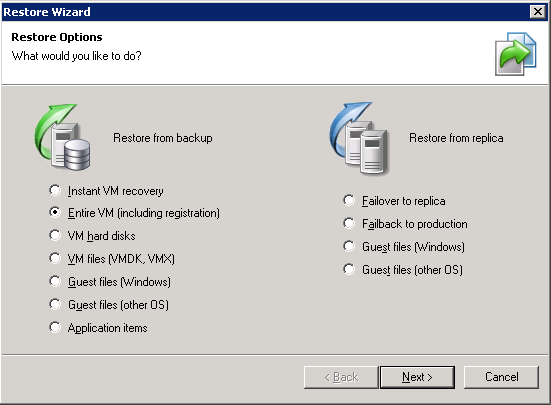
Click Add VM, select From Backup… and select your virtual machine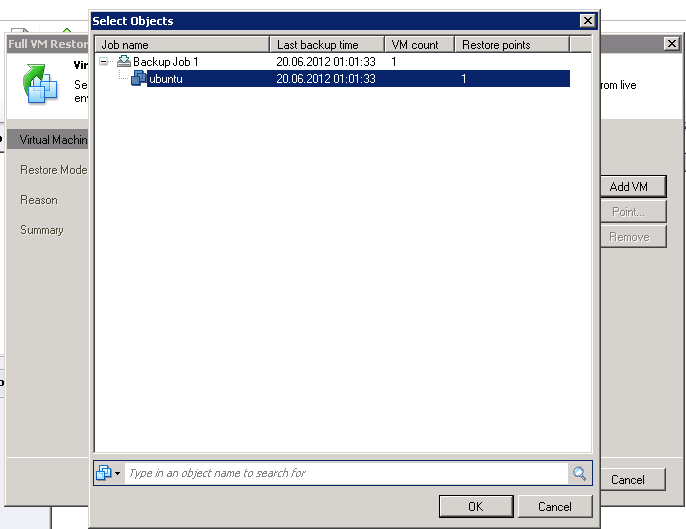
Restore to the original location sounds great, as my original VM has been deleted
After finishing the wizard, the restore session starts. A few minutes later the VM is restored and registered at my vCenter. Let’s power on the machine and check the system.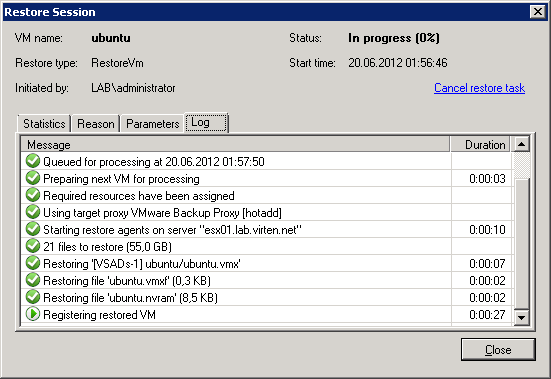
After checking each mount I can confirm: The restore was successfull. This is what I expected, as doing snapshot backup is the same as just copying the entire virtual disk. It doesn’t matter what’s inside the virtual machine. From OS perspective it is like pulling the plug. And exactly this fact is what pulls my attention: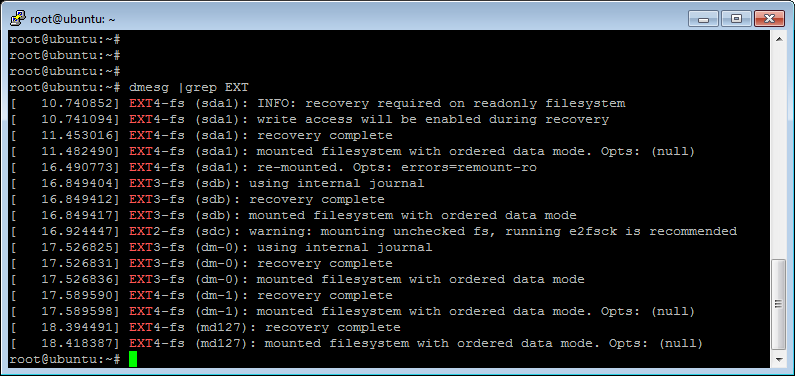
root@ubuntu:~# dmesg |grep EXT
[   10.740852] EXT4-fs (sda1): INFO: recovery required on readonly filesystem
[   10.741094] EXT4-fs (sda1): write access will be enabled during recovery
[   11.453016] EXT4-fs (sda1): recovery complete
[   11.482490] EXT4-fs (sda1): mounted filesystem with ordered data mode. Opts: (null)
[   16.490773] EXT4-fs (sda1): re-mounted. Opts: errors=remount-ro
[   16.849404] EXT3-fs (sdb): using internal journal
[   16.849412] EXT3-fs (sdb): recovery complete
[   16.849417] EXT3-fs (sdb): mounted filesystem with ordered data mode
[   16.924447] EXT2-fs (sdc): warning: mounting unchecked fs, running e2fsck is recommended
[   17.526825] EXT3-fs (dm-0): using internal journal
[   17.526831] EXT3-fs (dm-0): recovery complete
[   17.526836] EXT3-fs (dm-0): mounted filesystem with ordered data mode
[   17.589590] EXT4-fs (dm-1): recovery complete
[   17.589598] EXT4-fs (dm-1): mounted filesystem with ordered data mode. Opts: (null)
[   18.394491] EXT4-fs (md127): recovery complete
[   18.418387] EXT4-fs (md127): mounted filesystem with ordered data mode. Opts: (null)
All filesystems need to recover their journal, which means that the filesystem was not in a consistent state. But the backup should be consistent, as we had activated the “Enable VMware Tools quiescence” option. So what happened?
Part 3 – Creating filesystem consistent backups
The “Enable VMware Tools quiescence” option we set is a standard snapshot switch which actually does nothing because the vmsync driver has to be manually activated. This is where the Windows guys can rely on VSS. Linux does not have anything comparable. To enable vmsync run the VMware Tools Configuration (vmware-config-tools.pl) again and enter yes when it asks for the VMware FileSystem Sync Driver.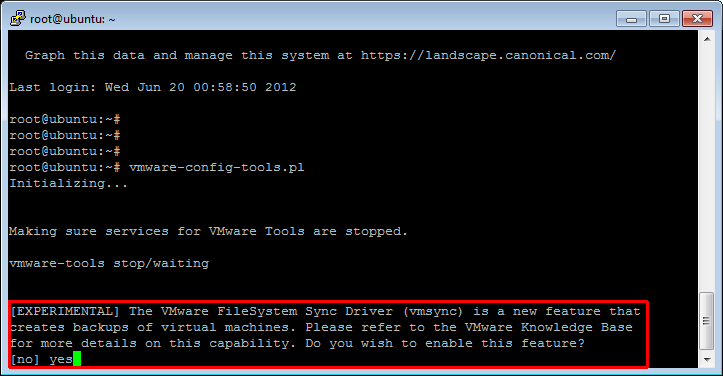
If the config utility asks for gcc and make, just install these packages (apt-get install gcc make)
Please note that this driver is, as stated, in an experimental state. This feature is not documented at VMware. I also could not find this VMware Knowledge Base entry. So if you want to use it, do it at your own risk.
Confirm that the plugin is active using lsmod: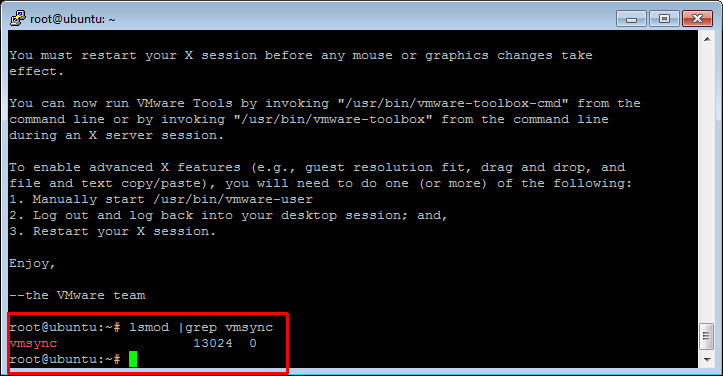
Now I am going to backup and restore the virtual machine again, to see what happens. After deleting and restoring the virtual machine again I got the following result:
As you can see the filesystem can be mounted without recovering the journal, which means that it was backuped in a consistent state. There is only one warning with the ext2 volume. This is because ext2 does not have the journaling feature and cannot be quiesced. This is only a small disadvantage as ext2 is not state of the art. Ext3, the successor to ext2 is on the market since 2001.
Part 4 – File-Level Restore
The last thing I want to check out is the file level restore, which is definitely an important feature as most restores are files, not entire systems. To start the file-level restore I open the Restore Wizard again and select Guest files (other OS).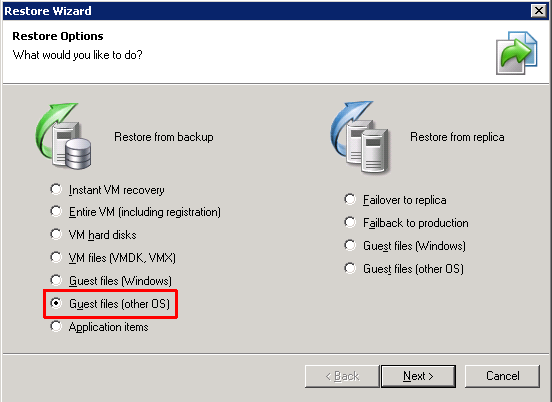
Select the virtual machine and choose the last restore point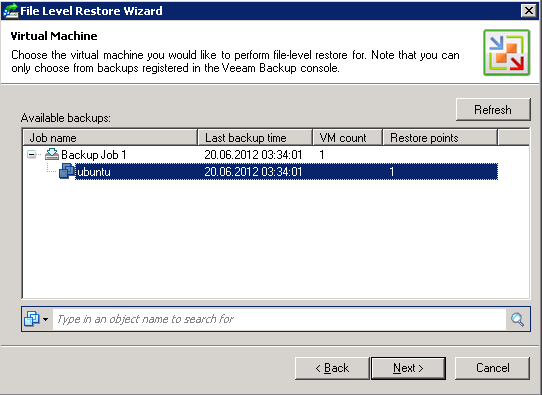
To restore files veeam requires deploying a virtual appliance. At the next step click Customize and select an ESX host. I also enable the FTP server to see what it actually does.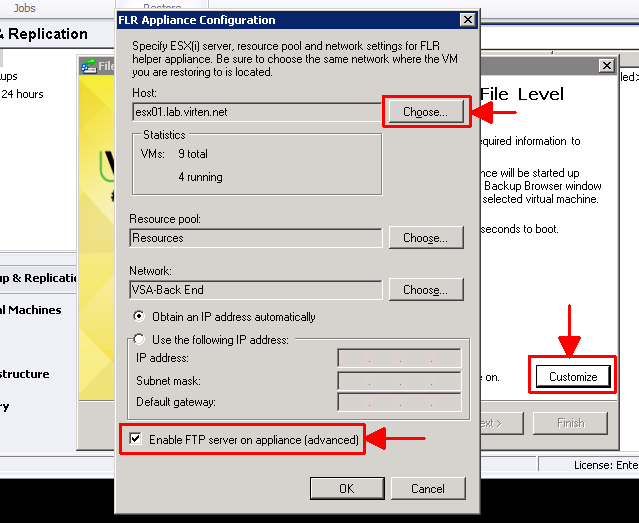
It takes a while to deploy the FLR appliance and ends up with a file level restore window which lists all partitions.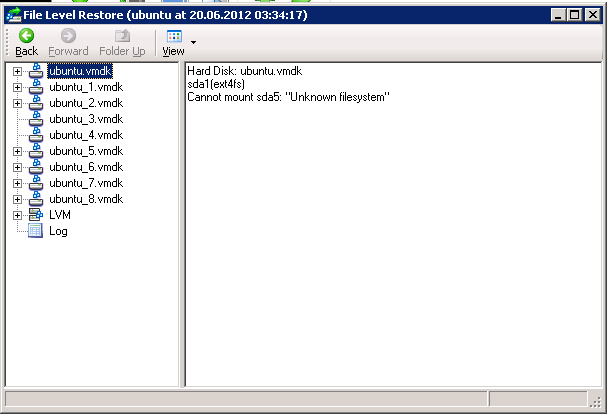
Which filesystems can be restored? Absolutely no issues with ext3 and ext4. Both filesystems are mounted in a consistent state and can be copied. The ext2 filesystem can also be restored, but the filesystem requires an fsck. I want to point out that even the LVM volumes can be restored, which is a really great feature. I didn’t expect that, as other backup vendors or older versions did not have this ability.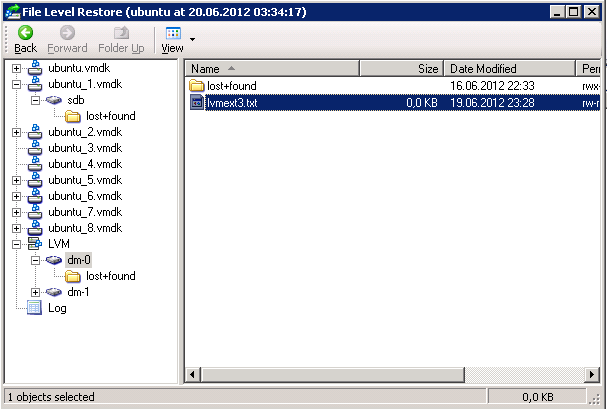
Only one filesystem cannot be restored. There was a softraid containing 2 virtual disks in a RAID0 stripe. This volume is gone. But is that bad? Ask yourself: Does it make sense to use a softraid inside a virtual machine? No. This is a really bad design idea and was only done to check whether it works or not. Don't worry about it!
If you want to restore the files directly from your virtual machine you can use FTP. This works without any flaws.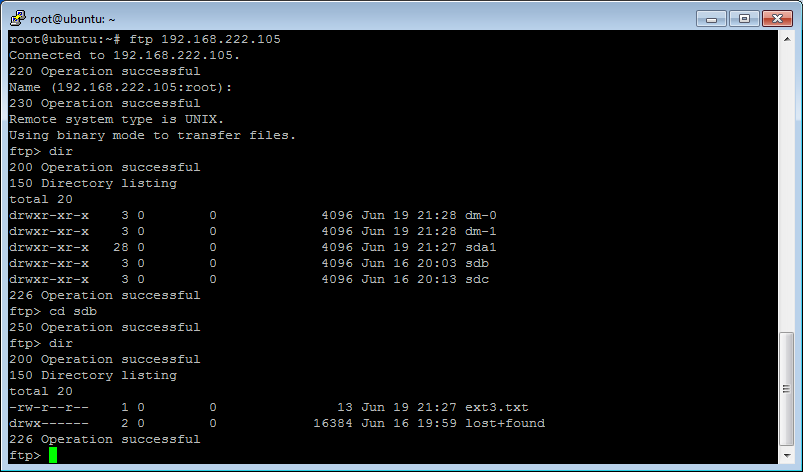
Conclusion
Veeam Backup & Replication 6.1 is definitely a valid solution for creating Linux guests backups. But you have to familiarize yourself with the new backup style. One fact is what might be an issue: You do not have a backup agent inside your virtual machine to restore files. But exactly this fact is the new backup style.
Hi Florian, great article.
I stumbled upon this while searching for some info on backing up OEL6.3 VMs with Oracle DB 11g on an LVM volume using Veeam B&R 6.1. Using VSS for Windows is fine, but what about the Linux servers? In your article, you show that by using the sync driver results in a filesystem consistent backup. Have you tested this on linux vm guests hosting SQL/Oracle DBs or Exchange? My main concern (from what I've read on Vmware/Oracle forums) is that on heavy loads, the I/O delay caused by the sync driver can become too long and might cause source application or filesystem corruption.
What are your thoughts on this?
Regards,
Steven
Hi Steven,
this is one of the disadvantages of VMware based backup solution. The application does not know that it has been backuped. So it can't do its transaction processing which is usually done after backups. This might result in bad performance and infinite growth.
With applications you usually need some intelligence that talks to your application. Every backup vendor that created sql or exchange backups has specific agents. This is not possible at the moment with Linux virtual machines. You can tell the machine to quiesece the filesystem, but this will not create application consistent backups.
Another drawback is if you want to have a singe-mail restore for example. Sure, the backup solution can restore the entire vm, but it cannot extract a single mail out of the backup and push it back to your mailbox.
In my opinion it is a valid solution to backup linux virtual machines with VMware backup, but if you want to have a good solution you need an agent, and thatfor you cannot rely on snapshot backup only.
If your application crashes during snapshot creation it is definatly not a good candidate for virtualisation. Same might happen during vMotion for example. Yes, snapshot creation with heavy loaded systems might me an issue, but in most cases this caused the snapshot to fail, not the application.
Kind regards
Florian