When you want to test Android on your PC, Android-x86 might be your solution. Android-x86 is an open source project that has ported Android to x86 platform. This allows us to install Android in a Virtual Machine with VMware Workstation or ESXi. Driver support is very limited, so there are many problems around with Android VMs that cant access the network. This post shows how to install Android in VMware Workstation and how to solve Network Connectivity issues.
The following Android-x86 releases are currently available. All versions can be installed and used in VMware Workstation:
- Android 4.3 (Jelly Bean)
- Android 4.2 (Jelly Bean)
- Android 4.0 (Ice Cream Sandwich)
- Android 3.2 (Honeycomb)
- Android 2.3 (Gingerbread)
- Android 2.2 (Froyo)
Download Page
Some older versions are available as separate Isos for different devices. Take whatever version you want. You can either boot an Android-x86 live system, or install it to the virtual disk.
No Network?
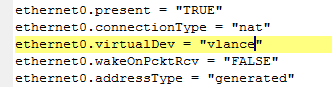
Edit the VM config File (.vmx) and changed the network adapter type to vlance:
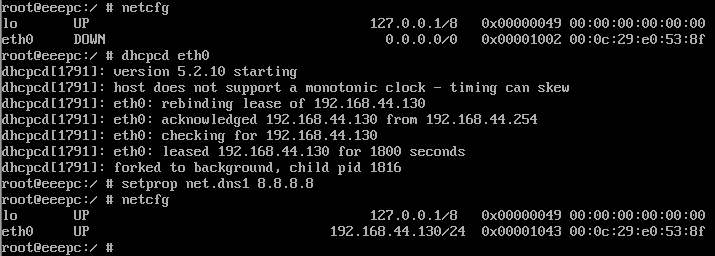
Some versions do not run DHCP automatically. You can verify that with the netcfg command. To get network access:
- Press CTRL+F1
- Type dhcpcd eth0
- Type setprop net.dns1 8.8.8.8 (or replace with your DNS Server)
- Press CTRL+F7
Installation Guide
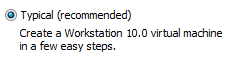
- Create a new virtual Machine
- Configuration Type Typical
- Select the disc image you've downloaded from android-x86.org

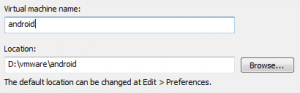
- Select Name and Location
- Don't change Disk Settings
- Deselect Power on this virtual machine after creation

- Open the VM Configuration File (.vmx) in Notepad
- Change the Network Adapter Type from "E1000" to "vlance" (Note: This Step is no longer required with Android 4.2/4.3 (Jelly Bean)
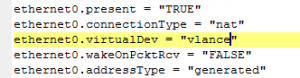
- Save the File
- Power on the Virtual Machine
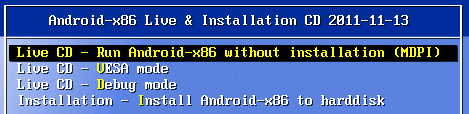
Run Android Live
When you want to run the Live CD (No installation), just use the first option.
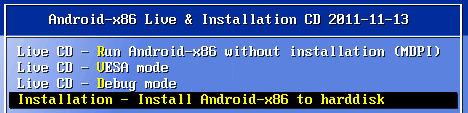
Install Android
- When you want to install Android, select "Installation"
- Select Create/Modify partitions
- New
- Primary
- <ENTER>
- Bootable
- Write
- Type Yes
- Quit
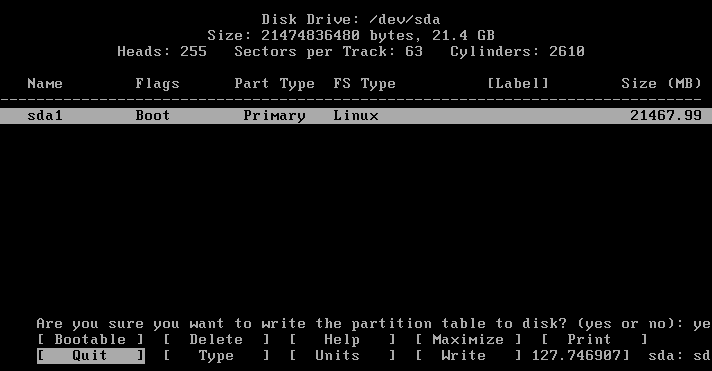
- Select sda1

- Select ext3
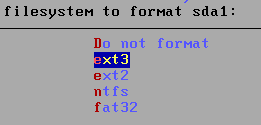
- Select Yes, until the installation has finished. Your Android Virtual Machine is now ready.
Hi Im having this problem were it can use my mic but i cant hear audio on vmware workstation
You need select freeSDB on intallation to see this option vlance
i am not able to sign up for google play acoount it is asking to switch on wifi
it shows me error 17 when i rebooted after installation and even after restarting the virtual machine
There is a question whether you want to install EFI GRUB2. Either select Skip there, or adjust your VM to use EFI-boot (haven't tested that one myself)
Thank you so much
if you do not have any sound go to vm settings and press add at the bottom and then select sound card and select ok thats it sound issue solved
if this does not work you will have to update your drivers for this you can download an app called driver booster and press scan that way you will check for updates ps i am 15 years old