This is the fourth part of the VCP6-DCV Delta Study Guide. It covers the hypervisors scalability and management improvements in vSphere 6.0. After this section you should be able to take advantage of the new features like Virtual Hardware 11, vNUMA and the flexible lockdown modes.
- vSphere 6 Scalability and Performance
- Virtual Hardware 11
- vNUMA-aware Memory Hot-Add
- Flexible Lockdown Modes
- Local Disk Management
vSphere 6 Scalability and Performance
vSphere 6.0 introduces a new level of Monster VMs with up to 128 virtual CPUs and 4TB of RAM. The limit in vSphere 5.5 was 64 vCPU and 1TB of RAM. This new capability allows you to run larger workloads than ever before in a virtual machine.
Hypervisor maximums have also been increased. A cluster in vSphere 6 clusters can now support 64 hosts with 8.000 virtual machines. ESXi hosts can now support up to 480 physical CPUs and 12 TB of RAM, each host can now run up to 1.000 virtual machines.
The following table shows the key performance differences between vSphere 5.5 and vSphere 6.0.
| vSphere 5.5 | vSphere 6.0 | |
| Physical CPUs per host | 320 | 480 |
| Physical RAM per host | 4 TB | 12 TB |
| VMs per host | 512 | 1000 |
| vCPU per VM | 64 | 128 |
| vMEM per VM | 1 TB | 4 TB |
| VMDK Size | 62 TB | 62 TB |
| Cluster Size | 32 | 64 |
| FT Max vCPU | 1 vCPU | 4 vCPU |
 Instant Clone
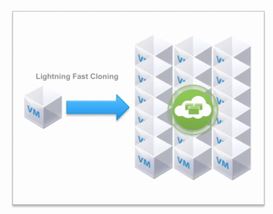
vSphere 6.0 introduces instant cloning, previously known as VMFork. The new rapid cloning technology deploy virtual machines within seconds, as much as 10 times faster than cloning a virtual machine in the traditional way.
A new virtual machine is "instantiated" by forking off an existing virtual machine in both memory and disk space, whereby reads come from the source machine but changes or writes are placed into files dedicated to the new virtual machine. This allows for new instantaneous cloning because data is not being copied. The child virtual machine starts where the parent virtual machine left off, so there is no boot process. The new virtual machine is instant on.
Instant cloning is targeted for virtual desktops (VMware Horizon) and containers within virtual machines.
NVIDIA GRID vGPU
ESXi 6.0 hosts that are installed with a NVIDIA GRID K1 or K2 physical GPU card can share this card with its virtual machines when NVIDIA GRID vGPU technology is enabled.
NVIDIA GIRD tagets virtual desktops to allow accelerated rendering. Highly graphics-intensive applications benefit from this solution, and the performance level is close to that of a dedicated graphic solution.

Virtual Hardware 11
Virtual Machines can only take advantage of the new features when they have been upgraded to Virtual Hardware Level 11 (ESXi 6.0 compatibility). A virtual machine running hardware version 11 supports:
- 128 vCPUs and 4 TB RAM
- vNUMA Memory Hot-Add (Added memory is now allocated equally across all NUMA regions)
- WDDM 1.1 GDI acceleration
- USB 3.0 xHCI controller
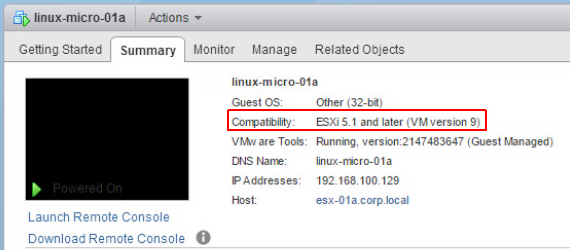
The hardware version of a virtual machine can be verified in the summary tab:
Upgrading a virtual machine to Virtual Hardware 11
Before you upgrade your virtual machine, consider these points:
- Create a snapshot or backup of the virtual machine in case there are issues post upgrade.
- Virtual Hardware 11 is only compatible with ESXi 6.0 or later. If you have ESXi 4.x or 5.x host in your environment, they can not run the virtual machine.
- Virtual Hardware can not be downgraded.
- If you want to upgrade many virtual machines, consider using vCenter Update Manager to automate the process.
- You can schedule a Virtual Hardware upgrade. If a virtual machine is marked for a scheduled upgrade, the hardware will be changed automatically at the next reboot.
To upgrade the virtual hardware:
- Upgrade VMware Tools (This is not necessary required, but might help to mitigate network compatibility issues on Windows virtual machines.)
- Create a backup or Snapshot
- Shutdown the virtual machine
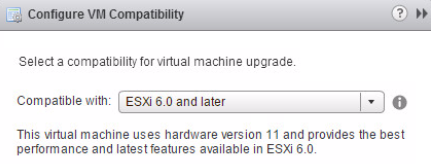
- Right-click the virtual machine and select Compatibility -> Upgrade VM compatibility

- Select Compatible with ESXi 6.0 and later and press OK
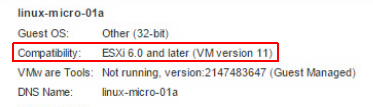
- Verify the hardware version in the summary tab of the virtual machine
- Power on the virtual machine
At this point you should verify that your virtual machine is working properly. If you have any problems you can rollback to the previous hardware version by reverting the snapshot. Do not forget to delete the snapshot later.
vNUMA-aware Memory Hot-Add
What is vNUMA?
Non-uniform memory access (NUMA) is a memory architecture that is used in modern systems with multiple sockets. Under NUMA, each processor has its own memory banks and can access its own local memory faster than non-local memory. ESXi has been NUMA-aware for quite some time, making memory and CPU allocation decisions based on its full understanding of the topology of the system’s physical hardware. In vSphere 5, vNUMA was introduced to give virtual machines the knowledge about the underlying physical server topology. The problem is, that when a vNUMA enabled virtual machine with the hot-add memory option is enabled and memory is hot-added to it, all new memory was allocated only to region 0.
With vSphere 6 hot-added memory is now allocated equally across all NUMA regions. This enhancement ensures that all regions benefit from the increase in RAM, enabling the virtual machine to scale without requiring any downtime.
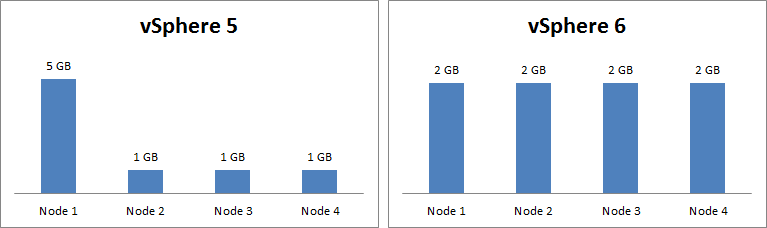
The following picture shows what happens when you hot-add memory to a virtual machine. In this example, a virtual machine with 4 vCPUs and 4 GB of RAM has been added another 4 GB of RAM. In vSphere 5.x, all memory has been allocated to region 0. In vSphere 6, the memory is allocated equally across all NUMA regions:
Flexible Lockdown Modes
To increase the security of ESXi hosts, you can put them in lockdown mode. In lockdown mode, operations to ESXi hosts are disabled and must be performed through a vCenter Server. Starting with vSphere 6.0, you can select normal lockdown mode or strict lockdown mode, which offer different degrees of lockdown. vSphere 6.0 also introduces the concept of Exception Users. The Exception User List helps to overrule lockdown modes for third-party solutions and external applications that need to access the host directly.
Normal Lockdown Mode
In normal lockdown mode the DCUI service is not stopped. If the connection to the vCenter Server system is lost and access through the vSphere Web Client is no longer available, privileged accounts can log in to the ESXi host's DCUI and exit lockdown mode. Only the following accounts can access the Direct Console User Interface:
- Accounts in the Exception User list for lockdown mode who have administrative privileges on the host. The Exception Users list is meant for service accounts that perform very specific tasks.
- Users defined in the DCUI.Access advanced option for the host. This option is for emergency access to the Direct Console Interface in case the connection to vCenter Server is lost.
Strict Lockdown Mode
In strict lockdown mode, which is new in vSphere 6.0, the DCUI service is stopped. If the connection to vCenter Server is lost and the vSphere Web Client is no longer available, the ESXi host becomes unavailable unless the ESXi Shell and SSH services are enabled and Exception Users are defined. If you cannot restore the connection to the vCenter Server system, you have to reinstall the host.
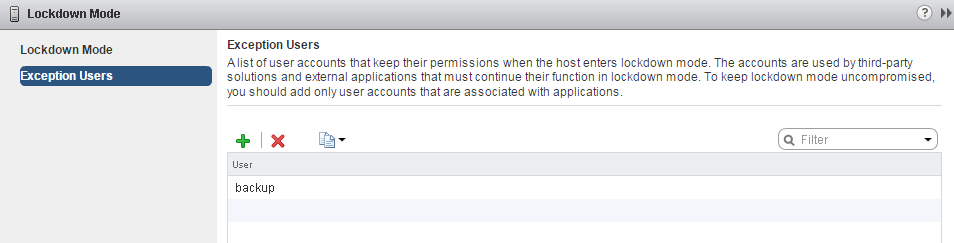
Exception Users
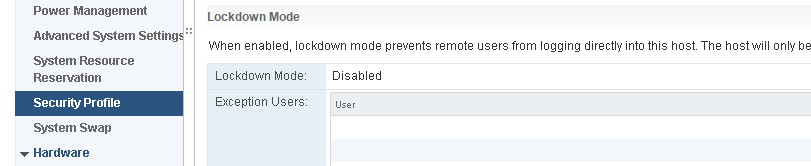
The Exception Users list is meant for service accounts that perform specific tasks such as host backups, and not for administrators. Adding administrator users to the Exception Users list defeats the purpose of lockdown mode.
Exception users can be local accounts on the ESXi server or Active Directory accounts if your ESXi server is joined to an active directory domain. To configure exception users navigate to:
ESXi -> Manage -> Settings -> Security Profile -> Lockdown Mode -> Exception Users
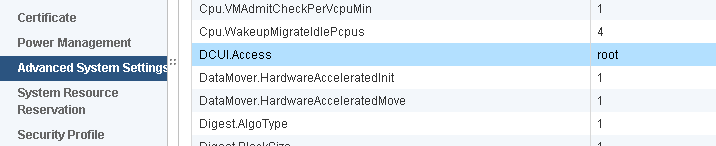
DCUI.Access Advanced Option
The DCUI.Access advanced option allows you to exit lockdown mode in the case of a vCenter Server failure. By default, the root user is included. You can add users to the list by editing the Advanced Settings for the host from the vSphere Web Client:
ESXi -> Manage -> Settings -> System -> Advanced System Settings -> DCUI.Access
Lockdown Mode and the ESXi Shell and SSH Services
ESXi Shell and SSH services are independent of lockdown mode. For lockdown mode to be an effective security measure, ensure that the ESXi Shell and SSH services are also disabled. Those services are disabled by default.
When a host is in lockdown mode, users on the Exception Users list can access the host from the ESXi Shell and through SSH if they have the Administrator role on the host. This access is possible even in strict lockdown mode. Leaving the ESXi Shell service and the SSH service disabled is the most secure option.
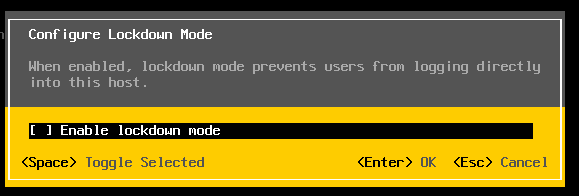
How to enable Lockdown Modes
Normal lockdown mode can be enabled from the DCUI or with the vSphere Web Client. Strict lockdown mode can only be activated with the vSphere Web Client.
- Configure normal lockdown mode with the DCUI
- Configure normal or strict lockdown mode during the Add Host Wizard

- Configure normal or strict lockdown mode in the ESXi settings
ESXi -> Manage -> Settings -> Security Profile -> Lockdown Mode
Local Disk Management
Disk Locator LED
Since Virtual SAN utilizes local ESXi disks there was the need for better manageability. In vSphere 6.0 a new feature has been added to turn on the locator LED. The locator LED helps to identify specific storage devices, so that you can locate them among other devices. In case of a disk failure you can now replace the failed disk easier without the risk of pulling the wrong device.
Enable or Disable the Locator LED on Storage Devices
- Open the vSphere Web Client
- Navigate to
ESXi -> Manage -> Storage -> Storage Devices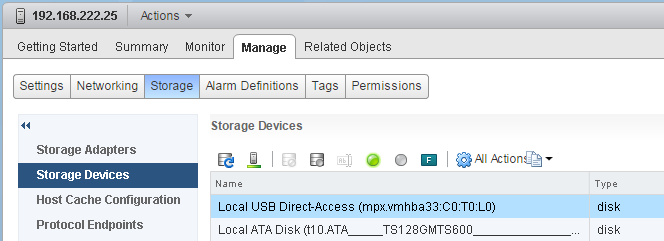
- From the list of storage devices, select one or more disks
- The green icon turns the locator LED on
The gray icon turns the locator LED off

Toggle Storage Devices Remote/Local and Flash/HDD
vSphere 6.0 allows to mark storage devices that are not automatically recognized as local flash devices. You can toggle both, Remote/Local and Flash/HDD:
| Mark a device as HDD | |
| Mark a device as Flash | |
| Mark a device as remote | |
| Mark a device as local |
VCP6-DCV Delta Study Guide
Part 1 - vSphere 6 Summary
Part 2 - How to prepare for the Exam?
Part 3 - Installation and Upgrade
Part 4 - ESXi Enhancements
Part 5 - Management Enhancements
Part 6 - Availability Enhancements
Part 7 - Network Enhancements
Part 8 - Storage Enhancements
Could you share, how have you added backup named user in exception users list?