 When deploying VMware NSX-V in a homelab, its huge resource requirement might be an issue. In the default configuration a small setup with NSX Manager, 3 NSX Controllers and 2 Edge gateways requires 30 GB Memory. Consumer VMs to connect to logical switches requiring additional resources.
This post explains how you can deploy VMware NSX in your homelab with less than 8GB Memory by downsizing each component including:
- NSX Manager
- NSX Controllers
- NSX Edge Gateways
- Consumer VMs
Any downsizing of NSX Components is not supported by VMware. Don't do this in production.
NSX Manager
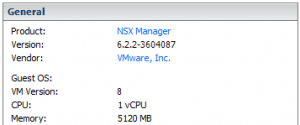
In NSX 6.2 the management virtual machine is deployed with 4 vCPU and 16GB memory. In this configuration, the NSX Manager scales up to 256 hypervisors, which is not really necessary in small Homelabs. The VM can be downsized by simply shutting it down and editing its settings. I've constantly removed resources until I noticed issues. CPU utilization was constantly at about 5% so I assume 1 vCPU should be enough. With 5 GB memory the appliance consumes about 80%, I would not recommend going lower.
4vCPU -> 1 vCPU
16GB Memory -> 5 GB Memory
NSX Controller
The controlpane of NSX is deployed as a group of three redundant Virtual Machines, each with 4 vCPUs and 4GB memory. This results in a total requirement of 12 vCPU and 12 GB memory. The first option to lower resource consumption is the requirement for redundancy. If you don't need redundancy and don't want to evaluate anything related to controller redundancy, stay with a single controller.
The second potential for savings is the controller configuration itself. Reducing NSX Controller resources is a little bit more tricky because the "Edit settings" function is blocked by the vCenter. To disable vCenter Server protection you have to delete respective entries from the VPX_DISABLED_METHODS table.
- SSH to the vCenter Server
- Enable Bash
shell.set --enable True
shell
- Connect to the vCenter Postgres Database with PSQL
/opt/vmware/vpostgres/current/bin/psql -U postgres
- Connect to the VCDB
\connect VCDB
- Identify Object IDs
select * from VPX_DISABLED_METHODS;
- Delete entries
delete from VPX_DISABLED_METHODS where entity_mo_id_val = 'MO_ID';
- Restart vCenter Server Service
service-control --stop vmware-vpxd
service-control --start vmware-vpxd
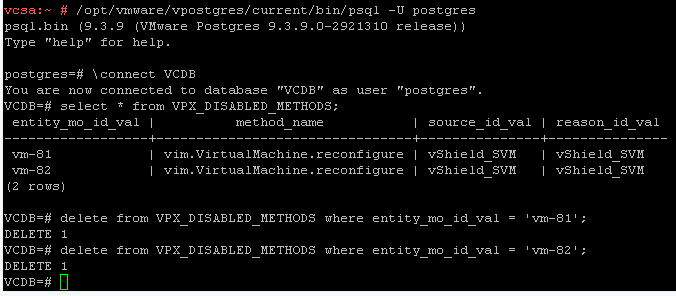
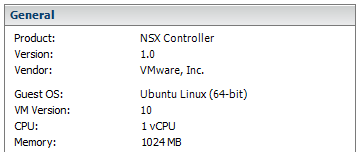
NSX Controller resources can now be edited with the vSphere Client. I'm happy with 1 vCPU and 2 GB memory, but I also had no issues with 1GB memory.
4vCPU -> 1 vCPU
4GB Memory -> 1 GB Memory
NSX Edge Gateway
During the NSX Edge deployment, the appliance size can be configured. The compact version is deployed with 1vCPU and 512 MB memory. There is no need to go lower.

Consumer Virtual Machines
To play around and evaluate VMware NSX you need consumer Virtual Machines that are connected to logical switches and provide services. These VMs should be as lightweight as possible but with the following requirements:
- Low resource requirements
- Easy and quick to install/configure/manage
- Clonable
- VMware Tools
- Webserver
- tcpdump
There are even smaller Linux systems like Tiny Core Linux but due to its ease of use I've decided to use Alpine Linux.
- Download Alpine Linux
- Create a Virtual Machine with the following specifications
- Other Linux (32-bit)
- 1vCPU
- 128 MB Memory
- 1GB HDD - Boot the VM from the Alpine Linux ISO
- Login as root (no password)
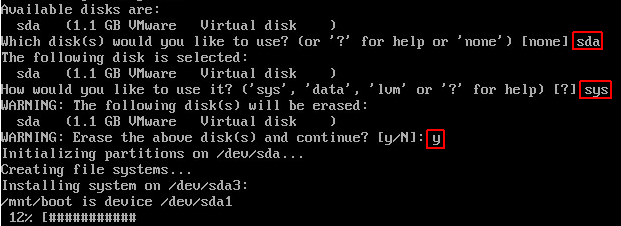
- Run setup-alpine and perform a sys mode installation
To perform a sys mode installation, make sure to enter a disk (sda) during the installation and set the installation mode to sys.
- Reboot - The VM will now boot from the hard drive.
- Login as root (no password)
- Install and configure VMware Tools
apk add open-vm-tools
rc-service open-vm-tools start
rc-update add open-vm-tools
- Install tcpdump
apk add tcpdump
- Install and configure Lighttpd
apk add lighttpd
rc-service lighttpd start
rc-update add lighttpd
- Create a default site for Lighttpd. Add the hostname to the HTML page to identify the server later.
echo "Lighttpd running on web01" > /var/www/localhost/htdocs/index.html
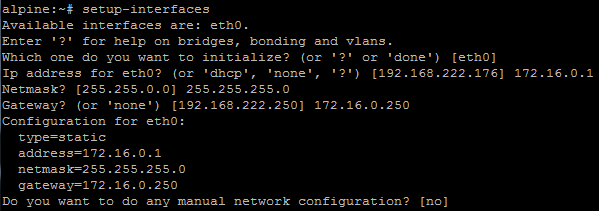
The Virtual Machine is now ready to be cloned and connected to NSX Logical Switches. All clones are configured with DHCP. If you want to configure the VM with a static IP address, run setup-interfaces and configure the interface according to the logical network configuration.
Hello. The other method to change the controller VM's settings is to do it from the legacy vSphere client. Edit settings option is not disabled there.
Greate site and great posts!
"Edit Settings..." is also greyed out in my C# Client when the entry in VPX_DISABLED_METHODS exists. What version are you using?
I should have been more specific. I used C# Client to login directly to the ESXi host hosting the controller VM. When you connect to vCenter server via C# Client the option is indeed greyed out.
Excellent post. Thanks!
very nice article, saved me a lot of money on hardware upgrades ;)
Do you have "segmentation fault" error with open-vm-tools on alpine linux? Or open-vm-tools work properly?
Nice post! I have also reduced the memory of NSX Manager server, but when I try to integrate NSX Manager with vCenter server, it says Component NSX is not yet in RUNNING phase, current phase STARTING.. It is not started at last. No luck. can you please help me out in this.
I changed this in VMware Fusion, just connect Workstation/Fusion to vCenter and then just change the cpu/mem trough there. easypeasy.
Managing vSphere Clusters with Workstation/Fusion - Totally underrated ;-)
Can you tell me what is the Minimum requirements to build an NSX for home lab
RAM:
Physical NIC
Physical Host\Esxi
RAM
CPU
can i build the NSX lab using two NUC deivces ?? thanks
thanks for the article.
i followed the steps and I can now see a controller vm under the ESXi host.
but my problem is the controller deployment finally failed with error message saying cannot power on the controller virtual machine.