After deploying the first NSX-T Manager, additional managers can be deployed using the NSX-T GUI. This is a crucial step to create a redundant and reliable setup. To deploy an additional NSX-T Manager appliance you first have to add the target vCenter as "Compute Manager". In some cases, eg. when NSX-T Managers are to run in a dedicated management vCenter, you don't want to add the vCenter as Compute Manager.
A compute manager is required to deploy an appliance. To add a compute manager, visit the COMPUTE MANAGERS page.

This article explains how to manually add additional Managers to an NSX-T Cluster using the CLI, without configuring a compute manager.
At this point, you already have the first NSX-T Manager installed and configured. You can add additional managers at any time, the configuration will be synchronized.
To join new managers you need the following information from the first deployed node:
- IP address
- Admin Username
- Password
- Cluster ID
- Certificate thumbprint
IP address, Admin Username, and Password are configured during the deployment and should be known. Cluster ID and Certificate thumbprint can be obtained using the GUI, CLI, or API:
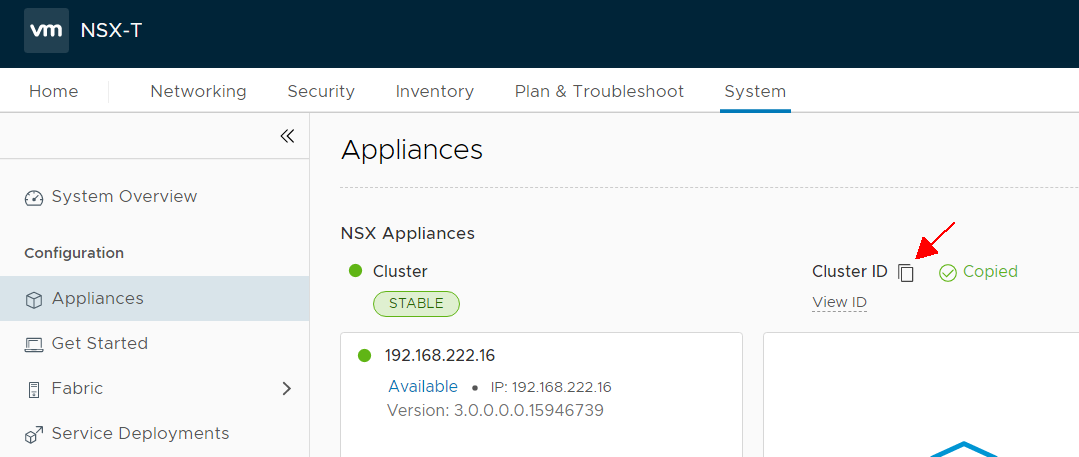
Obtain Cluster ID and Thumbprint using GUI
Open the NSX-T Web Interface on the first deployed node and navigate to System > Appliances. The Cluster ID can be added to the clipboard by pressing the button next to Cluster ID:
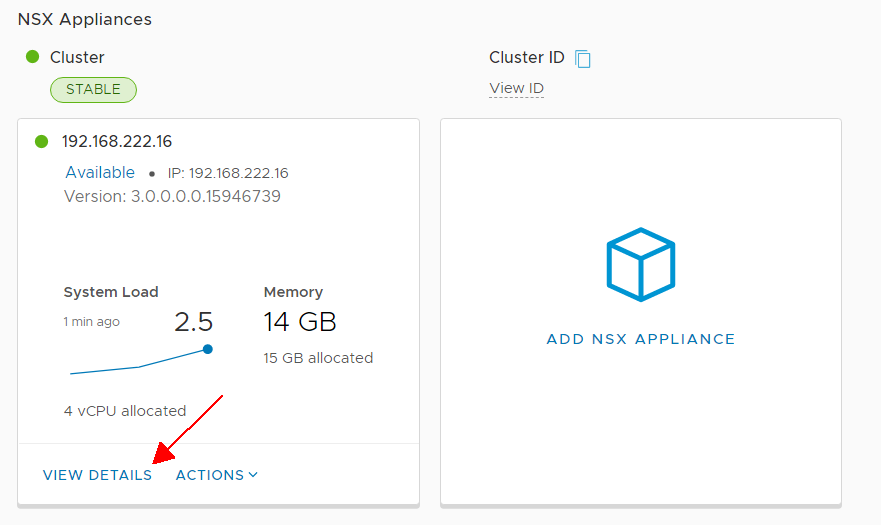
From System > Appliances open View Details from your first deployed node.
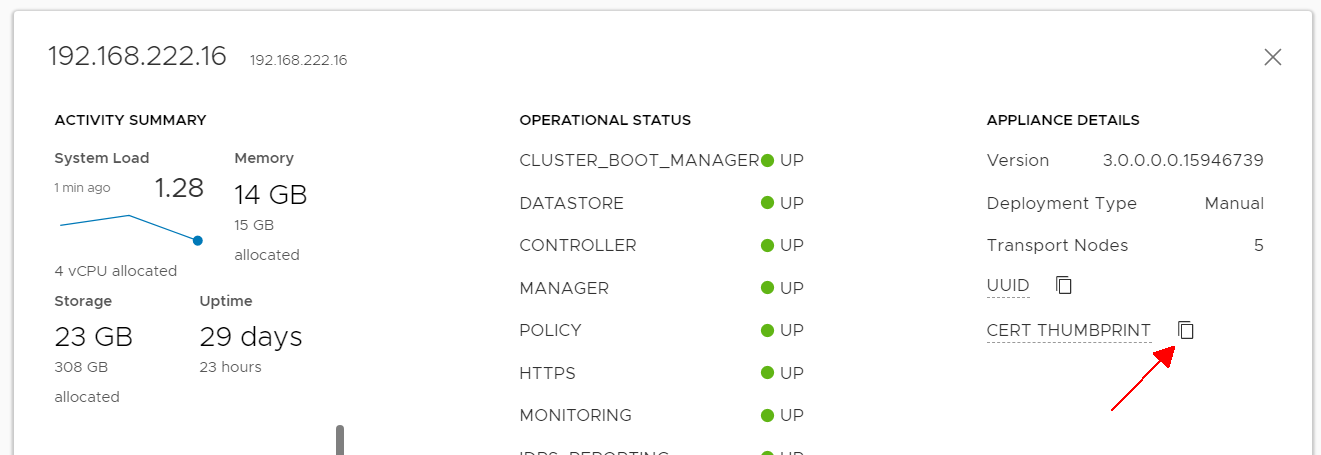
Press the button next to CERT THUMBPRINT to copy thumbprint to the clipboard.
Obtain Cluster ID and Thumbprint using CLI
Open an SSH or console session to the first deployed NSX Manager, login as admin and run the following commands:
nsx1> get cluster config |find Cluster\sId
Cluster Id: b907b370-1e7d-4c77-a0dd-a10f7981527d

nsx1> get certificate api thumbprint
d948723968c72d6ab5a75b8120270c4e417cc8272101875ce03f17998c410240

Obtain Cluster ID and Thumbprint using API
You can also obtain the required parameters by using the API. The Cluster ID is returned by /api/v1/cluster and the thumbprint by /api/v1/cluster/nodes. The nodes command returns several certificates, make sure to get the correct thumbprint (check for port 443).
# curl -s -k -u admin:'VMware1!VMware1!' https://nsx1.virten.lab/api/v1/cluster  |grep cluster_id
"cluster_id" : "b907b370-1e7d-4c77-a0dd-a10f7981527d",

# curl -s -k -u admin:'VMware1!VMware1!' https://nsx1.virten.lab/api/v1/cluster/nodes |grep '"port" : 443' -A2 |tail -1
"certificate_sha256_thumbprint" : "d948723968c72d6ab5a75b8120270c4e417cc8272101875ce03f17998c410240"
Deploy and join additional Managers
By now you should have all information required to join additional managers.
- Deploy the 2. Manager using the .ova
Make sure to have a clean configuration. Do not configure anything on the second node! - Open an SSH or console session to the new deployed NSX Manager using the admin user
- Run the command join <IP> cluster-id <cluster-id> username <username> password <password> thumbprint <thumbprint>
nsx2> join 192.168.222.16 cluster-id b907b370-1e7d-4c77-a0dd-a10f7981527d username admin password 'VMware1!VMware1!' thumbprint d948723968c72d6ab5a75b8120270c4e417cc8272101875ce03f17998c410240
Data on this node will be lost. Are you sure? (yes/no): yes
Join operation successful. Services are being restarted. Cluster may take some time to stabilize.

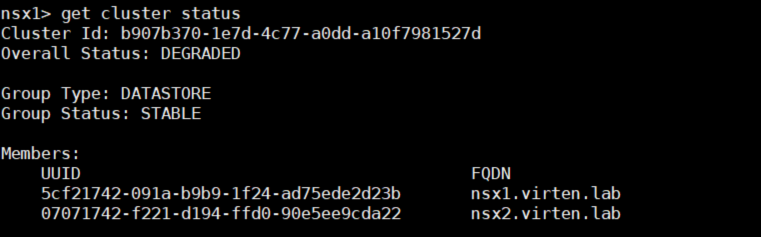
- The joining process might take up to 15 minutes. Run get cluster status to view the status. Do not make any changes or join more Managers until all cluster services are UP. You can also see the second manager in the GUI within System > Appliances.
When the synchronization process is finished you can use the same method to join the third Manager.
Additional Notes
When you have added Managers using the manual method you can't remove them in the GUI. To remove a Manager you have to use the CLI.
Open an SSH or console session to the NSX Manager that should remain in the cluster.
Identify Manager UUIDs with get cluster status
Remove the Manager with detach node <UUID>

Delete the Manager Virtual Machine