This is Part 6 of my "VMware vSphere with Kubernetes" Guide. In this article, I'm going to deploy a Tanzu Kubernetes Cluster (TKC). A TKC is a fully-featured version of the open-source Kubernetes container platform. You can provision and operate Tanzu Kubernetes clusters on top of the Supervisor Cluster.
- What is a Tanzu Kubernetes Cluster?
- Prepare the Cluster for a Tanzu Kubernetes Cluster
- Provision a Tanzu Kubernetes Cluster
What is a Tanzu Kubernetes Cluster?
A Tanzu Kubernetes Cluster is a fully-featured version of the open-source Kubernetes container platform than can be provided on top of the Supervisor Cluster. When deploying workloads, you can either deploy them directly to a Supervisor Clusters Namespace or inside a TKC running in the Namespace.
What are the advantages when running a TKC?
Use vSphere Pods running in the Supervisor Cluster when you want to:
- Run containers without needing to customize a Kubernetes cluster.
- Create containerized applications with strong resource and security isolation.
- Deploy vSphere Pods directly on ESXi hosts.
Use a Tanzu Kubernetes Cluster when you want to:
- Run containerized applications on open-source Kubernetes software.
- Customize the Kubernetes cluster, including root level access to control plane and
worker nodes. - Use different Kubernetes versions without requiring infrastructure upgrades.
- Create Kubernetes namespaces using the kubectl CLI.
- Manage cluster-level access control and configure PodSecurityPolicies.
- Create services of type NodePort.
- Run privileged pods
Prepare the Cluster for a Tanzu Kubernetes Cluster
Prior to create a TKC, you have to configure a Subscribed Content Library on the Supervisor Cluster. The virtual machine image that is used for the TKC nodes is pulled from this library.
- Open the vSphere Client and Navigate to Menu > Content Libraries and click the + Create button.
- Give the library a Name, eg. TKC
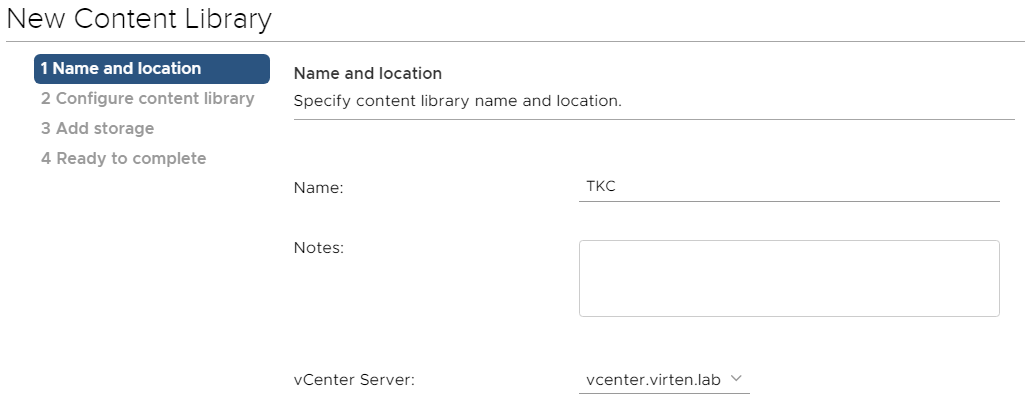
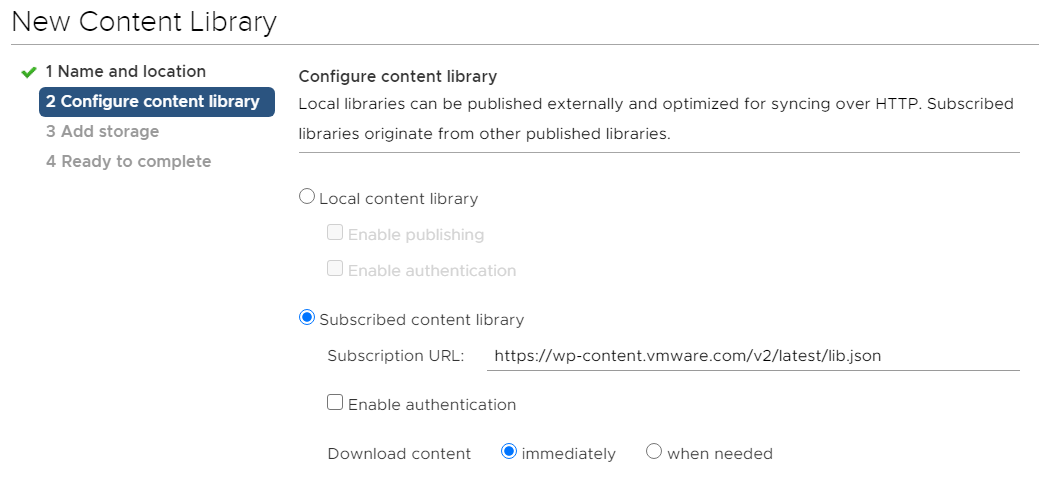
- Configure the Content Library as follows:
Type: Subscribed content library
Subscription URL: https://wp-content.vmware.com/v2/latest/lib.json
Download content: immediately
- Press YES to confirm the The thumbprint of the certificate.
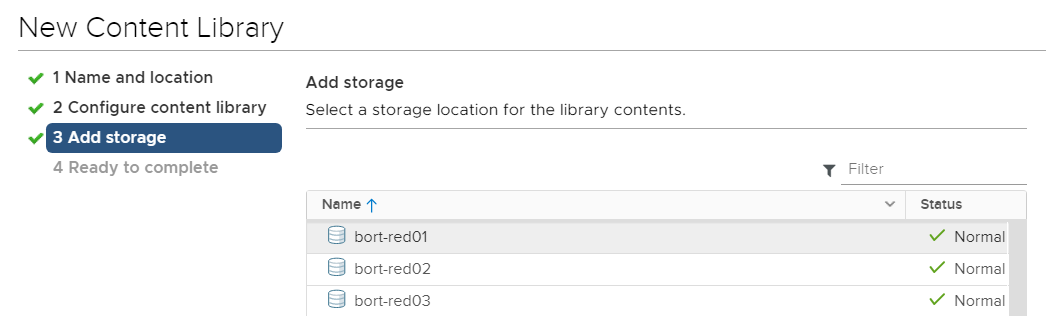
- Select the Datastore to be used for content library items.
- Press FINISH to end the wizard.
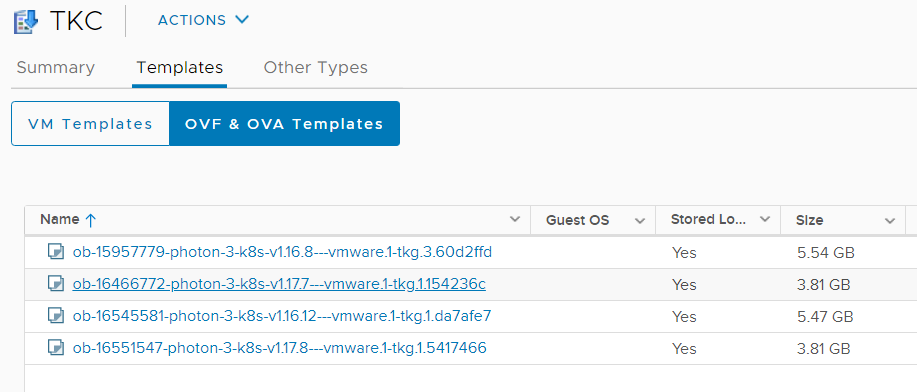
- The library is synced in the backgroud. Verify that you can see Images in the Content Library:


- Wait until the Download is finished.
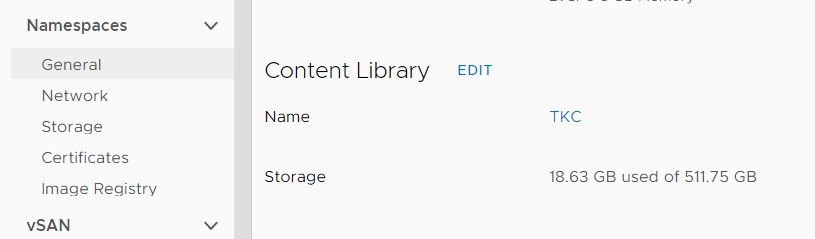
Note: If you have problems downloading the images, or the Sync Task fails, open a SSH connection to the vCenter and check /var/log/vmware/content-library/cls.log for errors. - Navigate to Host and Clusters > Cluster > Configure > Namespaces > General and click ADD LIBRARY
- Select the Subscribed Contant Library and press OK
Provision a Tanzu Kubernetes Cluster
Create a new Namespace to be used for the TKC. Note that vSphere Pods and TKC can coexist in a namespace. You can also have multiple TKC in a single Namespace.
Open the vSphere Client and navigate to Workload Management > Namespaces and click NEW NAMESPACE.
Select the Kubernetes-enabled Cluster, give the Namespace a name and click CREATE.

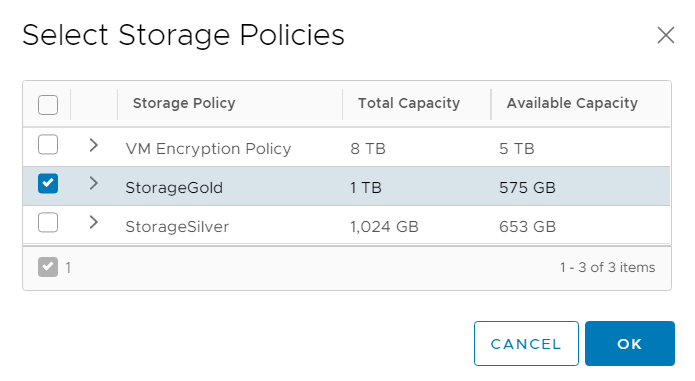
Add a Storage Policy to the new Namespace.
Log in to the supervisor Cluster.
# kubectl vsphere login --server=192.168.250.129 -u administrator@vsphere.local

Password:
Logged in successfully.

You have access to the following contexts:
   192.168.250.129
   playground
   tanzu

If the context you wish to use is not in this list, you may need to try
logging in again later, or contact your cluster administrator.

To change context, use `kubectl config use-context `
Switch to the tanzu Namespace/Context:
# kubectl config use-context tanzu
Switched to context "tanzu".
Verify that you can see the Virtual Machine Images from the content library. Select and note the version you want to install. You can either use the full string (eg. v1.17.8+vmware.1-tkg.1.5417466), or a shortcut (eg. v1.17).
# kubectl get virtualmachineimages
NAME                                                         VERSION                           OSTYPE
ob-15957779-photon-3-k8s-v1.16.8---vmware.1-tkg.3.60d2ffd    v1.16.8+vmware.1-tkg.3.60d2ffd    vmwarePhoton64Guest
ob-16466772-photon-3-k8s-v1.17.7---vmware.1-tkg.1.154236c    v1.17.7+vmware.1-tkg.1.154236c    vmwarePhoton64Guest
ob-16545581-photon-3-k8s-v1.16.12---vmware.1-tkg.1.da7afe7   v1.16.12+vmware.1-tkg.1.da7afe7   vmwarePhoton64Guest
ob-16551547-photon-3-k8s-v1.17.8---vmware.1-tkg.1.5417466    v1.17.8+vmware.1-tkg.1.5417466    vmwarePhoton64Guest
Verify that you have access to a storageclass and note the name. When your vCenter configured Storage Policy Name has non-DNS compliant characters, they are replaced. The name as stated here (storagegold) is needed later.
# k get storageclasses
NAME          PROVISIONER              RECLAIMPOLICY   VOLUMEBINDINGMODE   ALLOWVOLUMEEXPANSION   AGE
storagegold   csi.vsphere.vmware.com   Delete          Immediate           true                   6d22h
Choose size for Worker and Control Plane Nodes from the table.
| Class | CPU | Memory | Storage | Reservation |
| guaranteed-xlarge | 4 | 32 GB | 16 GB | Yes |
| best-effort-xlarge | 4 | 32 GB | 16 GB | No |
| guaranteed-large | 4 | 16 GB | 16 GB | Yes |
| best-effort-large | 4 | 16 GB | 16 GB | No |
| guaranteed-medium | 2 | 8 GB | 16 GB | Yes |
| best-effort-medium | 2 | 8 GB | 16 GB | No |
| guaranteed-small | 2 | 4 GB | 16 GB | Yes |
| best-effort-small | 2 | 4 GB | 16 GB | No |
| guaranteed-xsmall | 2 | 2 GB | 16 GB | Yes |
| best-effort-xsmall | 2 | 2 GB | 16 GB | No |
Use the information gathered above to create a YAML File.
apiVersion: run.tanzu.vmware.com/v1alpha1
kind: TanzuKubernetesCluster
metadata:
  name: tkg-cluster-1
  namespace: tanzu
spec:
  distribution:
    version: v1.17
  topology:
    controlPlane:
      count: 1
      class: best-effort-small
      storageClass: storagegold
    workers:
      count: 3
      class: best-effort-small
      storageClass: storagegold
  settings:
    network:
      cni:
        name: calico
      services:
        cidrBlocks: ["10.97.0.0/24"]
      pods:
        cidrBlocks: ["10.245.0.0/21"]
    storage:
      classes: ["storagegold"]
      defaultClass: storagegold
Annotated YAML:
apiVersion: run.tanzu.vmware.com/v1alpha1
kind: TanzuKubernetesCluster
metadata:
  name: tkg-cluster-1                      # Cluster Name
  namespace: tanzu                         # Namespace to deploy the Cluster
spec:
  distribution:
    version: v1.17                         # K8S version from available images
  topology:
    controlPlane:
      count: 1                             # Number of Control Plane Nodes
      class: best-effort-small             # Control Plane Node size
      storageClass: storagegold            # Control Plane Node storage
    workers:
      count: 3                             # Number of Worker Nodes
      class: best-effort-small             # Worker Nodes size
      storageClass: storagegold            # Worker Nodes Storage
  settings:
    network:
      cni:
        name: calico
      services:
        cidrBlocks: ["10.97.0.0/24"]       # Services Network CIDR (Must not overlap with the Supervisor Cluster!)
      pods:
        cidrBlocks: ["10.245.0.0/21"]      # Pods CIDR (Must not overlap with the Supervisor Cluster!)
    storage:
      classes: ["storagegold"]             # Storage Classes available in the TKC. Storage must be assigned to the Namespace
      defaultClass: storagegold            # Default Storage Class
Deploy the configuration file.
# kubectl apply -f tkg-cluster.yaml
tanzukubernetescluster.run.tanzu.vmware.com/tkg-cluster-1 created
The deployment will take some time. You can check the status with kubectl describe. Wait until all nodes are in the ready state. At this point, you can already note the API Endpoint IP address (192.168.250.134) which will be used to connect to the Tanzu Kubernetes Cluster later.
# kubectl describe tkc tkg-cluster-1
Name:         tkg-cluster-1
Namespace:    tanzu
[...]
  Cluster API Status:
    API Endpoints:
      Host:  192.168.250.134
      Port:  6443
    Phase:   provisioned
  Node Status:
    tkg-cluster-1-control-plane-6wv74:             ready
    tkg-cluster-1-workers-fl5nk-7ddcbdc677-4d7w9:  pending
    tkg-cluster-1-workers-fl5nk-7ddcbdc677-9kd26:  pending
    tkg-cluster-1-workers-fl5nk-7ddcbdc677-wqn45:  pending
  Phase:                                           running
  Vm Status:
    tkg-cluster-1-control-plane-6wv74:             ready
    tkg-cluster-1-workers-fl5nk-7ddcbdc677-4d7w9:  poweredon
    tkg-cluster-1-workers-fl5nk-7ddcbdc677-9kd26:  poweredon
    tkg-cluster-1-workers-fl5nk-7ddcbdc677-wqn45:  poweredon
Events:
# kubectl get tkc tkg-cluster-1
NAME            CONTROL PLANE   WORKER   DISTRIBUTION                     AGE     PHASE
tkg-cluster-1   1               3        v1.17.8+vmware.1-tkg.1.5417466   9m16s   running
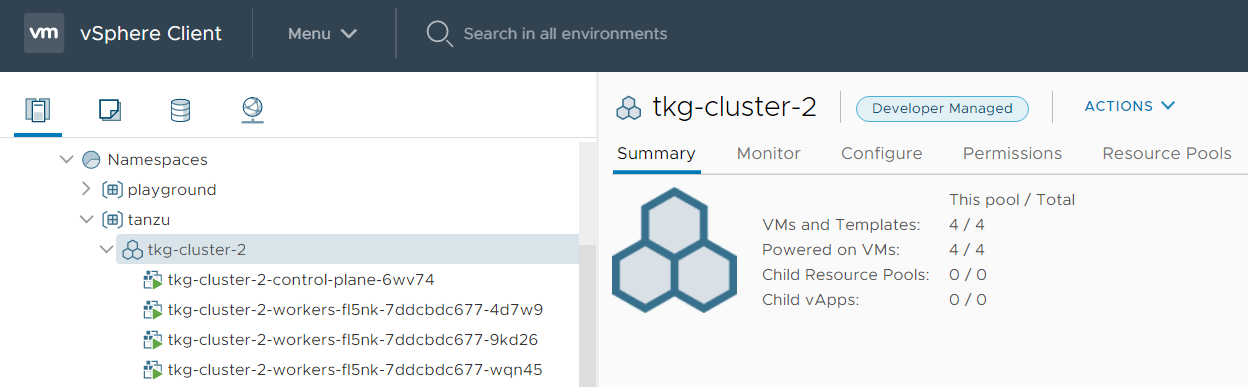
During the deployment, head over to the vSphere Client. You can see a new icon for the TKC including Control Plane and Worker Node Virtual Machines.
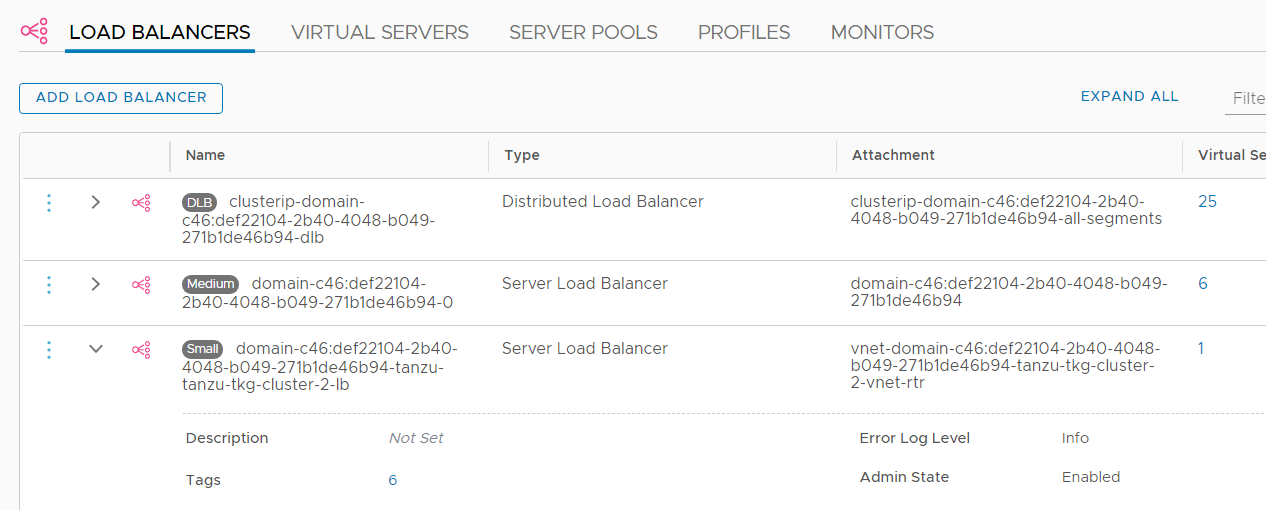
Each Tanzu Kubernetes Cluster gets its own Tier-1 Gateway and Load Balancer instance in NSX-T.

When the deployment is finished, you can log in to the Tanzu Kubernetes Cluster using kubectl with the vSphere Plugin:
# kubectl vsphere login --server=SUPERVISOR-CLUSTER-CONTROL-PLANE-IP \
--tanzu-kubernetes-cluster-name TANZU-KUBERNETES-CLUSTER-NAME \
--tanzu-kubernetes-cluster-namespace SUPERVISOR-NAMESPACE-WHERE-THE-CLUSTER-IS-DEPLOYED \
--vsphere-username VCENTER-SSO-USER-NAME
Please note that for authentication with SSO, you have to use the Supervisor Cluster IP (192.168.250.129) and not the TKC Cluster IP (192.168.250.134).
# kubectl vsphere login --server=192.168.250.129 --tanzu-kubernetes-cluster-name tkg-cluster-2 --tanzu-kubernetes-cluster-namespace tanzu --vsphere-username administrator@vsphere.local

Password:
Logged in successfully.

You have access to the following contexts:
   192.168.250.129
   playground
   tanzu
   tkg-cluster-2

If the context you wish to use is not in this list, you may need to try
logging in again later, or contact your cluster administrator.
When you view the context configuration, you can see that the tkg-cluster-2 context is using the TKC Cluster IP (192.168.250.134).
# kubectl config get-contexts
CURRENT   NAME              CLUSTER           AUTHINFO                                          NAMESPACE
          192.168.250.129   192.168.250.129   wcp:192.168.250.129:administrator@vsphere.local
          playground        192.168.250.129   wcp:192.168.250.129:administrator@vsphere.local   playground
          tanzu             192.168.250.129   wcp:192.168.250.129:administrator@vsphere.local   tanzu
*         tkg-cluster-2     192.168.250.134   wcp:192.168.250.134:administrator@vsphere.local
Now I want to deploy an Nginx Webserver. Create a new YAML file with the following content:
apiVersion: apps/v1
kind: Deployment
metadata:
  name: webserver
spec:
  replicas: 2
  selector:
    matchLabels:
      app: webserver
  template:
    metadata:
      labels:
        app: webserver
    spec:
      containers:
      - image: nginx
        name: nginx
---
apiVersion: v1
kind: Service
metadata:
  labels:
    app: webserver
  name: webserver
spec:
  ports:
  - port: 80
    protocol: TCP
    targetPort: 80
  selector:
    app: webserver
  sessionAffinity: None
  type: LoadBalancer
The deployment will fail and no pods are created. Check the error message with kubectl get events:
# kubectl get events --sort-by=.metadata.creationTimestamp
LAST SEEN   TYPE      REASON                   OBJECT                            MESSAGE
7s          Warning   FailedCreate             replicaset/webserver-54cbbc6dd8   Error creating: pods "webserver-54cbbc6dd8-" is forbidden: unable to validate against any pod security policy: []
[...]
Error creating: pods "<NAME>" is forbidden: unable to validate against any pod security policy: []
The problem is that the SSO User used to log in to the TKC is not allowed to deploy privileged pods. To solve the issue, apply a ClusterRoleBinding that applies "vmware-system-privileged". Create a YAML with the following content:
kind: RoleBinding
apiVersion: rbac.authorization.k8s.io/v1
metadata:
  name: rolebinding-default-privileged-sa-ns_default
  namespace: default
roleRef:
  kind: ClusterRole
  name: psp:vmware-system-privileged
  apiGroup: rbac.authorization.k8s.io
subjects:
- kind: Group
  apiGroup: rbac.authorization.k8s.io
  name: system:serviceaccounts
Apply the RoleBinding with kubectl.
# kubectl apply -f tanzu-rolebinding.yaml
Verify that Pods and the Service have been deployed successfully:
# kubectl get service
NAME         TYPE           CLUSTER-IP   EXTERNAL-IP       PORT(S)        AGE
kubernetes   ClusterIP      10.97.0.1    <none>            443/TCP        150m
supervisor   ClusterIP      None         <none>            6443/TCP       149m
webserver    LoadBalancer   10.97.0.9    192.168.250.135   80:32056/TCP   14s

# kubectl get pods
NAME                        READY   STATUS    RESTARTS   AGE
webserver-d698d7bd6-4ljbw   1/1     Running   0          26s
webserver-d698d7bd6-cmqwp   1/1     Running   0          26s
You should be able to visit http://192.168.250.135/ now.
vSphere with Kubernetes Guide |
Hi Florian,
do follow your blog posts a long time and do like how and what you write.
Did you came accross an issue of ImagePullBackOff STATUS during/after deploying a simple manifest?
My worker node is obviously not able to access the docker repo. I don't know how to login in the worker node. Do you?
According to William Lam's deployment script for vSphere with Tanzu using ALB, i did build this environment on top of two NSX-V segments (routable). One is used for management, the second for combined workload and frontend traffic. ALB was built and configured with the script. As long as i'm able to evaluate this, to me it's ok.
thanks