 With the release of Cloud Director 10.2, you can now integrate "vSphere with Tanzu" Kubernetes Clusters into VMware Cloud Director. That enabled you to create a self-service platform for Kubernetes Clusters that are backed by the Kubernetes integration in vSphere 7.0.
This article explains how to integrate vSphere with Tanzu in VMware Cloud Director 10.2
Prerequisites
To successfully deploy vSphere with Tanzu Clusters using VMware Cloud Director, carefully read the prerequisites. You can configure most parts without following them and it will not complain, but in the end, the deployment of Kubernetes Clusters will fail.
- VMware Cloud Director 10.2 [Release Notes] [Download]
- vCenter 7.0 (7.0 U1 recommended) added to VMware Cloud Director (VCD > Resources > Infrastructure Resources > vCenter Server Instances)
- NSX-T 3.0 added to VCD (VCD > Resources > Infrastructure Resources > NSX-T Managers)
- Network Pool configured (NSX-T Geneve transport zone)
- Workload Management enabled vSphere Cluster. I recommend my vSphere with Kubernetes Guide if you do not already have Workload Management enabled.

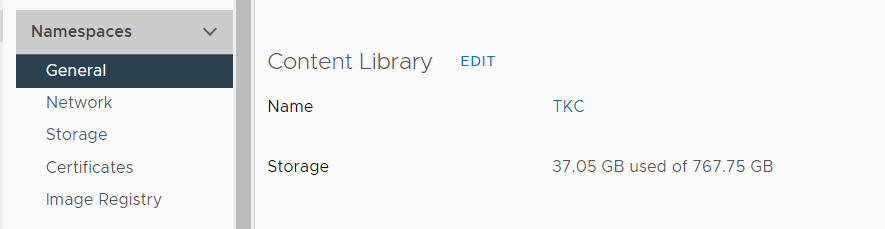
- TKG Content Library added to the Supervisor Cluster
(vCenter > Cluster > Configure > Namespaces > General)
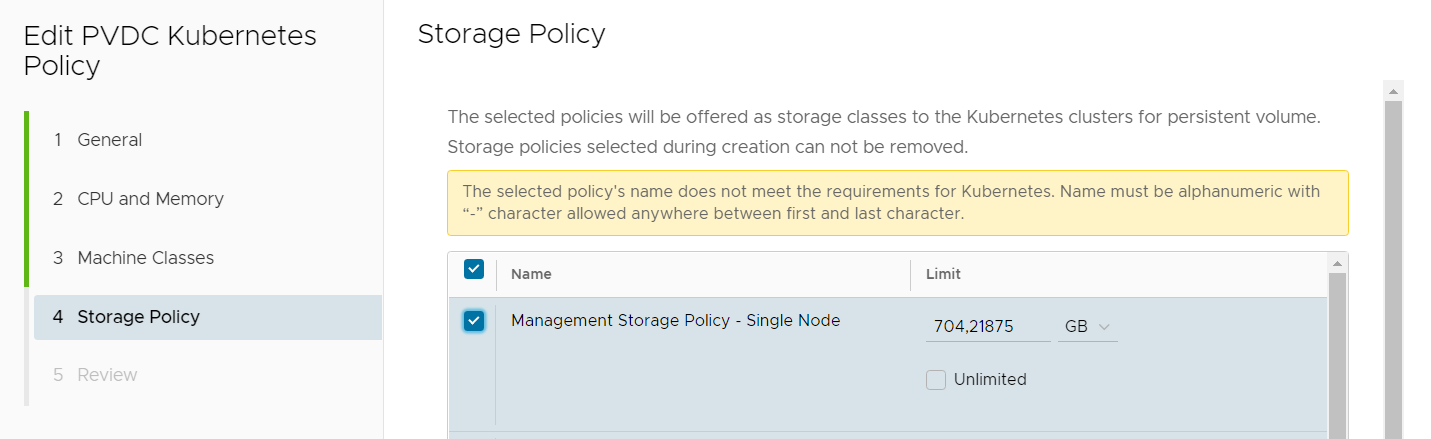
- Storage Policy names must be alphanumeric. No special characters allowed, except "-". If you want to use the default vSAN policies, just clone them to another name. I recommend using all-lowercase as that's required for Kubernetes anyway.
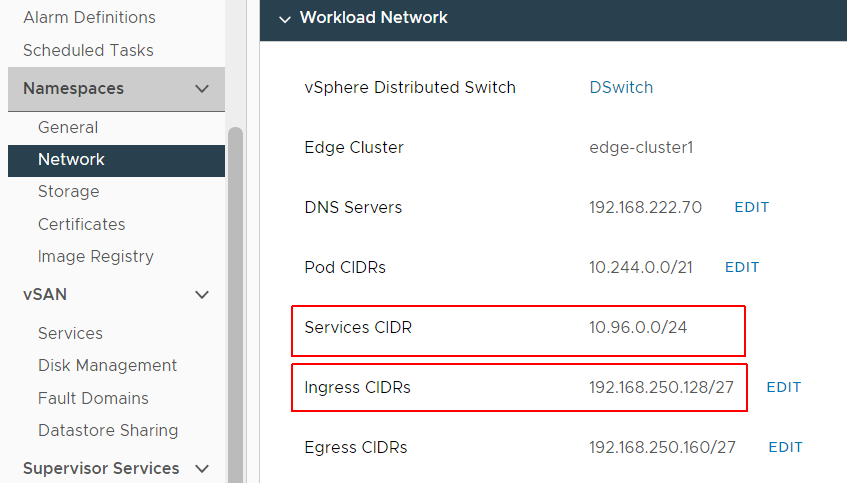
- The Supervisor Clusters IP address ranges for the Ingress CIDRs and Services CIDR must not overlap with IP addresses 10.96.0.0/12 and 192.168.0.0/16, which is the default for TKG Clusters. That means you can't use 192.168.x.x and 10.[96-111].x.x in the Supervisor Cluster.
Unfortunately, 10.96.0.0/24 is the default when enabling Workload Management and you can't change it after the deployment. Check your Network settings in vCenter > Cluster > Configure > Namespaces > Network. Here is a bad example that will definitely overlap:
Configure vSphere with Tanzu Provider in VMware Cloud Director
At this point, you should have VCD 10.2 installed and added your NSX-T Manager and a vCenter with enabled Namespace Management. It is not required to create an external network or Edge Gateway. Only the Geneve Network Pool has to be added. The first step is to create a Provider VDC.
Step 1 - Create Provider VCD
- In VCD, navigate to Resources > Cloud Resources > Provider VDCs and click NEW
- Give the Provider VDC a Name and select the vCenter as Provider
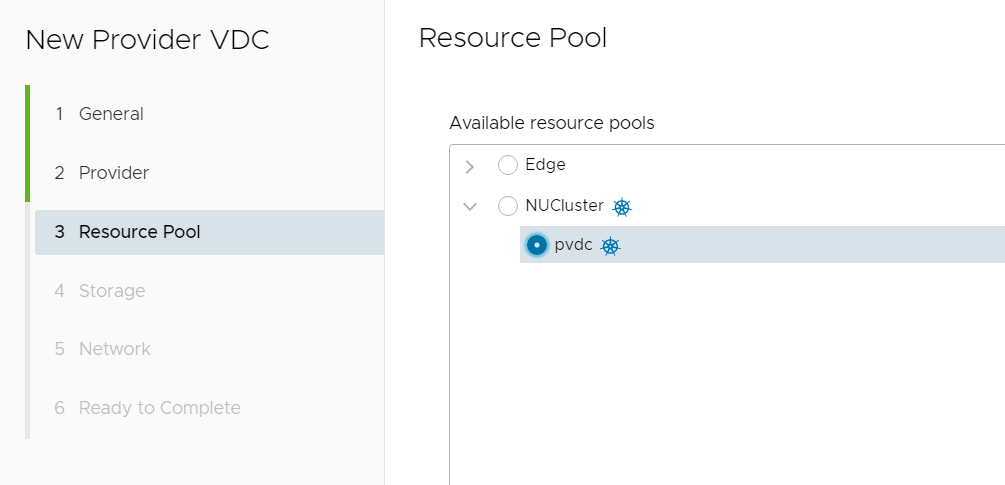
- Select the Cluster or Resource Pool you want to add as Provider VDC. Make sure that there is the Kubernetes logo next to the Cluster.
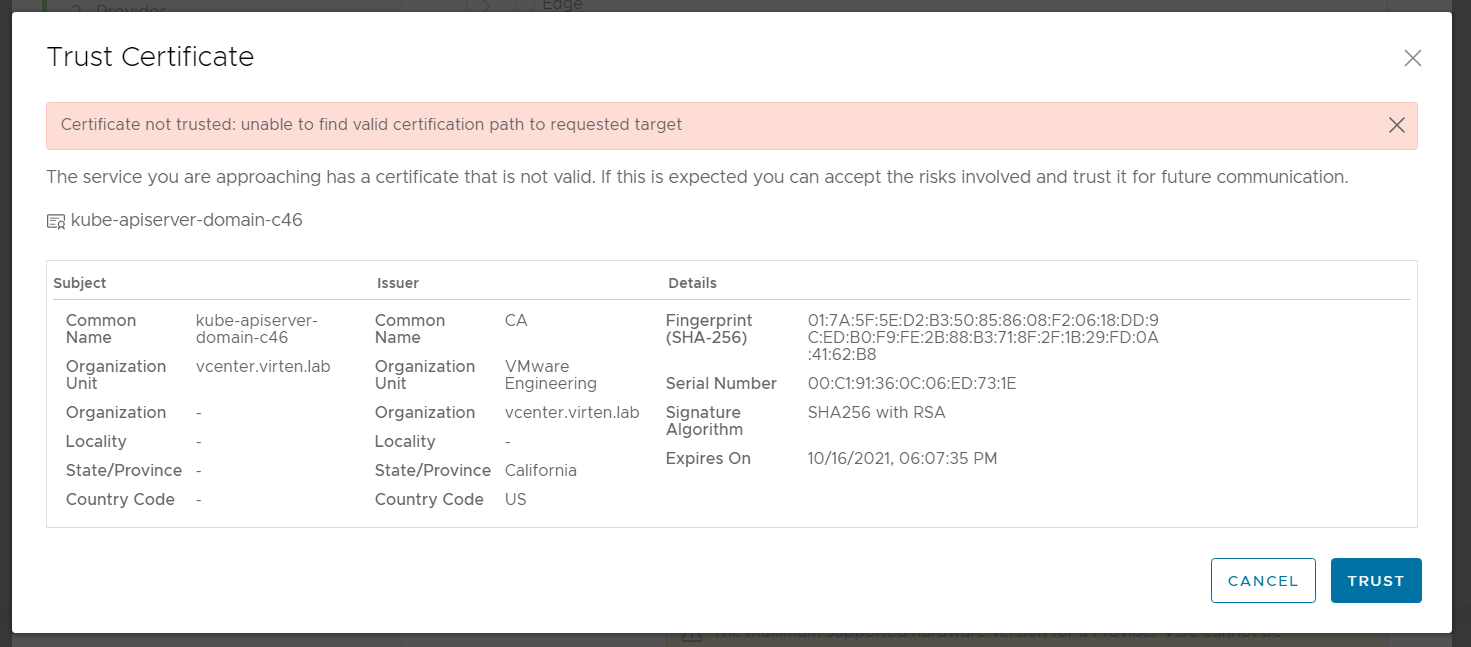
- Click TRUST to add the Kubernetes Certificate to the Trusted Certificates Store.
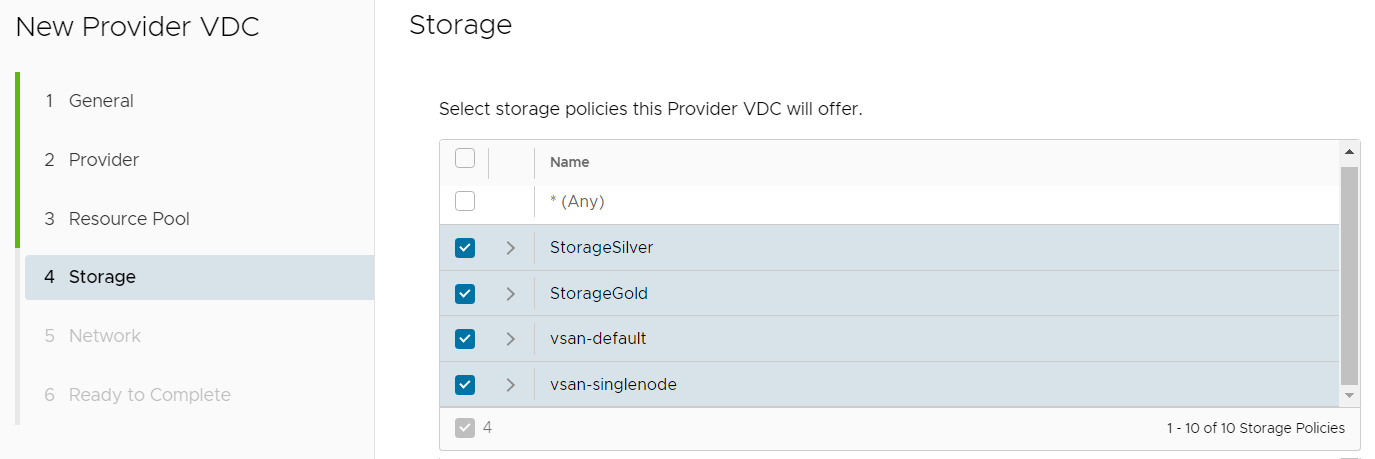
- Select the Storage Classes you want to offer in the Provider VDC.
- In the network configuration, choose "Select an NSX-T manager and Geneve Network pool" and configure your Geneve Pool.
- Finish the setup to create the Provider VDC. This will take a couple of minutes.
VMware Cloud Director should automatically create a default Kubernetes Policy for the Provider VDC. Verify the policy in the Provider VDC configuration. Make sure that you can see Storage Classes and Machine Classes.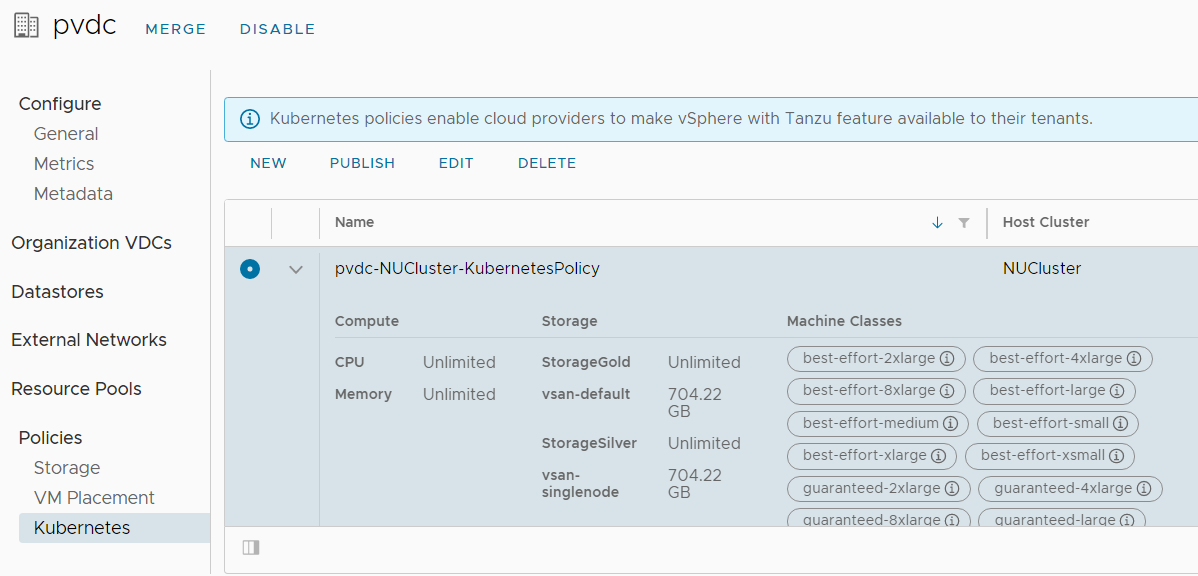
If Machine Classes are missing, you either have a problem with the certificate, or the TKG Content Library is missing. If Storage Classes are missing, they probably have an invalid name.
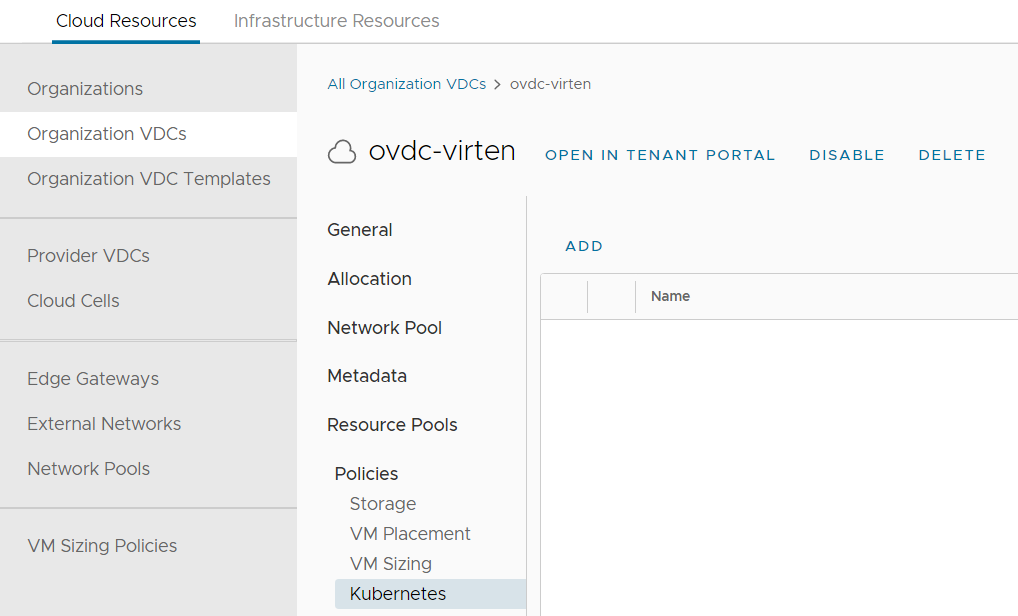
Step 2 - Publish the Kubernetes Policy to and Organization VDC
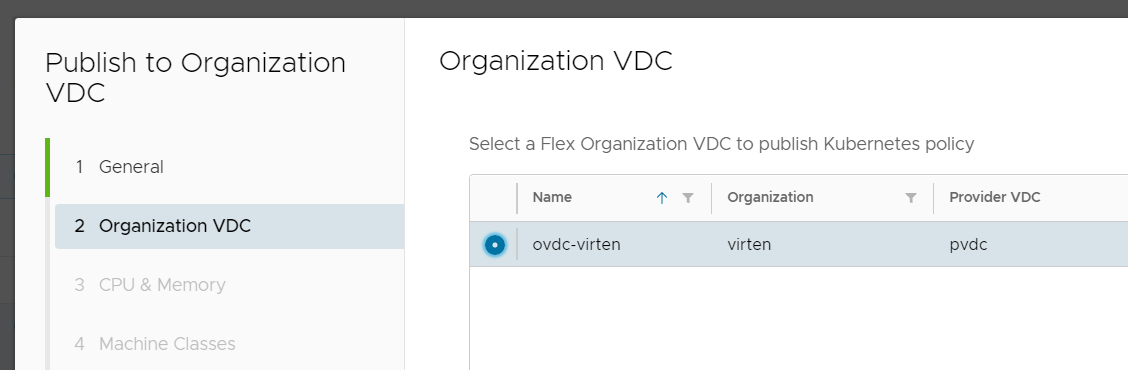
There are two options to publish the policy. You can either publish the policy from the PVDC, or from the OVDC.
- Create an Organization
- Create an Organization VDC with the Flex Allocation Model
- Open the Organization VDC and navigate to Policies > Kubernetes and press ADD
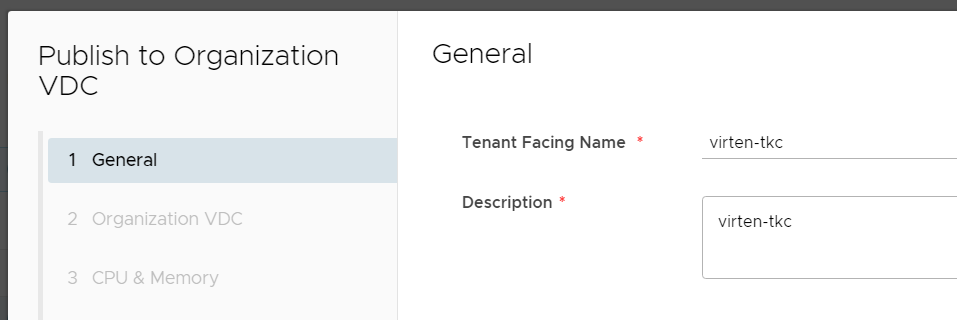
- Enter a Tenant Facing Name for the policy. The name must be DNS compliant as it is used to create a Namespace in the Supervisor Cluster.
- Note - This step is different whether the policy is published from the Organization VDC or the Provider VDC.
When publishing from the Provider VDC, you have to select the Organization VDC.
When publishing from the Organization VDC, you have to select the Kubernetes Policy
- Configure CPU and Memory Limits and if you want to use reservations. Those settings are added as "Allocated" in the Organization VDC and configured as Limits in the Namespace.
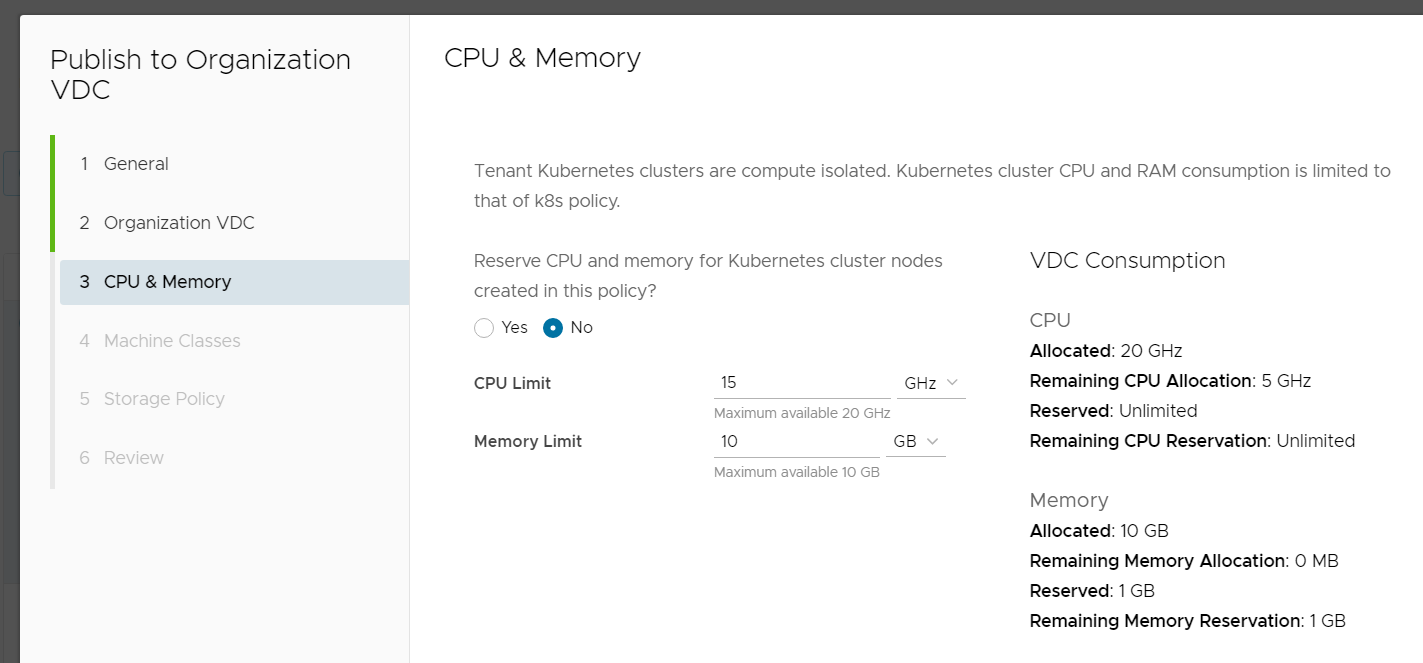
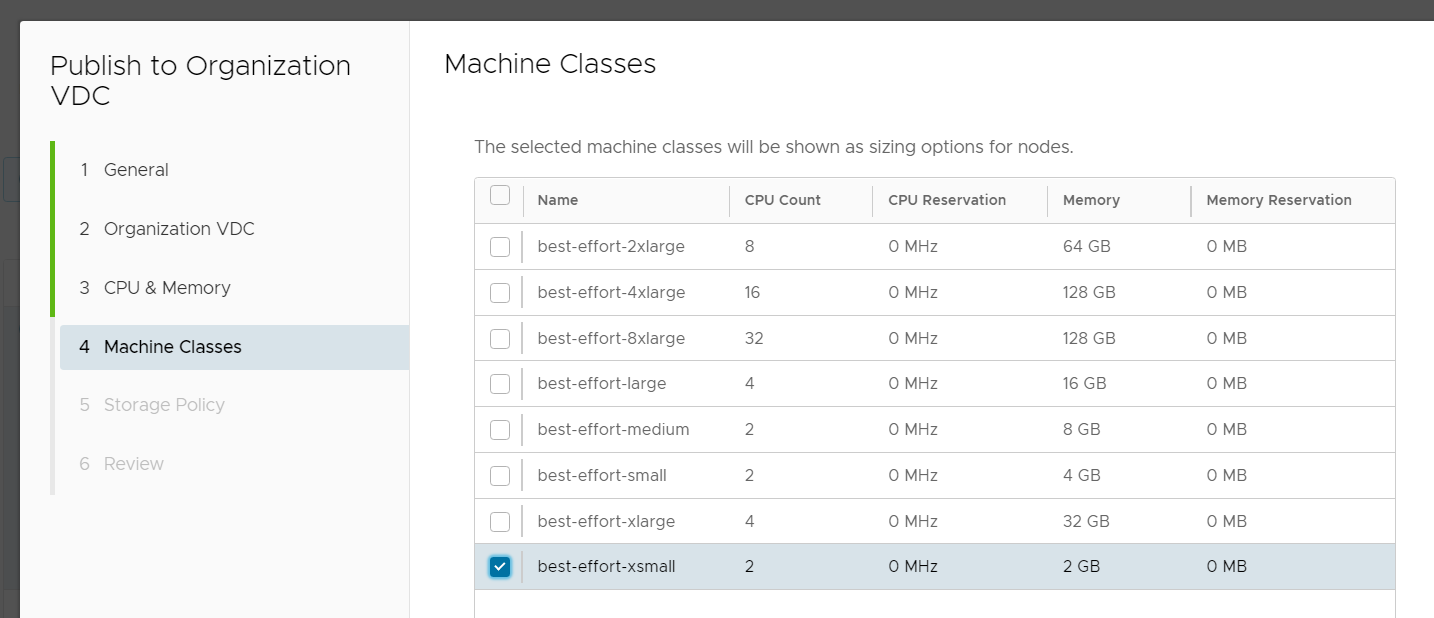
- Select the Virtual Machine Classes you want to allow the tenant to deploy for Kubernetes Control Plane and Worker nodes. If you have chosen "No Reservation" in the previous step, you can only select "best-effort-" classes. If you have enabled reservations you can also see the "guaranteed-" classes.
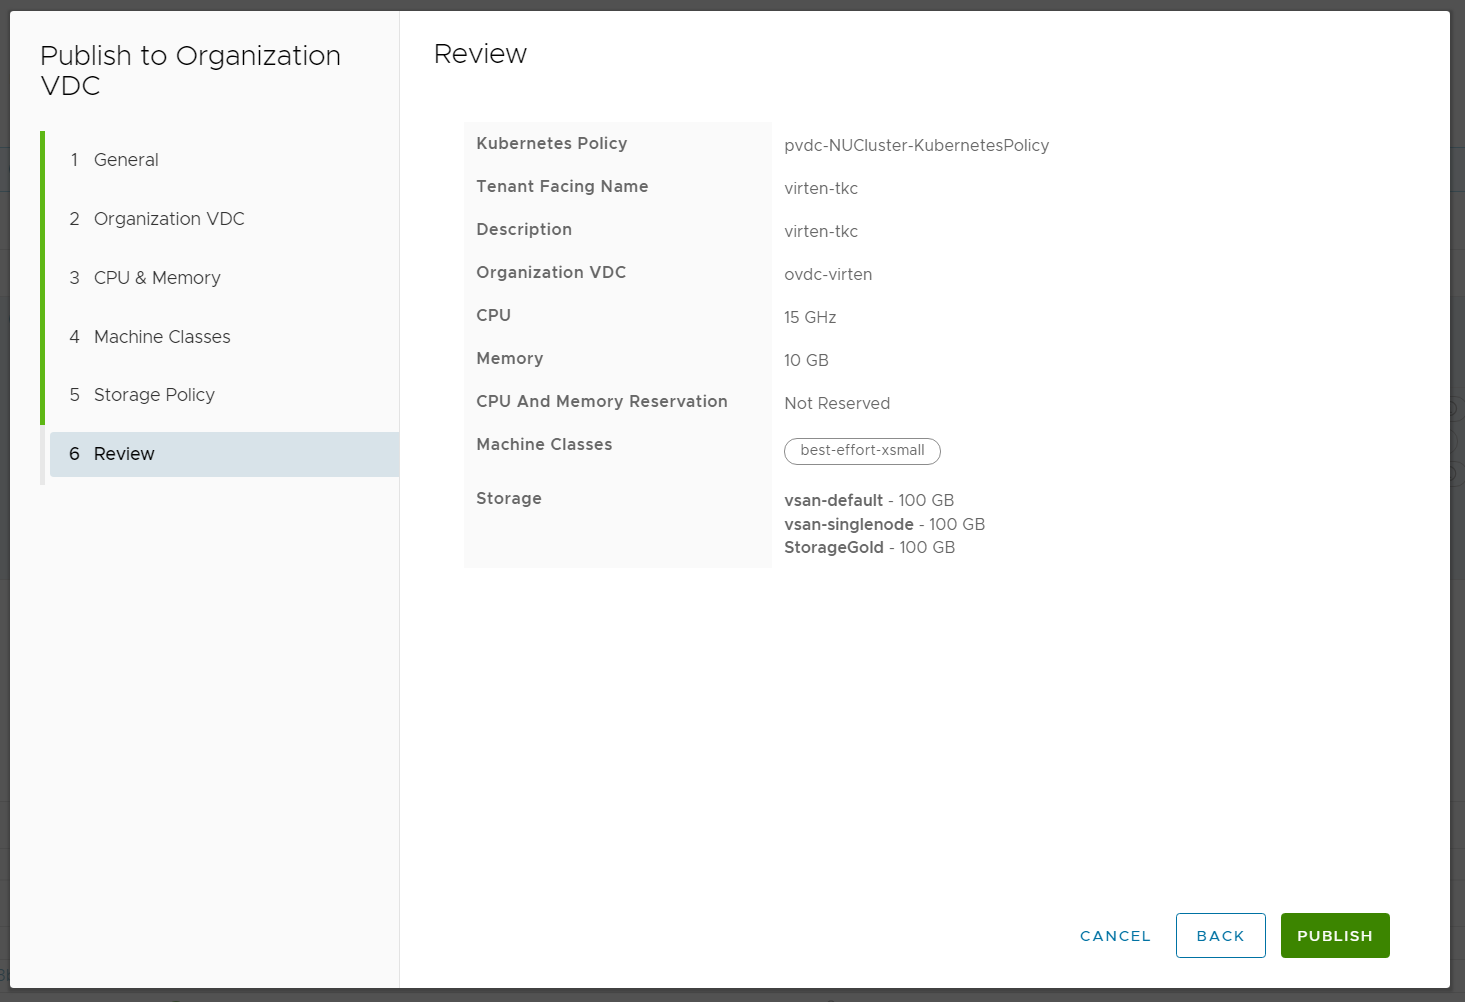
- Configure the Storage Policy that the tenant can use for persistent volumes.

- Review the configuration and click PUBLISH.
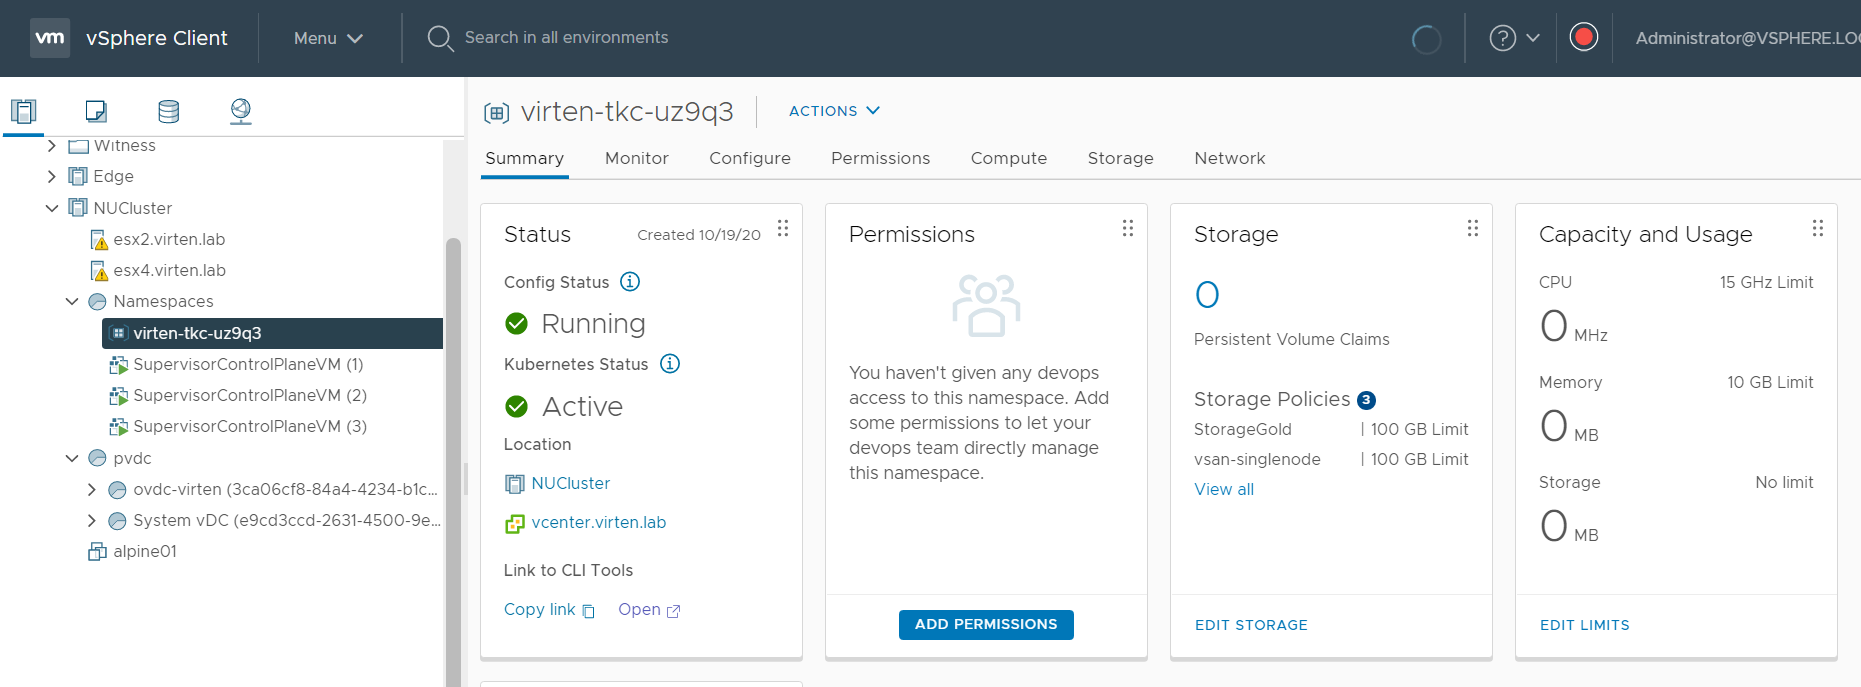
In the vSphere Client, you can see what happened in the backend. The published policy is a Namespace that has been created for the tenant. It is outside the Cloud Directors Provider VDC, but the resources are shared with the Organization VDC. The limits configured for CPU and Memory are accounted as "allocated" in the Organization VDC.
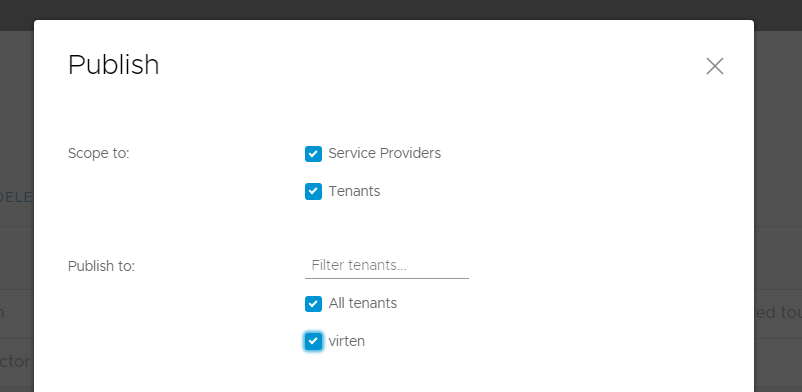
Step 3 - Publish the Container UI Plugin to the Organization
The tenant needs access to the Kubernetes Container Cluster Plugin to deploy Kubernetes clusters by himself.
- Navigate to More > Customize Portal
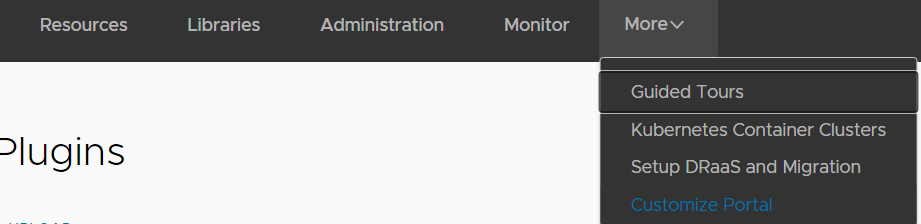
- Select the Container UI Plugin and press PUBLISH
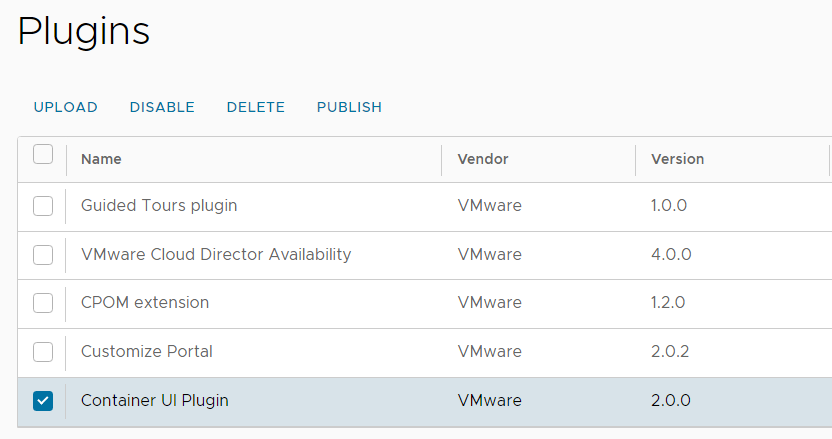
- Select the Tenant and press SAVE
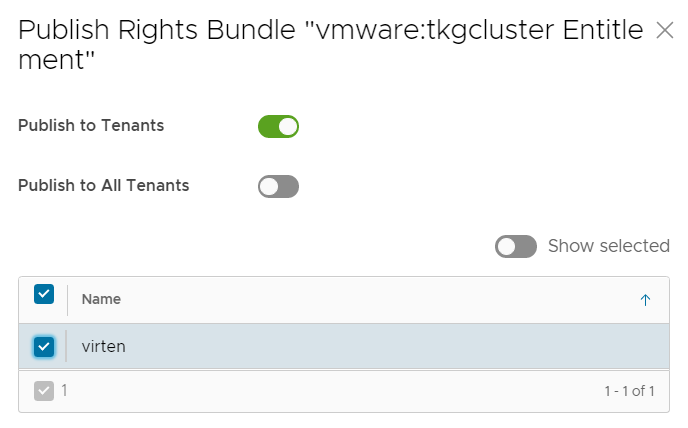
Step 4 - Publish the TKG Cluster Entitlement to the Organization
At this point, the tenant has its own Kubernetes Namespace and access to the UI Plugin, but it is still not possible to create Tanzu Kubernetes Clusters. It is required to publish the TKG Cluster Entitlement to the tenant.
- Navigate to Administration > Tenant Access Control > Rights Bundles
- Select vmware:tkgcluster Entitlement and press PUBLISH
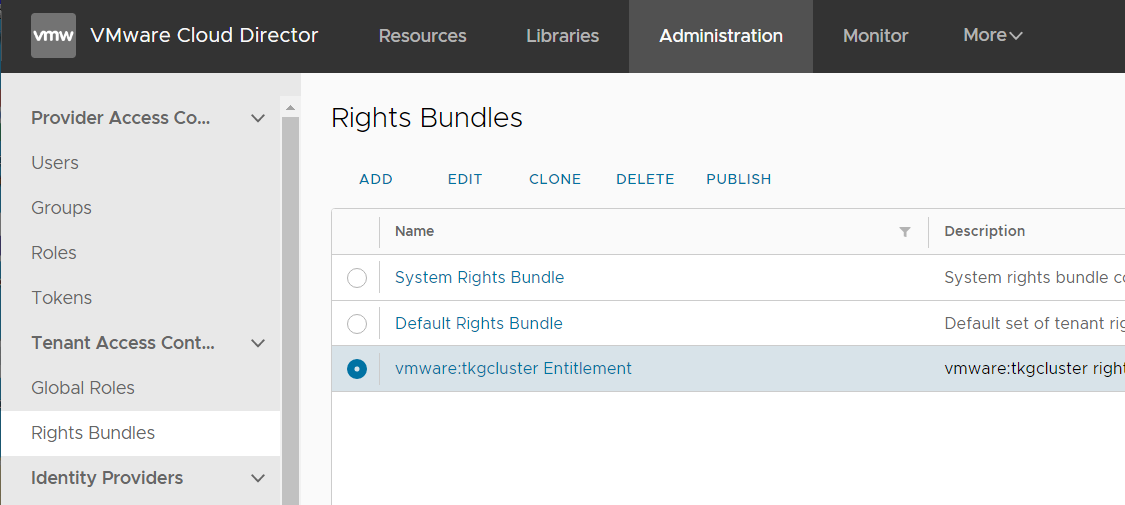
- Select the Tenant and press SAVE
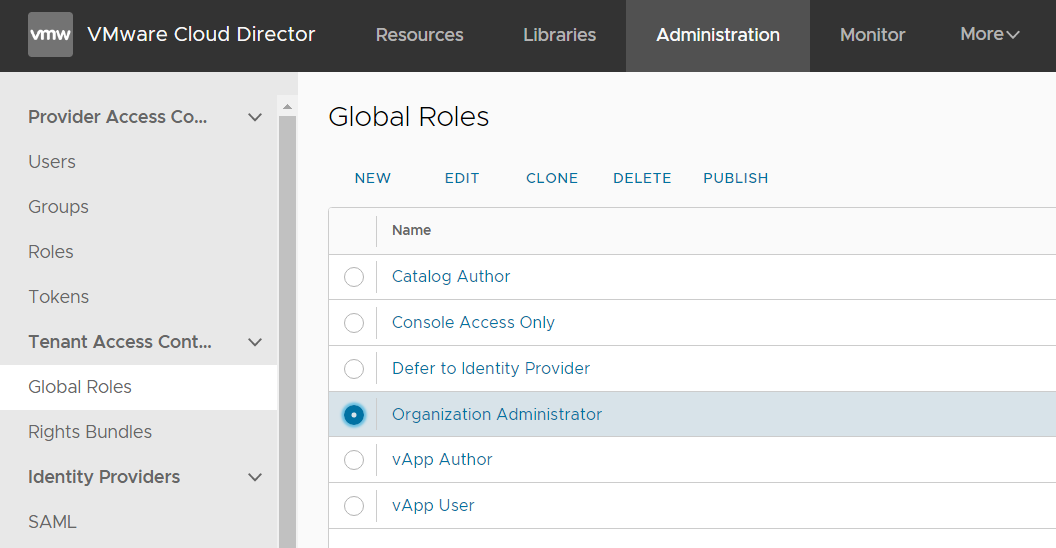
Step 5 - Create and Publish a Role with TKG Permissions
Creating Kubernetes Clusters is not included in the global role "Organization Administrator", so the tenant still can't deploy TKG Clusters. To solve this, clone the Admin role and add TKG permissions.
- Navigate to Administration > Tenant Access Control > Global Roles
- Select Organization Administrator and press CLONE
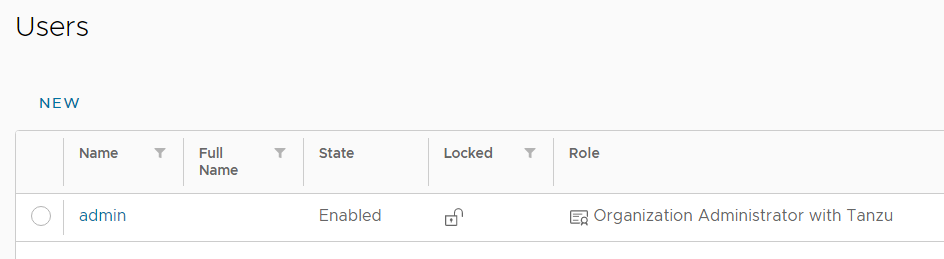
- Give the policy a name (eg. Organization Administrator with Tanzu)
- Enable Modify Selected Rights
- Enable all Tanzu related permissionsAdministrator View: Tanzu Kubernetes Guest Cluster
View: Tanzu Kubernetes Guest Cluster
Administrator Full Control: Tanzu Kubernetes Guest Cluster
Full Control: Tanzu Kubernetes Guest Cluster
Edit Tanzu Kubernetes Guest Cluster
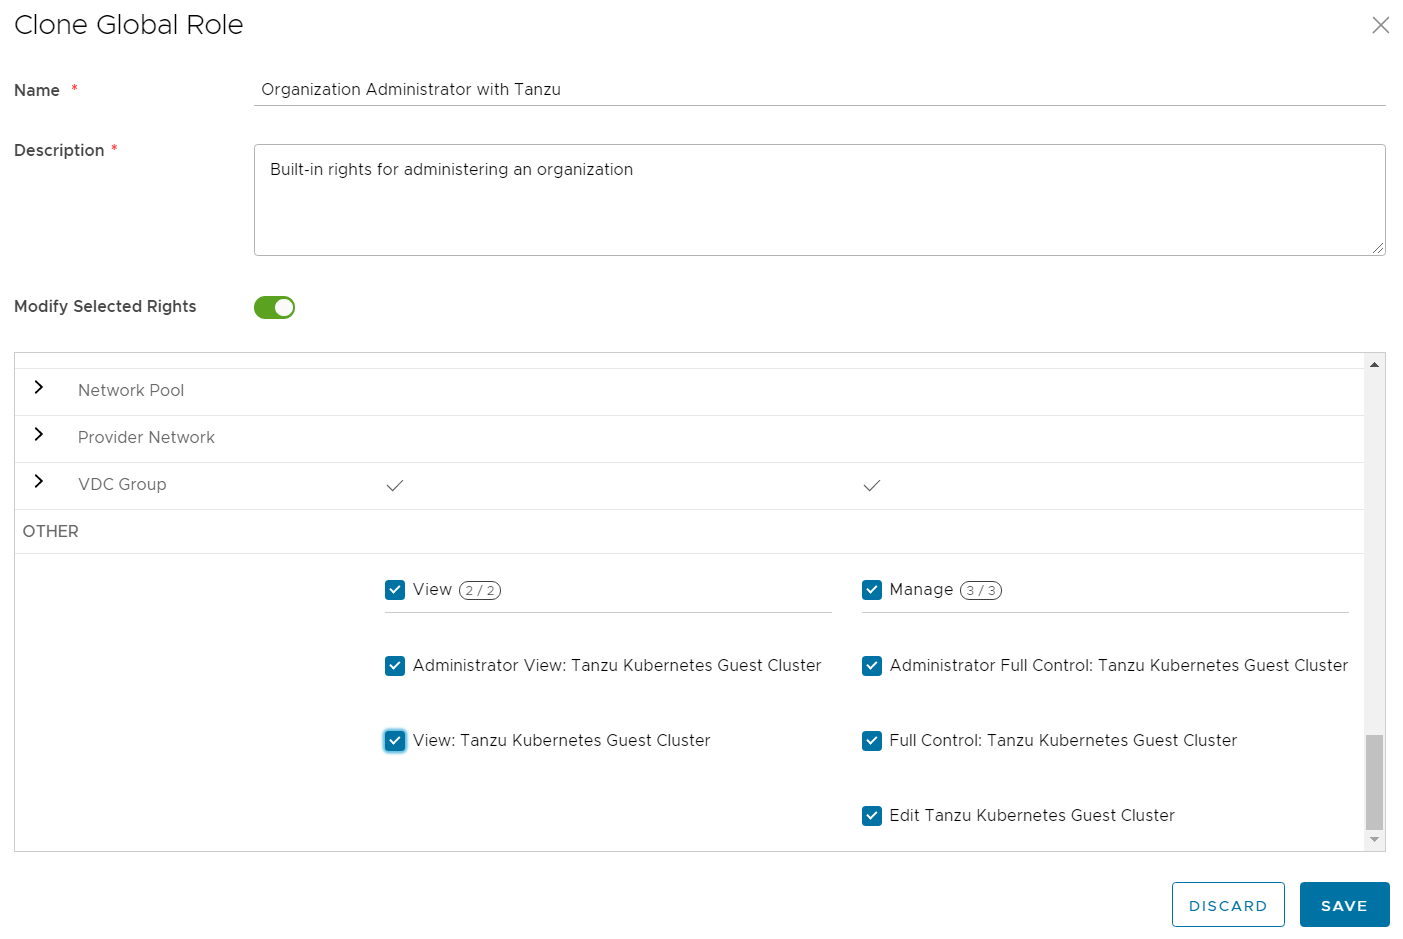
- Press SAVE
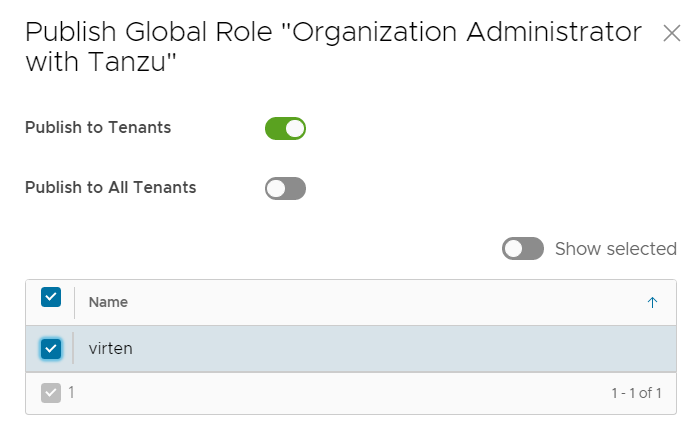
- Select the new role and press PUBLISH
- Select the Tenant and press SAVE
- Navigate to Resources > Organizations > [NAME] and press OPEN IN TENANT PORTAL
- In the Tenant Portal, navigate to Administration > Users and create the tenant's Admin account with the new Organization Administrator with Tanzu role.
That's it from the Service Provider view. The tenant is now able to deploy Tanzu Kubernetes Clusters.
Deploy a "vSphere with Tanzu" Kubernetes Cluster as Tenant
Now it's time to switch over to the Tenant's perspective and deploy a "vSphere with Tanzu" Cluster. From here, the process is self-explaining and straight-forward.
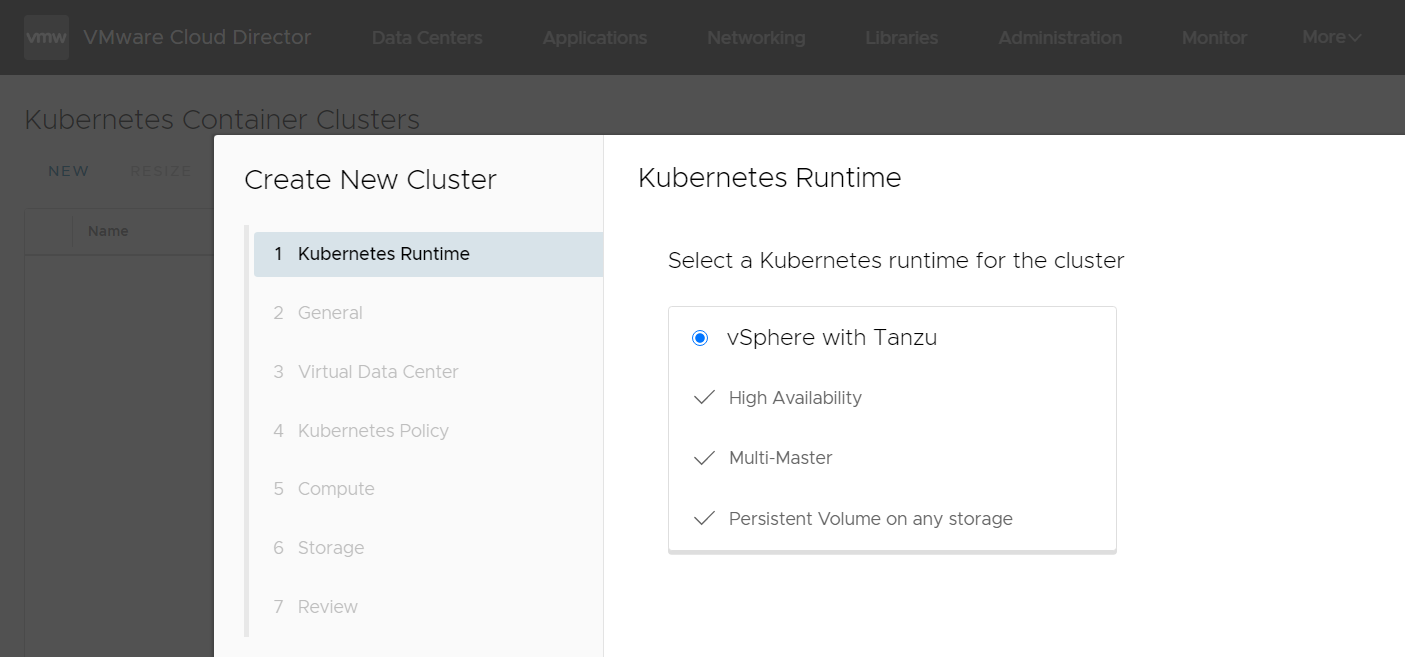
- Log in to the Cloud Director as Tenant
- Navigate to More > Kubernetes Container Clusters
- Press NEW
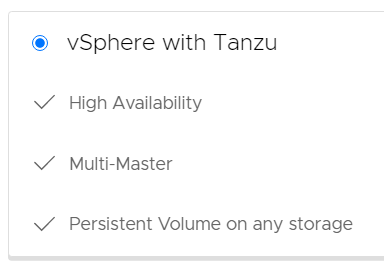
- Select vSphere with Tanzu
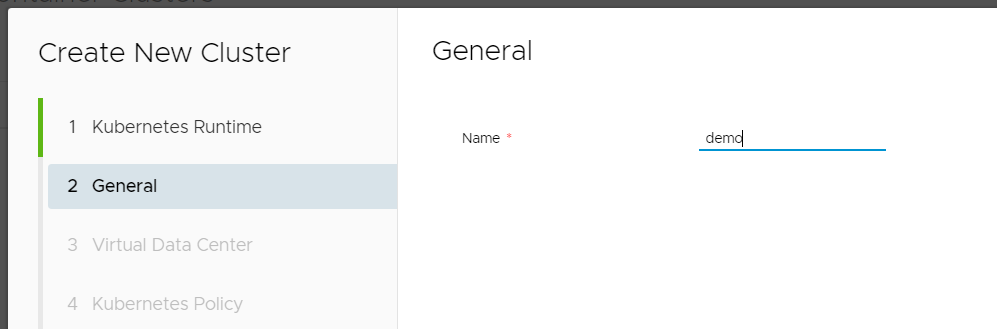
- Enter a DNS compliant Name. All lowercase and "-".
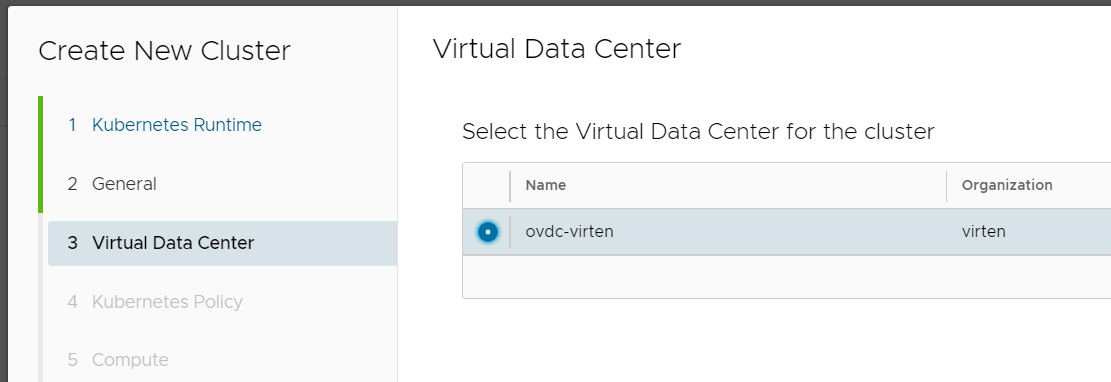
- Select the Organization VDC
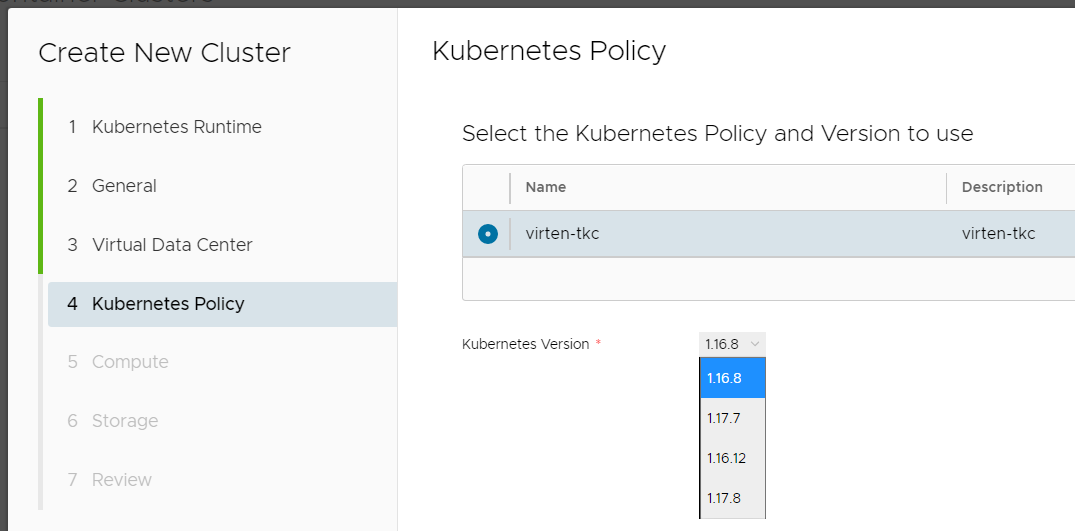
- Select the Kubernetes Policy and Version
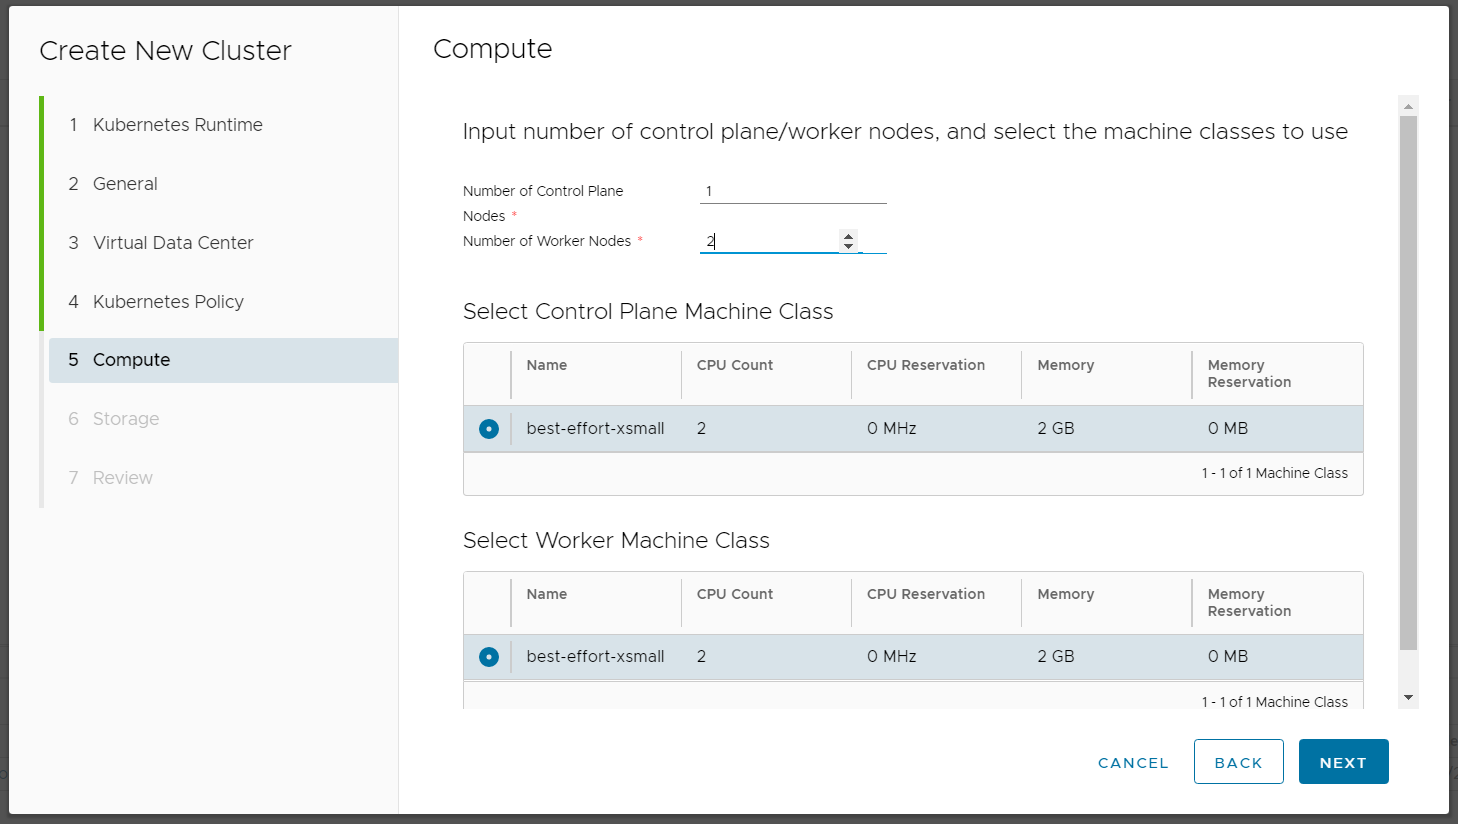
- Select Number and Size of Control Plan and Worker nodes.
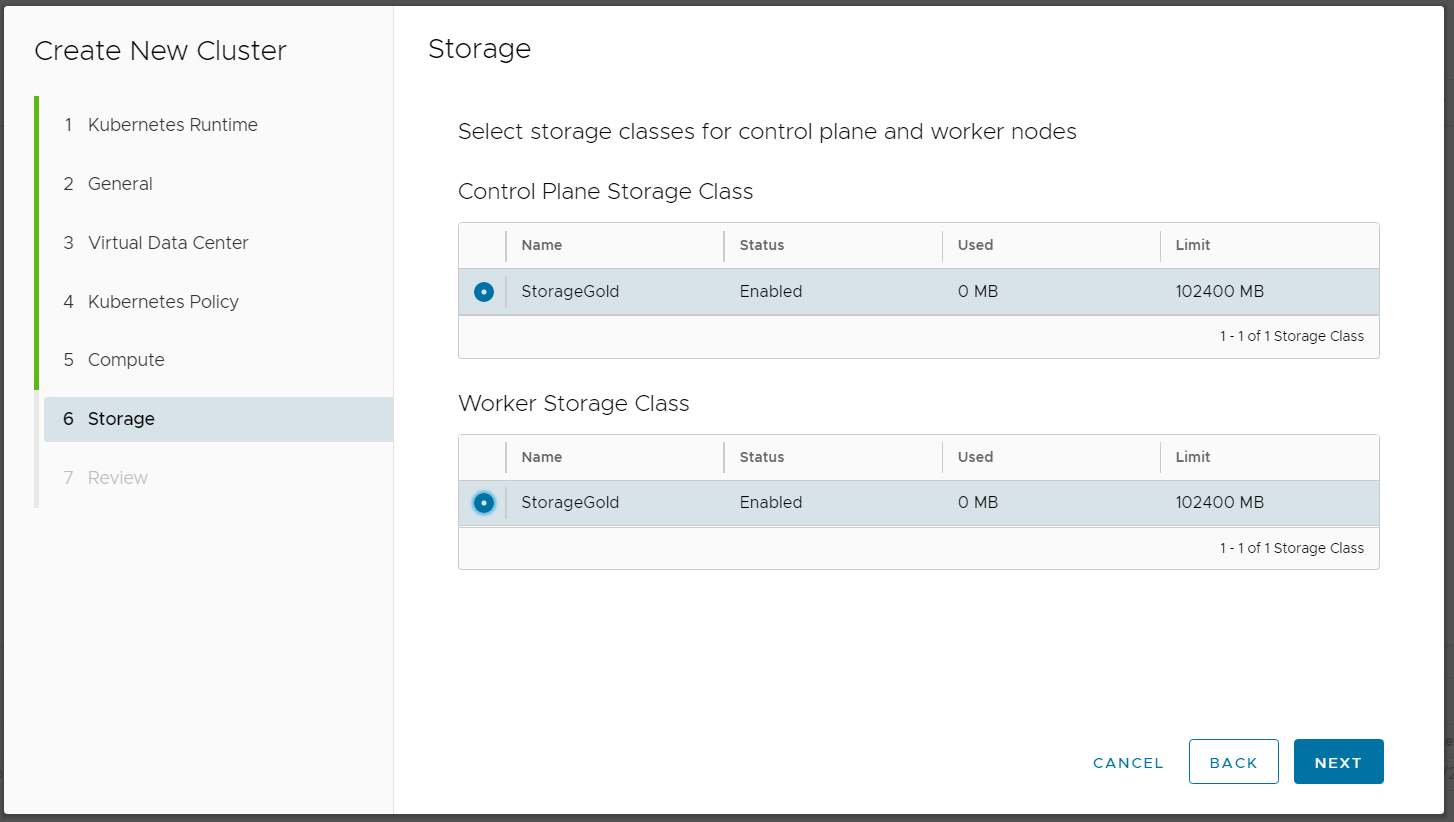
- Select Storage Class for Control Plane and Worker nodes.
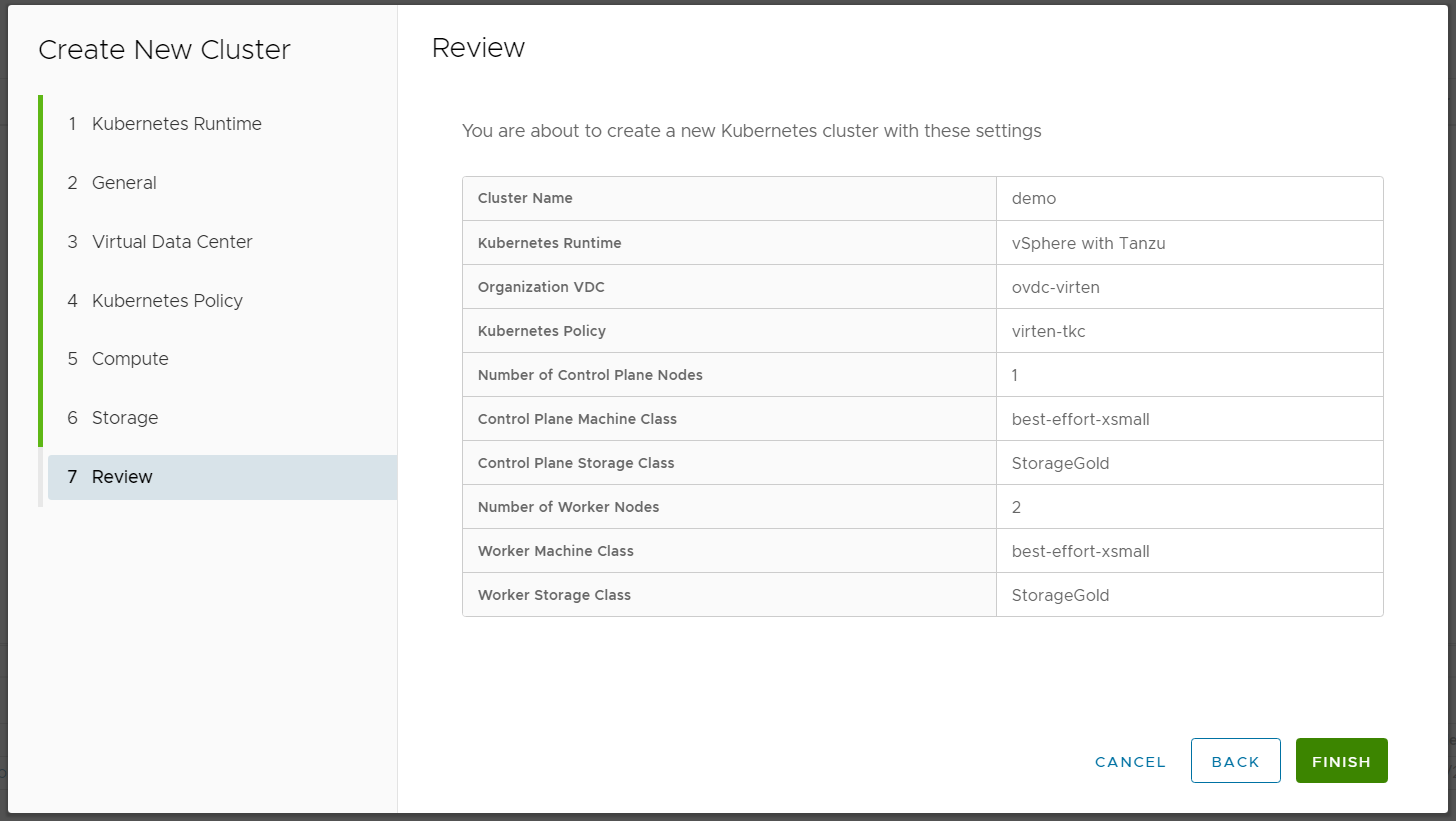
- Review the Configuration and press FINISH
- Done
When the deployment is finished, the tenant can download the kubeconfig file, which includes the cluster address and an access token. To download the kubeconfig, select the cluster and press DOWNLOAD KUBE CONFIG.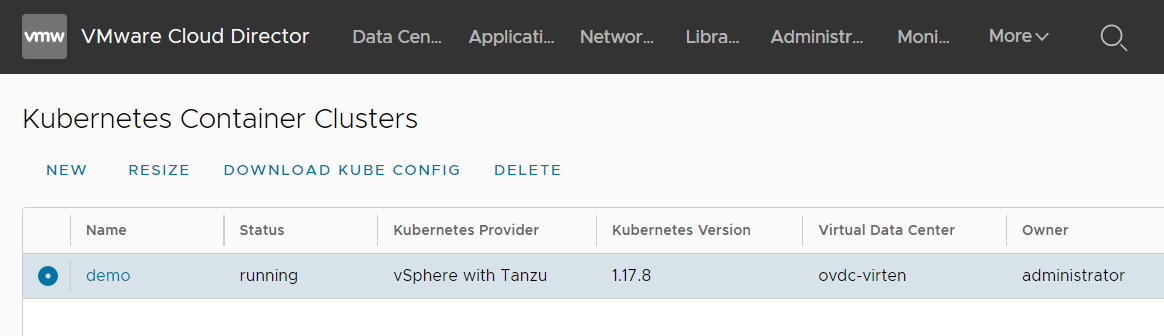
The kubeconfig looks like this:
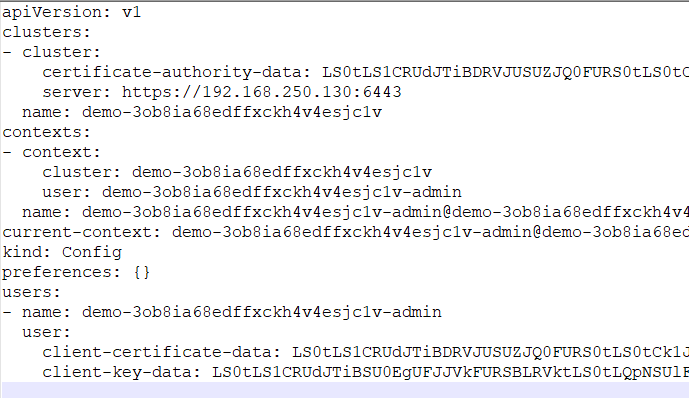
The configuration file can be used by copying it to your local kubectl configuration, eg. ~/.kube/config
You can now use kubectl to manage your cluster and deploy workloads. Don't forget that you have to create a RoleBinding that grants access to all service accounts within the default namespace to run a privileged set of workloads using the default PSP vmware-system-privileged.
# kubectl create rolebinding rolebinding-default-privileged-sa-ns_default \
--namespace=default --clusterrole=psp:vmware-system-privileged \
--group=system:serviceaccounts
Or else, you will see the following error message, when deploying pods:
Error creating: pods "webserver-d698d7bd6-" is forbidden: unable to validate against any pod security policy: []
Quick test deployment:
# kubectl create deployment webserver --image nginx
deployment.apps/webserver created

# kubectl scale deployment webserver --replicas 2
deployment.apps/webserver scaled

# kubectl expose deployment webserver --port=80 --type=LoadBalancer
service/webserver exposed

# kubectl get service webserver
NAME        TYPE           CLUSTER-IP     EXTERNAL-IP       PORT(S)        AGE
webserver   LoadBalancer   10.51.239.92   192.168.250.131   80:31853/TCP   17s
As you can see, the external IP address that has been assigned to the service is from the Supervisor Clusters Ingress range. It has nothing to do with the Cloud Directors' external network and is completely decoupled from the tenants' network.
Hi. I cannot go past step 2.9.
When i publish the policy to the ORG VDC the task is stuck on 1%, on vCenter the namespace is created but after a few minutes the task on vCloud fails with this error:
Timed out waiting for resource pool for supervisor namespace xx-0uzbm to sync to inventory
An than the namespace on vCenter is deleted.
Did you ever encounter this issue? Any hint could be very useful.
Thanks.
Hi,CLAUDIO
I facing the same issue. Did you sloved this issue?