
The installation of ESXi on a Raspberry Pi using the ESXi on ARM Fling basically involves 3 steps:
- Patch RPi EEPROM to the latest version using an SD card. You can reuse the SD card in Step 2.
- Write RPi Firmware and EFI to an SD Card. This is the bootloader for ESXi and needs to remain in your RPis SD slot, even after ESXi installation.
- Install ESXi on ARM using a USB flash drive (This step is identical to x86 Hardware)
I've tried to make this sprocess unattended so I've created two PowerShell functions that automate Step 1 and 2.
First of all, as this can't be stressed enough, read the documentation. There are additional information in the document that you are required to know to run ESXi on Raspberry Pi smoothly.
Prerequisites
To get started with ESXi on Raspberry Pi using the PowerShell functions you need:
- One or Two SD Cards (You can overwrite the EEPROM SD Card, or use a new)
- USB Flash Drive (For the ESXi installation)
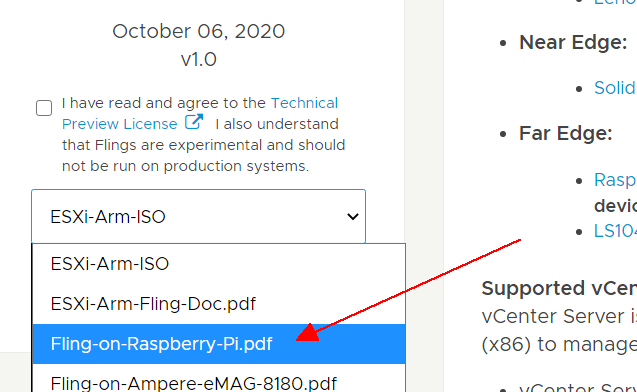
- ESXi on ARM ISO
- Raspberry Pi 4 Model B (With proper cooling and power supply)
- HDMI Monitor
- Micro HDMI to HDMI Cable
- Windows System with Powershell 5 or PowerShell Core to create the SD Card
- esxi_on_rasperry_pi_functions.ps1 (GitHub)
Part 1 - Update EEPROM
The first part is to make sure that your Raspberry Pi has the latest EEPROM installed. As of today, the latest verison is VL805: 0138a1 (2020-09-03). This version works very well with ESXi. The official guide describes the installation of Raspberry Pi Os to upgrade the EEPROM, but there is a simple alternative using the EEPROM boot recovery tool which I am using here.
- Download the esxi_on_rasperry_pi_functions.ps1 module (Download: GitHub)
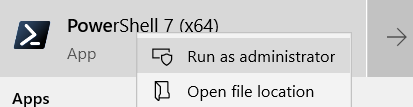
- Start a privileged PowerShell Session. The privileged session is required to format the SD card.
- Import the esxi_on_rasperry_pi_functions.ps1 Module
PS> Import-Module .\esxi_on_rasperry_pi_functions.ps1
- Insert an SD card to your PC (Warning: All data will be erased!)
- Run Write-RpiEepromToUsb
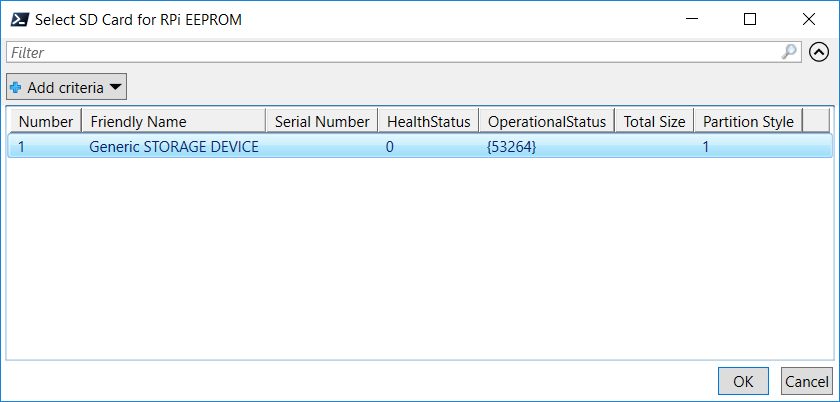
- A window (Out-GridView) will open, allowing you to select the USB to write the Image to. Select your SD card and klick OK.
- The system will ask for confirmation to delete all data on your SD Card. Press Y.
- Wait until the process is finished. This will take about 20 seconds. When successfull, the system prints further instructions. Keep the PowerShell Session open for the Part 2.

- Remove the SD card from your PC
- Insert the SD card to your Raspberry Pi
- Power on Raspberry Pi
- Wait at least 10 seconds.
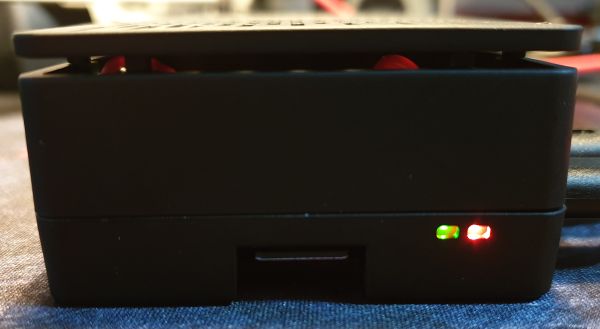
- If successful, the green LED light will blink rapidly (forever), otherwise, an error pattern will be displayed. If an HDMI display is attached then the screen will display green for success or red if failure a failure occurs.
- Remove the power plug from your Raspberry Pi. You can reuse the SD card in Step 2.
Part 2 - Write RPi Firmware and EFI to an SD card
The second part creates an SD card containing the EFI Firmware for ESXi. This firmware is required to boot from USB devices, which is required to install ESXi. It has to remain your RPis SD slot after ESXi has been installed. Don't bother with a large SD card as the firmware is only about 25 MB and you can't use the SD Card for anything else like Datastores or ESXi itself.
- Use the privileged PowerShell Session from Part 1 with the esxi_on_rasperry_pi_functions.ps1 Module loaded, or start a new one.
- Insert an SD card to your PC. You can use the EEPROM SD card from Part 1. (Warning: All data will be erased!)
- Run Write-RpiFirmwareToUsb
- A window (Out-GridView) will open, allowing you to select the USB to write the Image to. Select your SD card and klick OK.
- The system will ask for confirmation to delete all data on your SD Card. Press Y.
- Wait until the process is finished. It might take a few minutes as it has to download roughly 200MB, modify the bootloader with the UEFI loader, and write everything to the SD card.
- When successfull, the system prints further instructions.

- Remove the SD Card from your PC
- Insert the SD Card to your Raspberry Pi
- Power on Raspberry Pi
- Press ESC to enter Setup
- Disable 3 GB RAM Limit (Device Manager > Raspberry Pi Configuration > Advanced Configuration > Limit RAM to 3 GB)
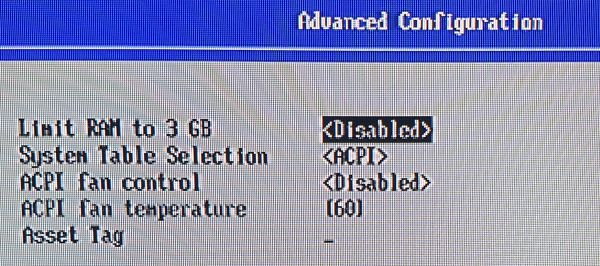
- Press F10 to save
You are now ready to Install ESXi.
Part 3 - ESXi Installation
From here, the ESXi Installation is similar to the Installation on x86 hardware.
- Get ESXi on ARM Fling .iso Installer (My VMware Account is required. The registration is free)
- Write the ESXi Image to an USB thumb drive (eg. with Rufus, see this article)
- Insert the USB thumb drive to your Raspberry Pi
- Make sure that the Firmware SD Card is still in the RPis SD card slot
- Power on Raspberry Pi
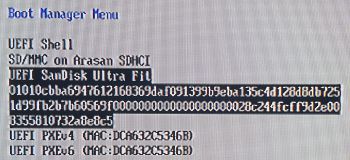
- The Pi might stuck while trying to do a PXE boot. To skip that, press ESC to enter the BIOS, select Boot Manager an manually select your USB drive.
- Follow the Installer to install ESXi.
Additional Notes:
The Invoke-WebRequest function is very slow in PowerShell 5. Either use PowerShell Core 7, or disable the progress bar to speed up the download:
$ProgressPreference = 'SilentlyContinue'
Thanks for this your instructions were much more much better than the Fling ones. Curious if anyone else is having trouble with the final install due to RAM. The original instructions says the 8GB model is preferred but the 4GB would work. I have the 4GB model, but when I get to the end of the install it errors out and says it only finds 3GB. Anyone else have the same problem?
Can you double-check that you've disabled the 3GB Memory limit in the RPis Bios? It is enabled by default.
I did verify that after getting the error. I even tried re-enabling, rebooting, and disabling a second time to make sure that wasn't the problem. Thanks
Wound up fixing my problem the easy way,I got an 8GB Pi and ESX loaded just fine.
I do have a second question though, does anyone know if the Raspberry Pi wireless nic can be seen by ESX? I only see the wired port?
Thanks
ESXi does not support any Wifi adapters.
Everything worked ok. Thank for the great article. Any idea how to check the temperature of the Pi when esxi is running ?
Nope. I tried to compare 3 different cooling options and ended with just using the standard Raspberry Pi OS to check the difference...
One more question, maybe you have tried installing the esxi via iscsi on raspberry pi ? I added the iscsi target, configured the boot order to iscsi,usb(esxi installer), but still the installer could not find the remote destination.
There is now a guide out on how to install using iSCSI: https://blogs.vmware.com/arm/2020/10/17/esxi-arm-with-iscsi/
Just for others that will be here, it is possible to install Esxi via iSCSI from Synology, i did it yesterday 100% works. It looks like there might be a little glitch where you can't make mistakes while typing the configuration for iscsi target which causes the configuration not to save properly. You write it and it just keeps blank. This happens when apparently you correct your typos.
and one other thing. synology starts lun indexing from 1 , not 0, so you have to change it as well inside the configration section in iscsi.