During my first attempts to integrate "vSphere with Tanzu" into VMware Cloud Director 10.2, I had a couple of issues. The integration just wasn't as smooth as I expected and many configuration errors are not mitigated in the GUI. Also, there are a lot of prerequisites to strictly follow.
In this article, I'm going through the issues I had during the deployment and how to solve them.
The organization has not been authorized to host TKG clusters
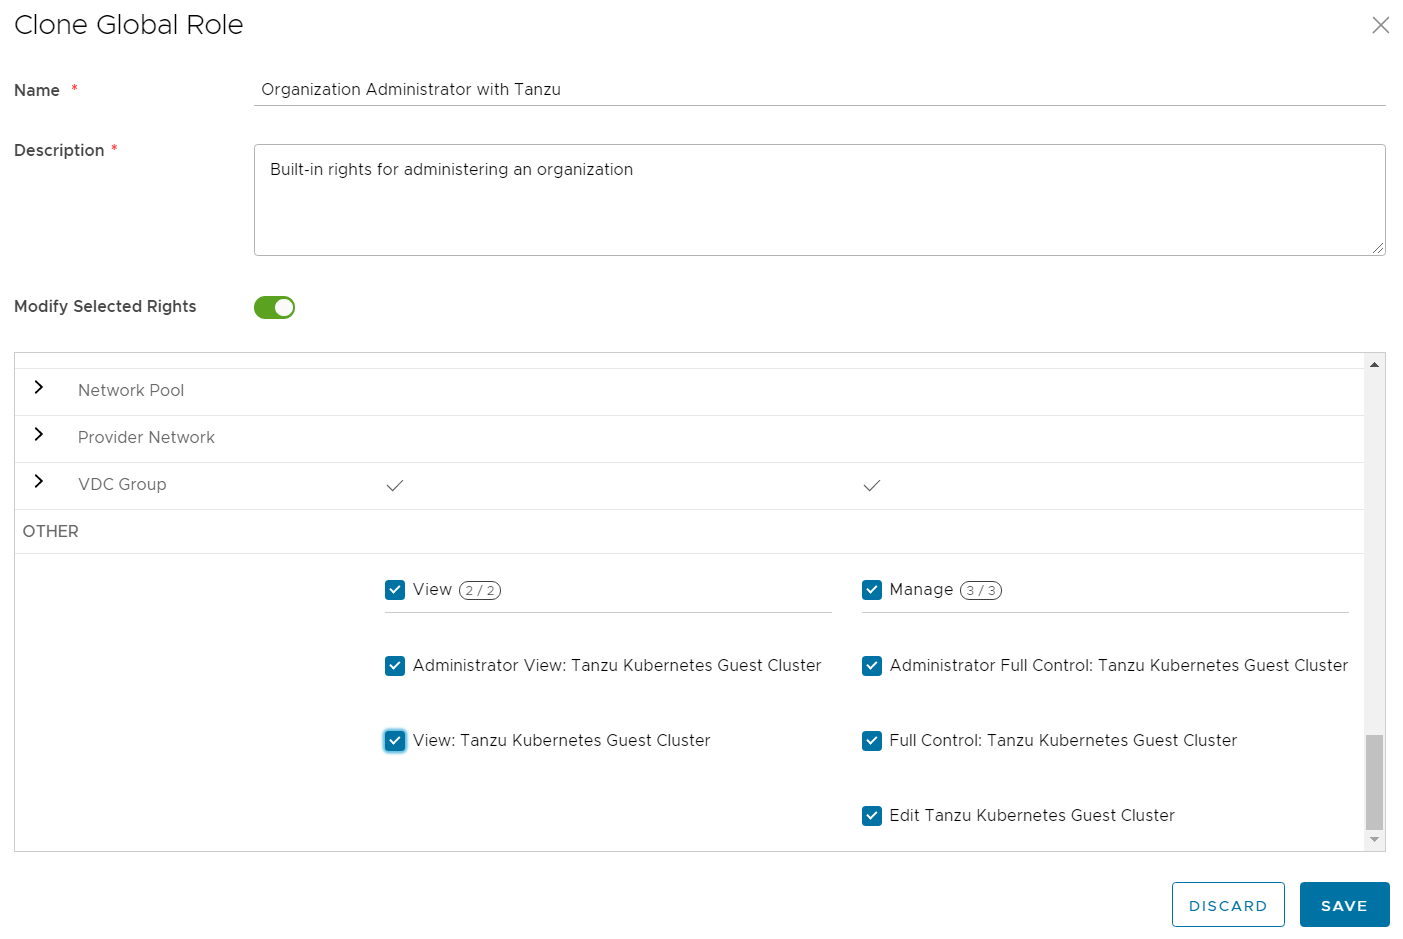
You've published the policy to a Tenant and it is still not possible to deploy TKG Clusters? To grant tenants the right to create and manage Tanzu Kubernetes clusters, you must also publish the vmware:tkgcluster Entitlement rights bundle to the organization.
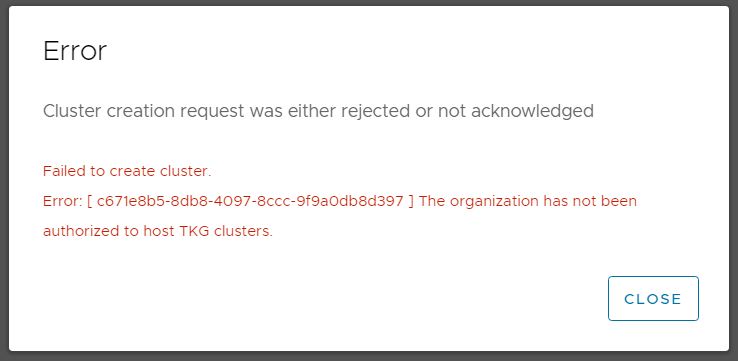
The following error message is displayed after the tenant has finished the Tanzu deployment wizard:
Error
Cluster creation request was either rejected or not acknowledged
Failed to create cluster.
Error: [ c671e8b5-8db8-4097-8ccc-9f9a0db8d397 ] The organization has not been authorized to host TKG clusters.
Solution:
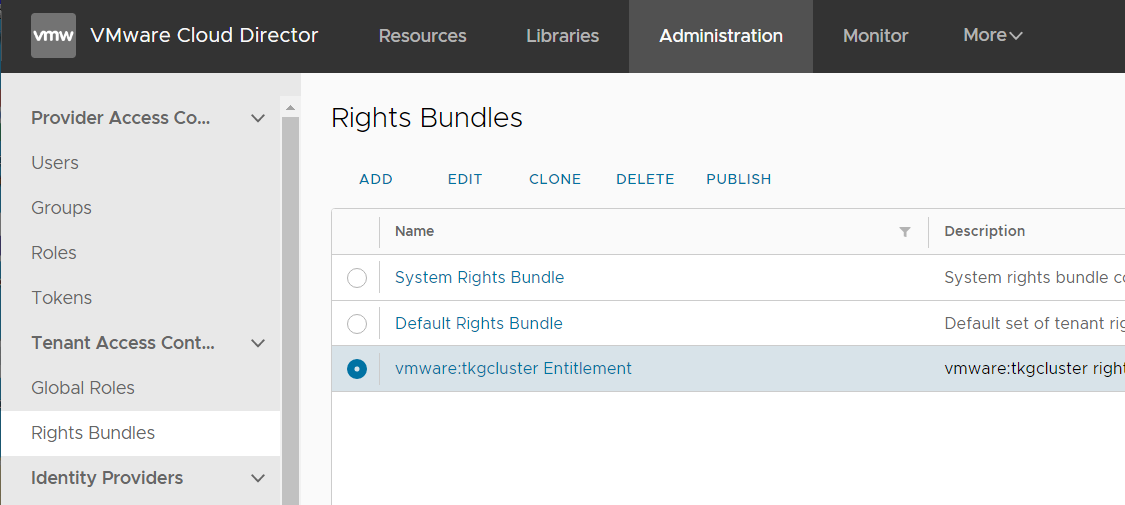
- Navigate to Administration > Tenant Access Control > Rights Bundles
- Select vmware:tkgcluster Entitlement and press PUBLISH
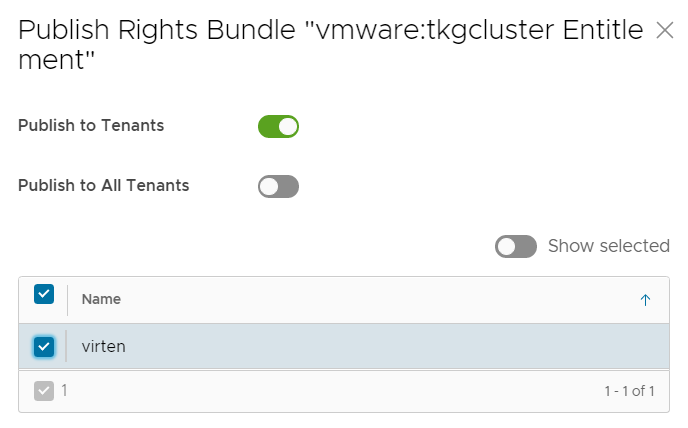
- Select the Tenant and press SAVE
- After publishing the rights bundle to the tenant organization, make sure to also fix the Organization Administrator Rights. The permission to deploy TKG Clusters is also not enabled by default. However, the tenant can also fix it by himself by creating his own rule.
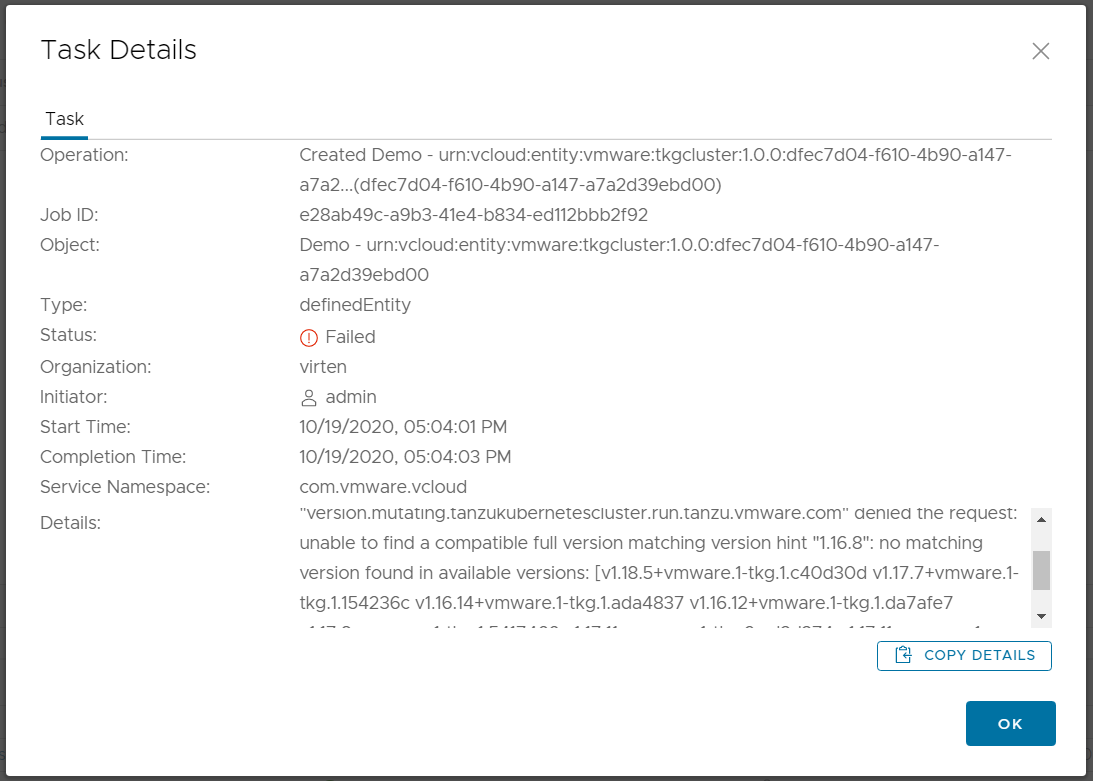
Unable to find a compatible full version matching version hint "1.16.8"
Step 4 in the Kubernetes Cluster deployment wizard allows the tenant to choose the Kubernetes version. In my environment, the deployment of version 1.16.8 failed.
An operation in vSphere for Kubernetes failed, reason message: Forbidden - admission webhook "version.mutating.tanzukubernetescluster.run.tanzu.vmware.com" denied the request:
unable to find a compatible full version matching version hint "1.16.8": no matching version found in available versions:
[v1.18.5+vmware.1-tkg.1.c40d30d v1.17.7+vmware.1-tkg.1.154236c v1.16.14+vmware.1-tkg.1.ada4837 v1.16.12+vmware.1-tkg.1.da7afe7 v1.17.8+vmware.1-tkg.1.5417466 v1.17.11+vmware.1-tkg.2.ad3d374 v1.17.11+vmware.1-tkg.1.15f1e18]
Make sure that you have the TKC library added to the vSphere Cluster in the Namespaces General configuration.

Verify that the Content Library has successfully downloaded VMware's Photon images for Kubernetes.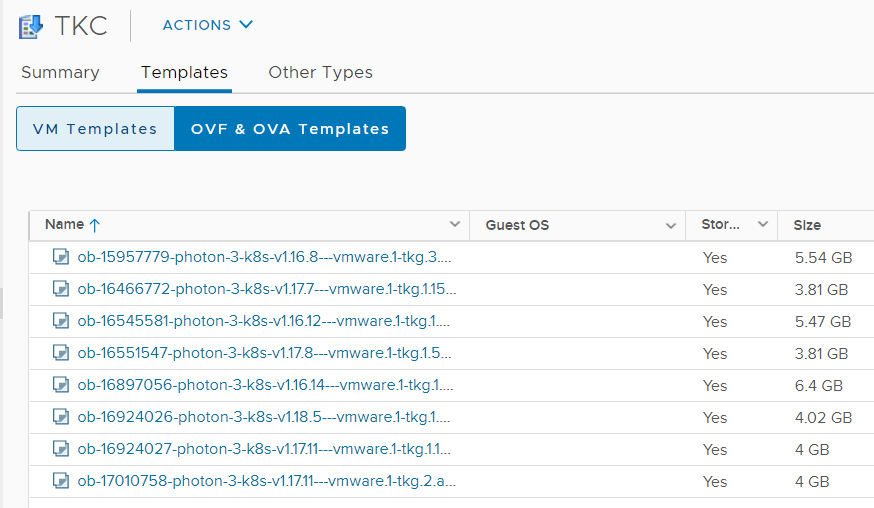
Use kubectl to verify that the supervisor cluster has recognized the images:
# kubectl get virtualmachineimages
NAME                                                         VERSION                           OSTYPE
ob-15957779-photon-3-k8s-v1.16.8---vmware.1-tkg.3.60d2ffd    v1.16.8+vmware.1-tkg.3.60d2ffd    vmwarePhoton64Guest
ob-16466772-photon-3-k8s-v1.17.7---vmware.1-tkg.1.154236c    v1.17.7+vmware.1-tkg.1.154236c    vmwarePhoton64Guest
ob-16545581-photon-3-k8s-v1.16.12---vmware.1-tkg.1.da7afe7   v1.16.12+vmware.1-tkg.1.da7afe7   vmwarePhoton64Guest
ob-16551547-photon-3-k8s-v1.17.8---vmware.1-tkg.1.5417466    v1.17.8+vmware.1-tkg.1.5417466    vmwarePhoton64Guest
ob-16897056-photon-3-k8s-v1.16.14---vmware.1-tkg.1.ada4837   v1.16.14+vmware.1-tkg.1.ada4837   vmwarePhoton64Guest
ob-16924026-photon-3-k8s-v1.18.5---vmware.1-tkg.1.c40d30d    v1.18.5+vmware.1-tkg.1.c40d30d    vmwarePhoton64Guest
ob-16924027-photon-3-k8s-v1.17.11---vmware.1-tkg.1.15f1e18   v1.17.11+vmware.1-tkg.1.15f1e18   vmwarePhoton64Guest
ob-17010758-photon-3-k8s-v1.17.11---vmware.1-tkg.2.ad3d374   v1.17.11+vmware.1-tkg.2.ad3d374   vmwarePhoton64Guest
VMware Cloud Director displays a default set of Kubernetes versions that are not related to the available images in the TKG Content Library. These versions are a global setting. Available versions in VCD 10.2 are 1.16.8, 1.16.12, 1.17.7, and 1.17.8. The list of available versions can be changed using the cell management tool.
./cell-management-tool manage-config --name wcp.supported.kubernetes.versions -v [versions]
The following command adds version 1.18.5 to the default setting.
/opt/vmware/vcloud-director/bin/cell-management-tool manage-config --name wcp.supported.kubernetes.versions -v 1.16.8,1.16.12,1.17.7,1.17.8,1.18.5
DNS-1123 subdomain must consist of lower case alphanumeric characters
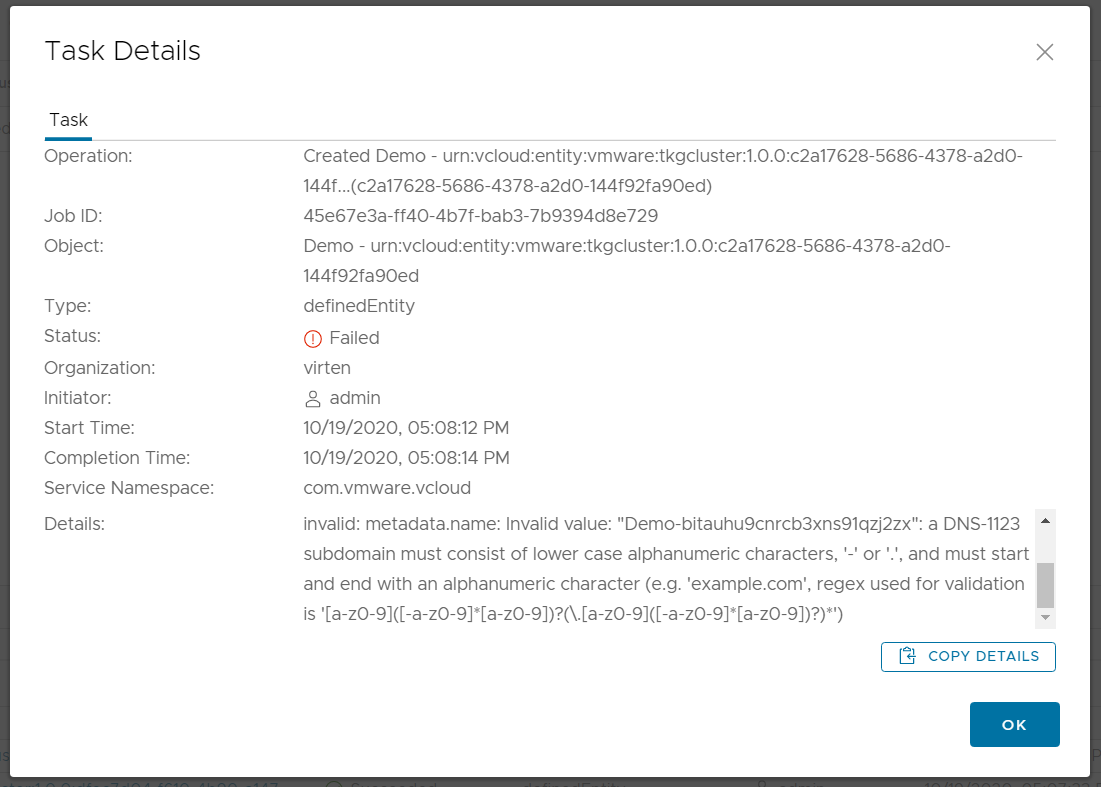
Step 2 in the Kubernetes Cluster deployment wizard misses a sanity check for the name. You can enter whatever you want, but the name must be DNS-1123 compliant.

If you use the string "Demo" to deploy the Kubernetes Clusters, the process fails with the following error message:
An operation in vSphere for Kubernetes failed, reason message: Unprocessable Entity - TanzuKubernetesCluster.run.tanzu.vmware.com "Demo-bitauhu9cnrcb3xns91qzj2zx" is invalid: metadata.name: Invalid value: "Demo-bitauhu9cnrcb3xns91qzj2zx": a DNS-1123 subdomain must consist of lower case alphanumeric characters, '-' or '.', and must start and end with an alphanumeric character (e.g. 'example.com', regex used for validation is '[a-z0-9]([-a-z0-9]*[a-z0-9])?(\.[a-z0-9]([-a-z0-9]*[a-z0-9])?)*')
Solution:
Use a DNS-1123 compliant name for the Kubernetes Cluster.
- Only lower case alphanumeric characters
- '-' or '.' are the only allowed special characters
- The Name must start and end with an alphanumeric character
Could not connect to vSphere for Kubernetes infrastructure
In some cases, I think it might happen when you connect to a vCenter Server that is running an older version than 7.0 Update 1, the Provider VDC Kubernetes policy can not be successfully created. The Cloud Director cell needs access to the Control Plane Node IP Address from the Supervisor Cluster and the Certificate needs to be added as a Trusted Certificate.
Cloud Director cannot reach vSphere for Kubernetes, reason message: Could not connect to vSphere for Kubernetes infrastructure
Another symptom is that Machine Classes are not added to the Kubernetes Policy. This is how the policy should look like:
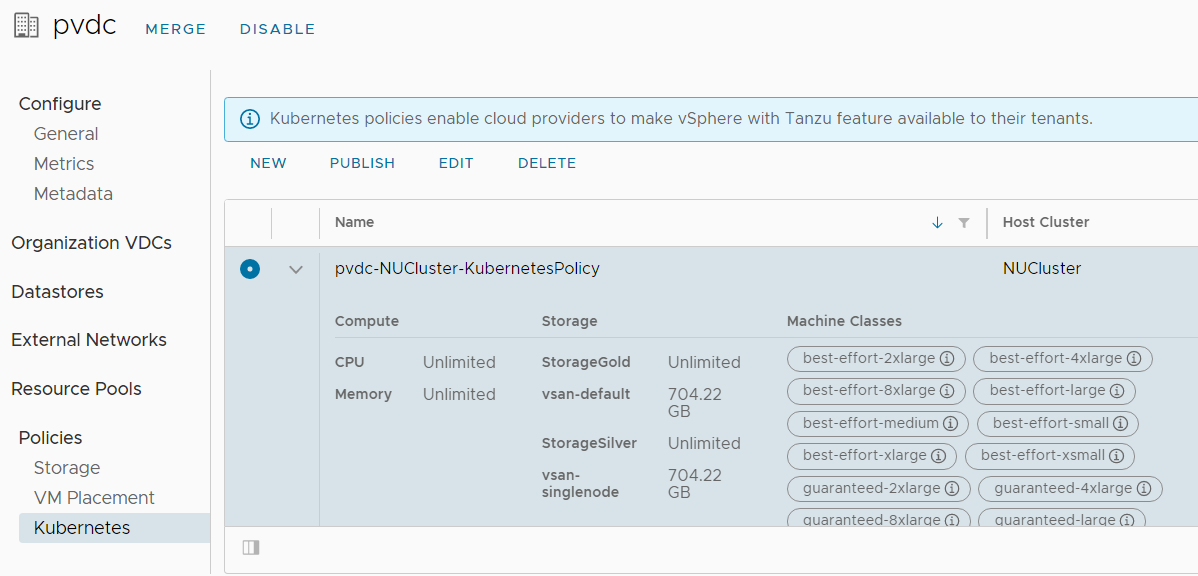
The first step to solve the issue is to find the Control Plane Node IP Address. Open the vSphere Client and navigate to Cluster > Monitor > Namespaces > Overview to find the IP Address.

Verify that VCD can reach the Address with ping.
# ping 192.168.250.129
PING 192.168.250.129 (192.168.250.129) 56(84) bytes of data.
64 bytes from 192.168.250.129: icmp_seq=1 ttl=62 time=1.37 ms
64 bytes from 192.168.250.129: icmp_seq=2 ttl=62 time=0.789 ms
64 bytes from 192.168.250.129: icmp_seq=3 ttl=62 time=0.851 ms
64 bytes from 192.168.250.129: icmp_seq=4 ttl=62 time=0.749 ms

--- 192.168.250.129 ping statistics ---
4 packets transmitted, 4 received, 0% packet loss, time 3044ms
rtt min/avg/max/mdev = 0.749/0.941/1.375/0.253 ms
When you can reach the Control Plane, the next step is to add the Certificate to the trusted store. You need the Certificate in PEM format. Either visit your Control Plane Address with a browser and export the certificate (Base-64 encoded) or use the following command on a Linux machine:
# openssl s_client -connect [Control Plane Address]:443
Copy the certificate (from and including -----BEGIN CERTIFICATE----- to -----END CERTIFICATE-----) to a file and save it as .pem file. Copy everything in the red square:
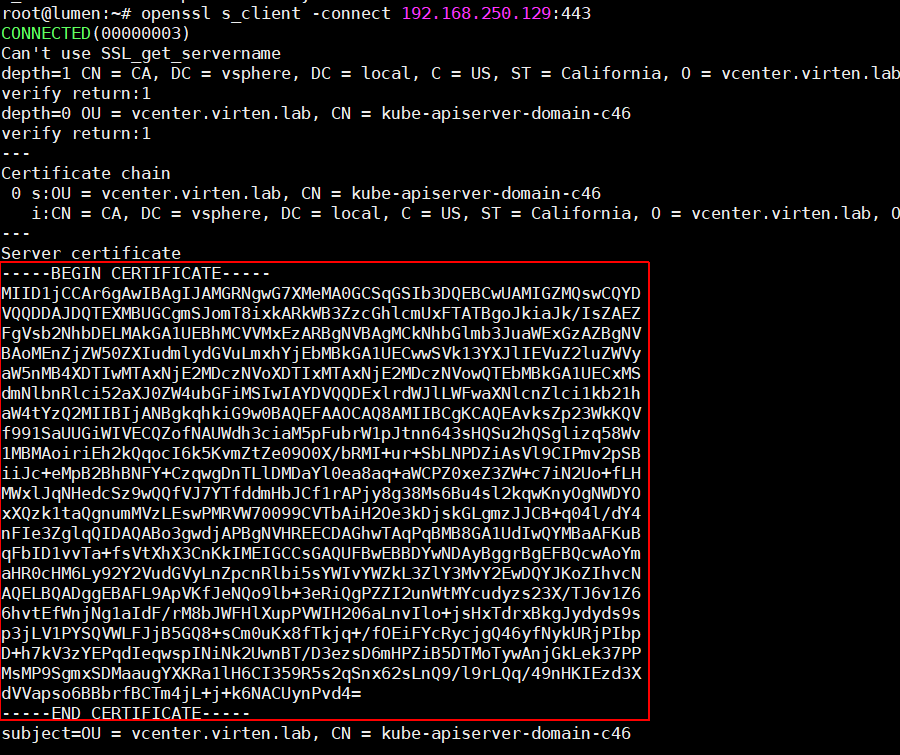
In VCD, navigate to Administration > Certificate Management > Trusted Certificate, click ADD and import the .pem file.
After that, reconnect the vCenter Server within Infrastructure Resources > vCenter Server Instances > vCenter > Reconnect. You should now see Virtual Machine Classes at the Provider VDC Kubernetes Policy.
cidrBlocks intersects with the network range
TKG Clusters in VMware Cloud Director are deployed with the default Service CIDR 10.96.0.0/12 and Pod CIDR 192.168.0.0/16. When these IP addresses are in use by the service provider, the deployment fails.
An operation in vSphere for Kubernetes failed, reason message: Unprocessable Entity - admission webhook "default.validating.tanzukubernetescluster.run.tanzu.vmware.com" denied the request: spec.settings.network.pods.cidrBlocks intersects with the network range of the external ip pools in network provider's configuration, spec.settings.network.pods.cidrBlocks intersects with the network range of the external ip pools LB in network provider's configuration
Supervisor Clusters IP address ranges for the Ingress CIDRs and Services CIDR must not overlap with IP addresses 10.96.0.0/12 and 192.168.0.0/16, which is the default for TKG Clusters. That means you can't use 192.168.x.x and 10.[96-111].x.x in the Supervisor Cluster.
Unfortunately, 10.96.0.0 is the default when enabling Workload Management, so I expect this to happen a lot. As you can't change the network configuration in the Supervisor Cluster after the deployment, the solution is not simple and requires to redeploy Workload Management.
To check your Network settings, navigate to vCenter > Cluster > Configure > Namespaces > Network and check the values for Service CIDR and Ingress CIDR.
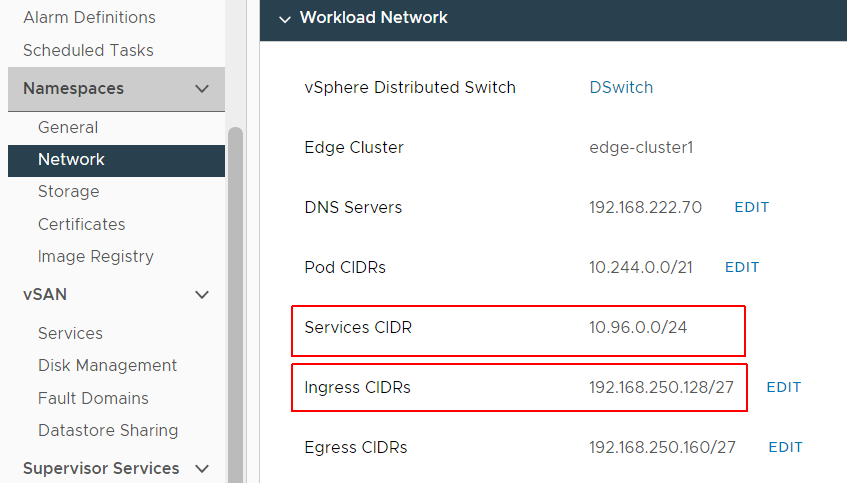
In this example, Service CIDR (10.96.0.0/24) overlaps with the default Service CIDR of TKG (10.96.0.0/12) and Ingress CIDR (192.168.250.128/27) overlaps with the default Pod CIDR of TKG (192.168.0.0/16).
The solution is to redesign your Supervisor Clusters network. You have to remove Workload Management and reenable it without using 192.168.x.x and 10.[96-111].x.x.
There is also a workaround available that involves changing the TKG defaults in VCD but I highly recommend not using this workaround in production as it's not clear that it will work with future updates.