Power over Ethernet is a nifty solution to run your Raspberry Pi without an additional power supply. You can fully run ESXi-Arm on a Raspberry Pi with a single RJ45 network cable.
If you want to build a cluster of Pies or just want to have a clean setup, get a PoE HAT. This article explains the options that you have to add PoE support for your Raspberry Pi for the following use cases:
- Standalone ESXi with 2.5" or M.2 SSD
- ESXi Cluster using iSCSI Storage
- vSAN Witness
What is a PoE HAT?
A Power over Ethernet HAT (Hardware Attached on Top) is a small accessory for the Raspberry Pi that allows you to power your Raspberry Pi using Power over Ethernet supported networks. Power over Ethernet (PoE) was initially designed to have a single cable to provide both data connection and electric power to devices such as Wireless Access Points, IP cameras, or IP phones.
No additional modification to the main Raspberry Pi board is needed for those products to work. The HAT is connected to the 4 pins PoE HAT header next to the RJ45 Gigabit Ethernet port, and the GPIO pins.
PoE HaT Options for Raspberry Pi 4B
The official Fling documentation lists three PoE HAT options. The official version, and HATs by GeeekPi and UCTRONICS.
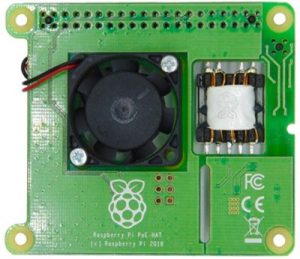
Official Raspberry Pi 4 PoE HAT
Price: $25,-
Fan: Yes (Does not work with ESXi-Arm)
I would not recommend the official PoE HAT to be used with the ESXi-Arm Fling at the moment. The PoE HAT is fitted with a small fan that is controlled via I2C bus. The idea behind this is that the fan will turn on and off automatically depending on the temperature of the main processor on the Raspberry Pi. Unfortunately, there is no support for that control mechanism at the moment, so the fan does not spin at all.
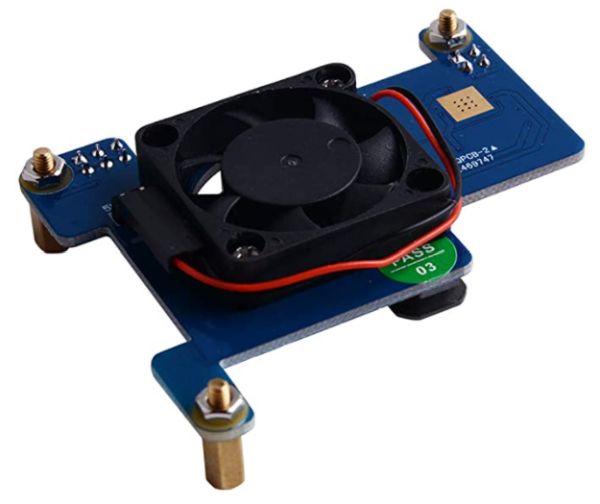
GeeekPi Raspberry Pi 4 PoE HAT
Price: $23,-
Fan: Yes
The GeeekPi PoE HAT is delivered with all necessary screws and spacers and is ready to be mounted to the Raspberry Pi without modifications or additional parts. There is enough clearance for small CPU/Memory/USB Controller heatsinks. The fan is connected to the 5V power source and not controlled by the Pi, so it will run at full speed all the time.
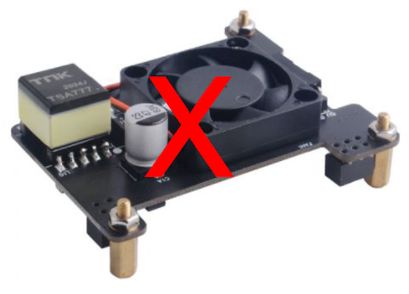
Be very careful when buying the GeeekPi HAT as there are two different options. The "normal" version (SKU: EP-0115) and an "isolated" version (SKU: EP-0127). I haven't managed to get the isolated version to work. I've tried 3 Pies, 2 HATs, and different power sources (Switch and PoE Injector). None of the combinations works and I don't know why. If you know, let me know.
You can easily identify the non-working HAT by the two large electronic components next to the fan.
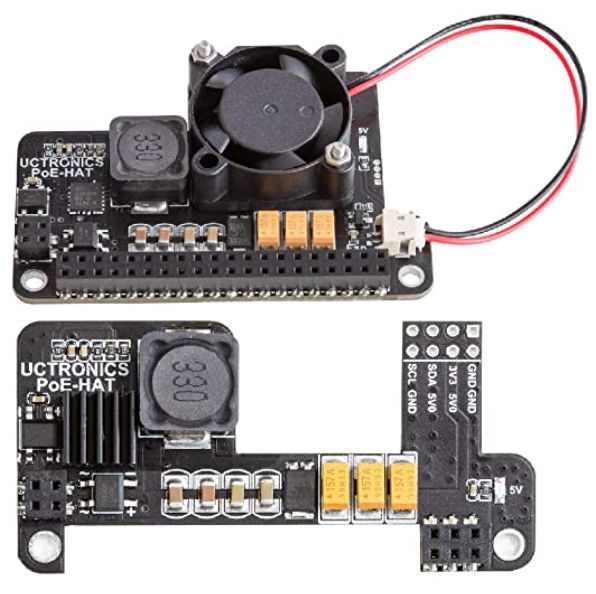
UCTRONICS Raspberry Pi 4 PoE HAT
Price: $20,- / $23,-
Fan: No / Yes
The UCTRONICS PoE HAT is available with and without a cooling fan. It is designed to sit directly onto PoE and GPIO pins without any space between the RPi and the HAT so there is no space for passive heatsinks. There is only space for a small CPU heatsink in the non-active cooling version. If you want to use heatsinks, which I highly recommend, you have to use spacers which I'll show later in this article.
Power over Ethernet Requirements
Normal switches are not capable of powering a device through the network cable. If you want to make use of the PoE HAT, you need an IEEE 802.3af compliant PoE Injector or Switch.
A PoE Injector is a small device with Input and Output RJ45 connectors that is plugged between the switch and the Raspberry Pi. The PoE Injector is also connected to a power supply and injects 48V to the network cable. When using PoE Injectors, make sure that they are compliant with the IEEE 802.3af standard. This is crucial as some vendors are using PoE similar injectors with only 24V. Those adapters that you see quite often with IP cameras are also referred to as "passive PoE".
The best option is to use a network switch that supports IEEE 802.3af PoE. There are plenty of options available. A good example to get started is the 5-Port Gigabit PoE Switch by Cudy. It is available for $45,- and can power up to 4 Raspberry Pis.
PoE Injector: 802.3af PoE PoE Injector: $15,-
Switch: Cudy 5-Port Gigabit PoE Switch: $45,-
Does PoE provide enough power for the Raspberry Pi?
The recommended power supply for the Raspberry Pi 4 should have a current capacity of 3A at 5V. That is the equivalent of 15W. The 3 PoE HATs mentioned above provide 2.5A at 5V, which is slightly lower but from my experience, it should be fine as long as you don't overdo with USB connected drives.
I've done some power consumption tests assuming that the maximum power usage is 12.5W (2.5A * 5V) with the following results (Measured at the USB power supply):
- Idle with fan at 3.3V: 5.5 W
- Idle with 2.5" SSD and fan at 3.3V: 5.9 W
- CPU Stress Test with 2.5" SSD and fan at 3.3V: 7.7 W
- Full Stress Test with 2.5" SSD and fan at 5V: 8.6 W
With those numbers, I'm quite confident that using ESXi-Arm on a PoE powered Raspberry Pi will work without problems.
My Setup
While planning my setup, I had the following use cases for the ESXi-Arm Fling in mind:
- Standalone ESXi with 2.5" or M.2 SSD
- ESXi Cluster using iSCSI Storage
- vSAN Witness with 2x "High" Endurance USB Flash Drive
I've decided to go with the UCTRONICS fanless PoE HAT. I like the small form factor and I was looking for a solution that allows me to implement different cooling options. Except for the spacing issues, the implementation was a no-brainer. In my setup, I'm using the following components:
- Raspberry Pi 4B with 8GB
- UCTRONICS Raspberry Pi 4 PoE HAT without fan
- Cudy GS1005P 5 Port Gigabit Ethernet PoE+ Switch
- GeeekPi Raspberry Pi 4 Case
- 3D printed Extended Lid for the GeeekPi Case (needed to fit the PoE HAT)
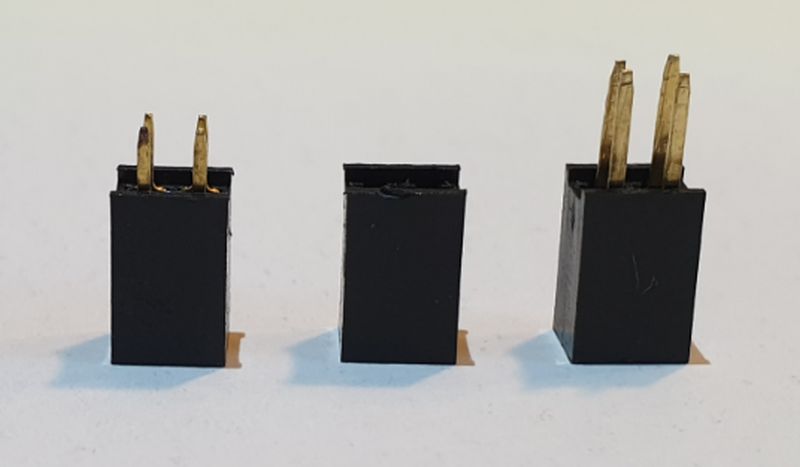
- 2x2 / 2x3 2.54mm Double Row Pin Header with long pins
Problem 1 - Space between PoE HAT and Raspberry Pi
The UCTRONICS PoE HAT is designed to sit very close to the RasPi making the use of passive heatsinks impossible. This is what the HAT looks like from the bottom. The 3x2 and 2x2 holes are intended to fit onto the PoE and GPIO headers:
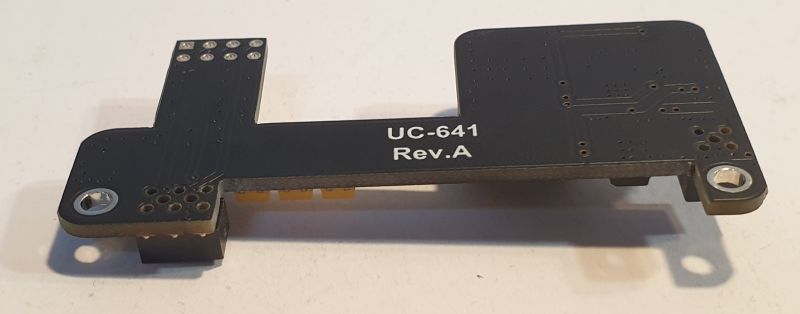
I've modified the HAT with 3x2 and 2x2 "female pin headers". This gives the Raspi enough space to use passive heatsinks on CPU/Memory/USB and Ethernet controllers.
The solution is very simple and does not require permanent modifications or soldering. Just search for "2.54mm Female Pin Header Double Row". Those sockets are usually intended to be soldered onto a circuit board and have short pins. Make sure to get long pins.
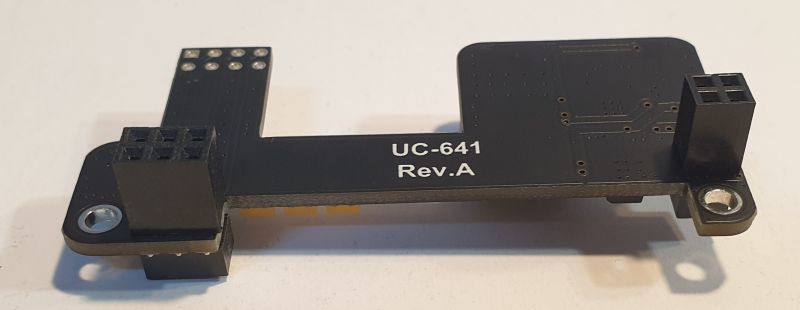
Actually, "double row long pin" is not a common thing. You do either find "single row - long pin" or "double row - short pin". If that's the case for you, just build them by yourself. You can easily remove the pins using pliers without damaging them.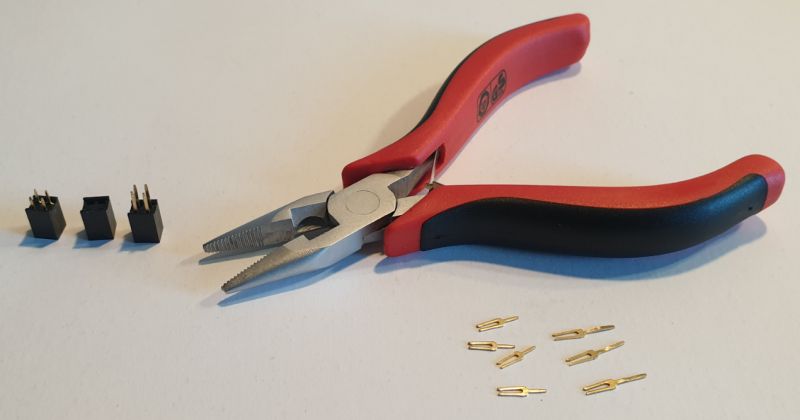
This is what the attached PoE HAT looks like with the modified extension. The RasPi is already attached to the bottom part of the GeeekPi case:
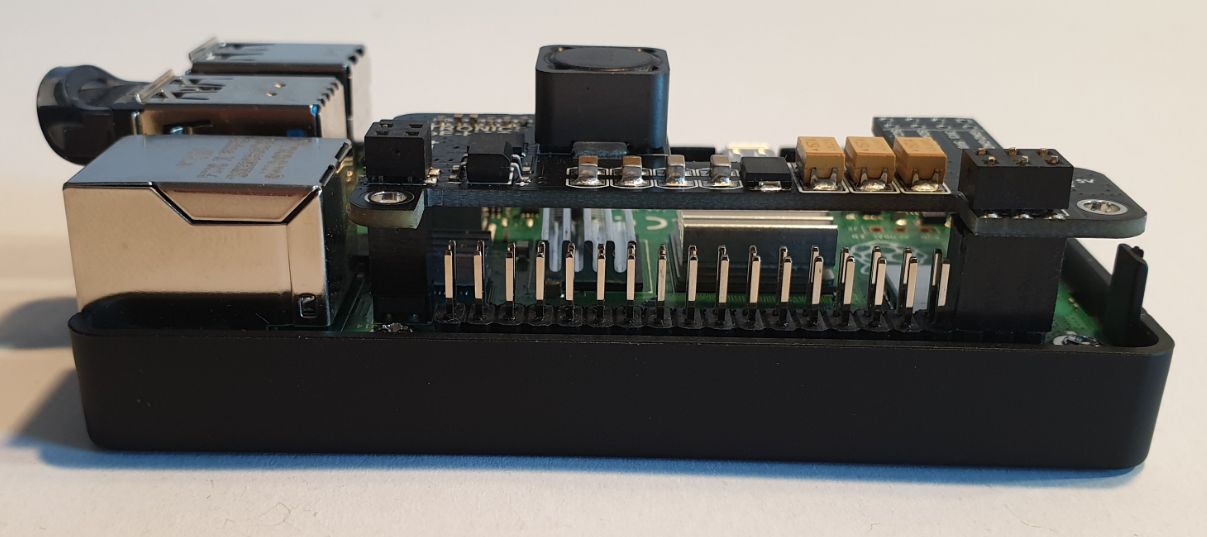
There is still enough space to add passive heatsinks.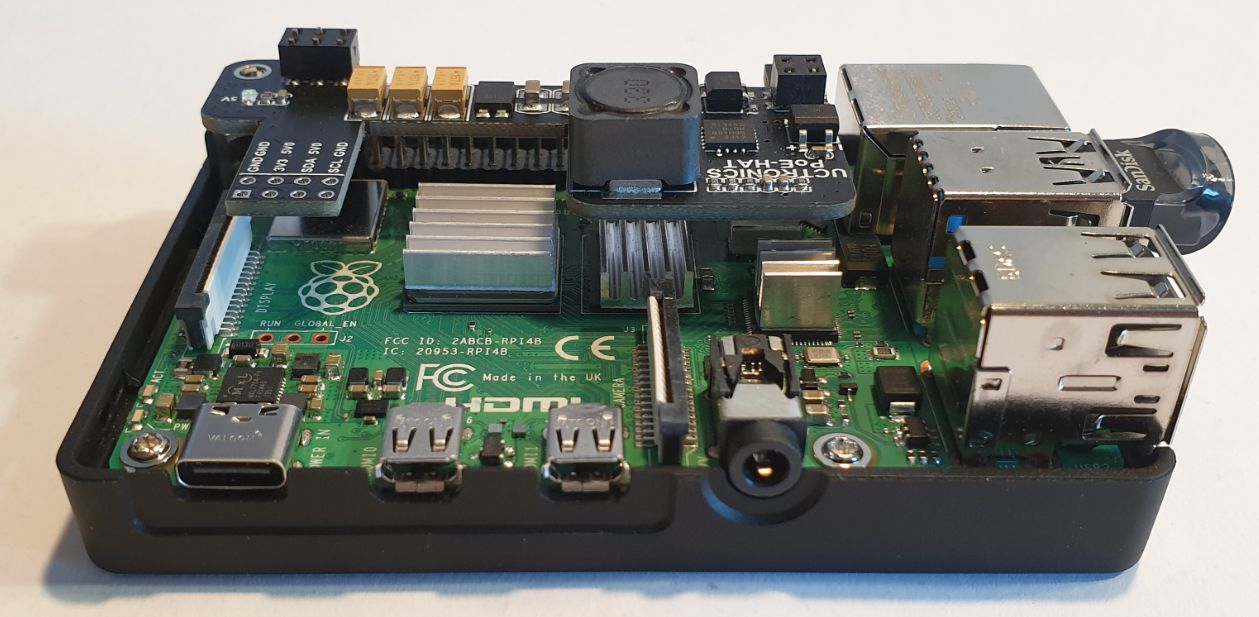
Problem 2 - Not enough space to close the case
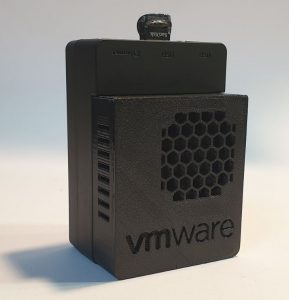
With the PoE HAT attached to the RasPi, there is not enough space to close the GeeekPi case with the original lid, so I created and 3d-printed my own extended version. This is the final result
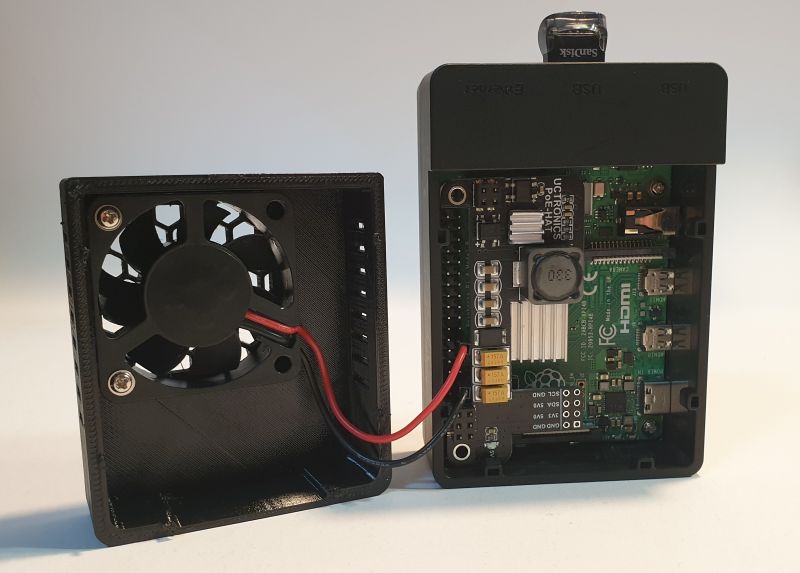
You can either solder the fan to the PoE HAT or if you are fine with it running at 3.3V use the free 3.3V header. The second 3.3V is PIN17. Connect ground to PIN9.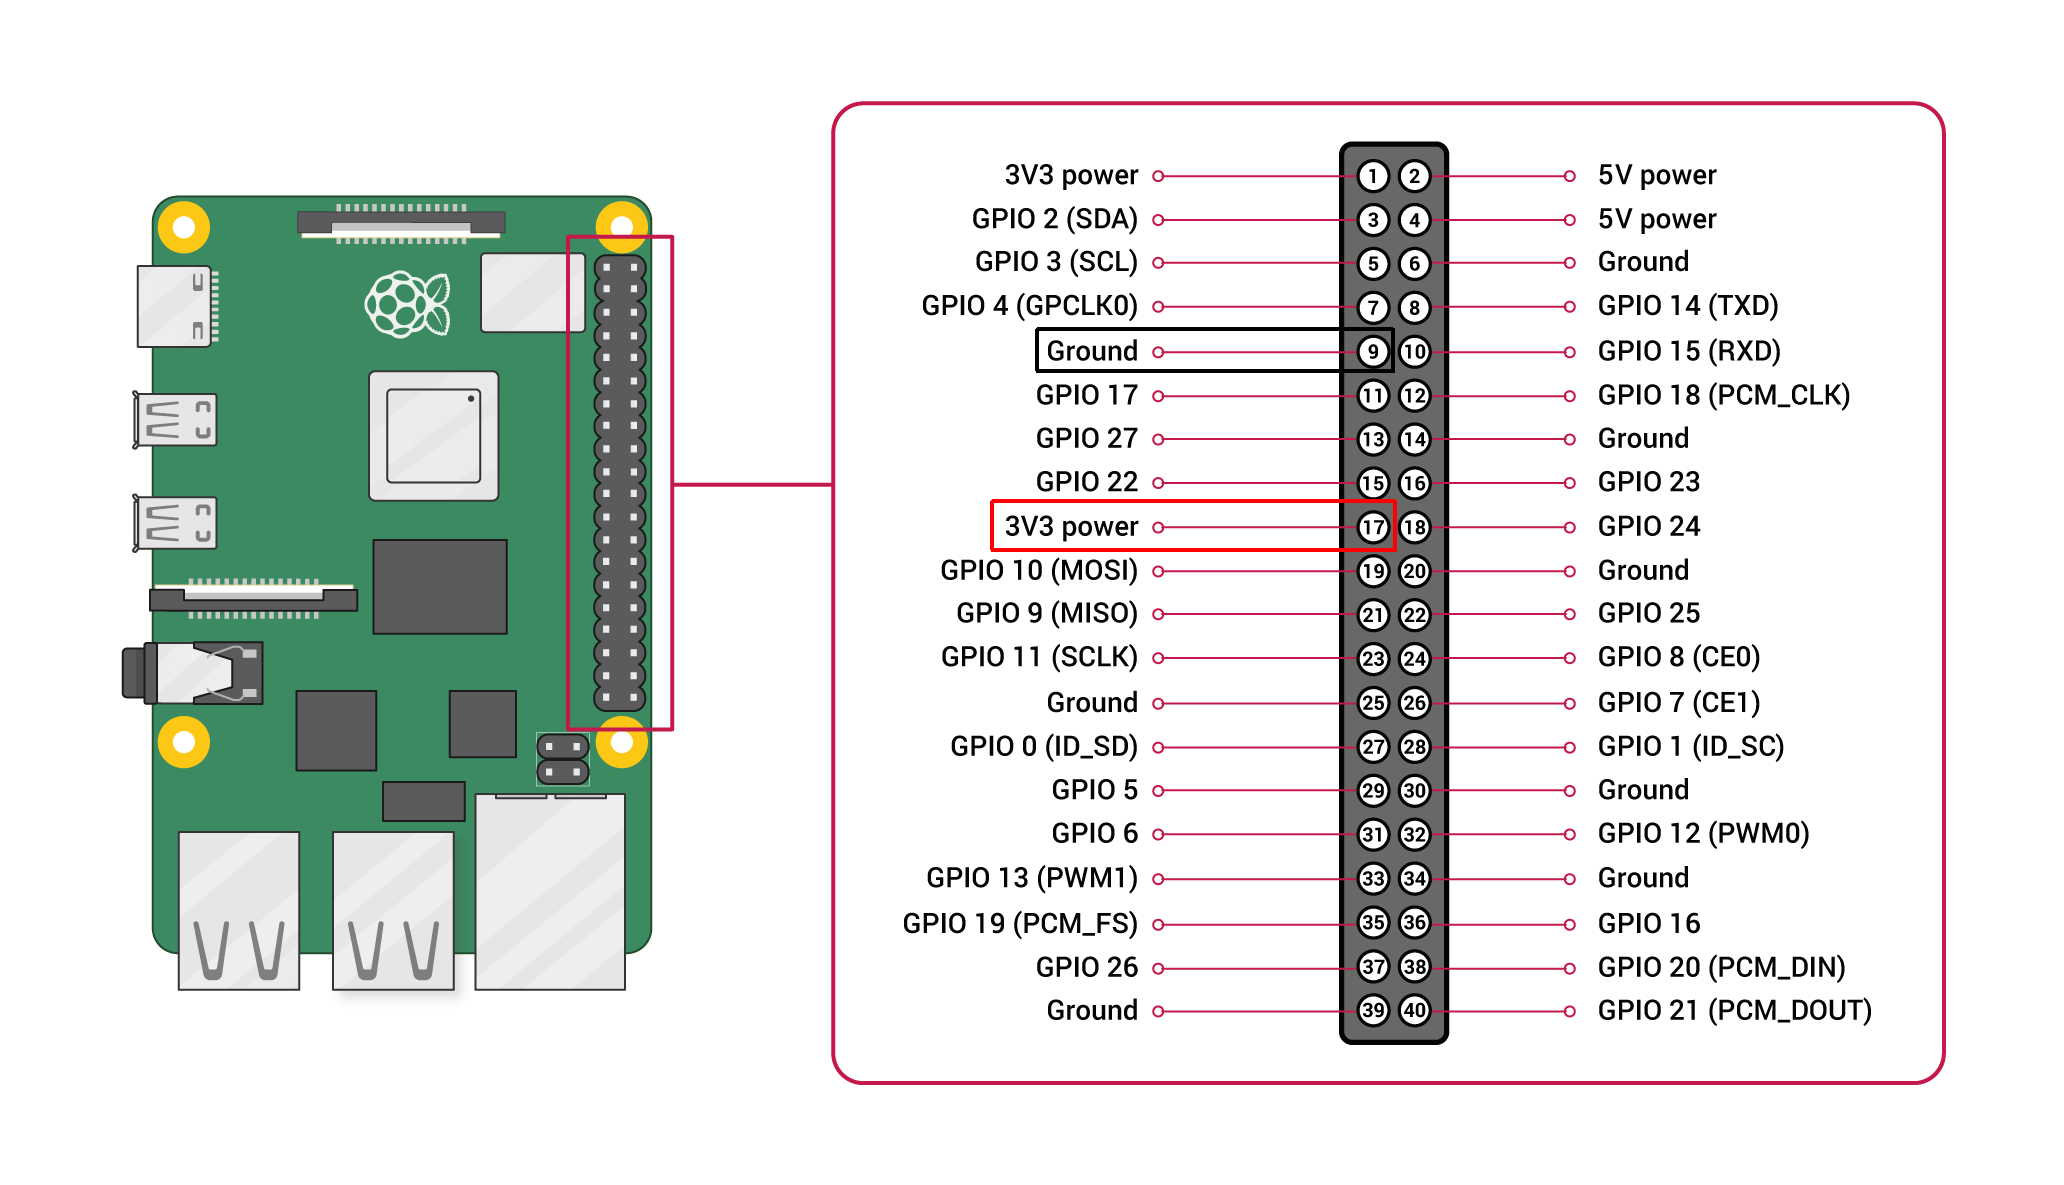
And here is the final result.