This article explains how you can create Virtual Machines in Kubernetes Namespaces in vSphere with Tanzu. The deployment of Virtual Machines in Kubernetes namespaces using kubectl was shown in demonstrations but is currently (as of vSphere 7.0 U2) not supported. Only with third-party integrations like TKG, it is possible to create Virtual Machines by leveraging the vmoperator.
With the kubernetes-admin, accessible from the SupervisorControlPlane VM, you can create Virtual Machines today.
Please keep in mind that this is not officially supported by VMware.
[Update 2021-05-02 - VM Service has been release in vSphere 7.0 U2a. Read this article for instructions.]
Step 1: Preparation - Create User and Namespace
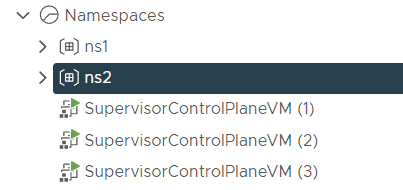
Create an SSO User named k8s-vmadmin and Kubernetes Namespace named ns2. The user is later used to create Virtual Machines in the ns2 namespace.
Step 2: Preparation - Content Library
Virtual Machines in vSphere with Tanzu Namespaces have to be deployed from a content library. Currently, you can only add a single Content Library to your Supervisor Cluster. This Content Library is a subscribed library used for Tanzu Kubernetes Grid images. To use your own images, you can either replace the TKG library or work with a local copy (usually used in air-gapped environments). Another option, that I am using in this article, is to add a second Content Library using kubectl. I'm using Photon OS Images, which are lightweight, easy to use, and customizable with Cloud-Init.
- Download Photon OS Images
- Open the vSphere Client
- Navigate to Menu > Content Libraries
- Press + Create
- Enter a Name
- Select Local content library
- Select a storage location for the content library
- Finish the wizard
- Import Virtual Machine images using Actions > Import Item
- Note the Content Libraries UUID. The unique identifier is required to import the library using kubectl. The easiest way to get the UUID is by opening the Content Library in the vSphere Client and looking at the URL.
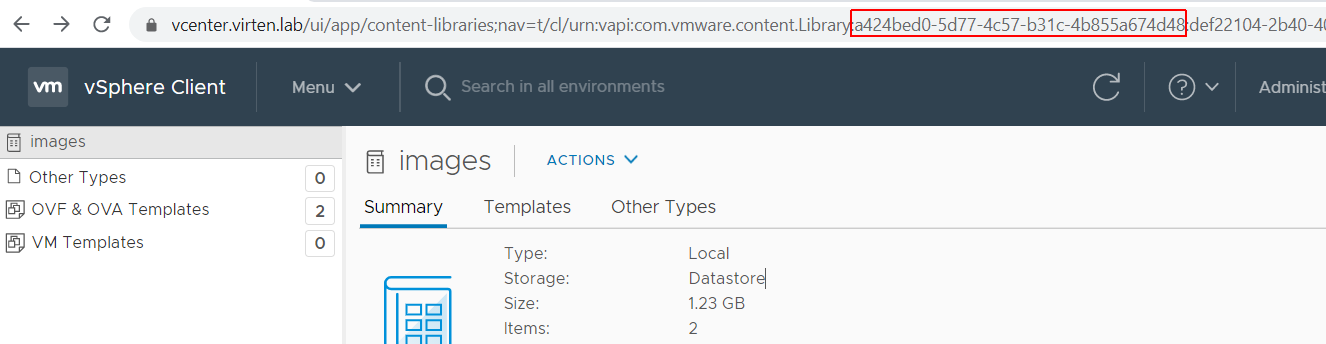
That's it from the vSphere Client. The following steps are done using kubectl.
Step 3: Kubernetes VM Operator Role and Content Source
Now the tricky part begins. Currently, adding a Content Source or directly create Virtual Machine objects in namespaces is neither possible using the embedded edit role, nor with the global SSO Administrator. I'm using the kubernetes-admin on the SupervisorControlPlaneVM to create the ContentSource, Role and RoleBinding to allow namespace users to deploy Virtual Machines using kubectl.
- SSH to the vCenter Server Appliance and login as root
- Start the bash shell
# shell
- Get SupervisorControlPlane IP and credentials
# /usr/lib/vmware-wcp/decryptK8Pwd.py

Cluster: domain-c46:def22104-2b40-4048-b049-271b1de46b94
IP: 10.99.2.10
PWD: 3lnCN5ccPhg0cl1WQTZTGNzL[...]
------------------------------------------------------------
- Use the IP and password from step 3. to login to the SupervisorControlPlane
# ssh root@10.99.2.10
- On the SupervisorControlPlane, you should be able to run kubectl with kubernetes-admin permissions. Verify that you can create the required resources ContentSource, ContentLibraryProvider, ClusterRole, and RoleBinding
# kubectl auth can-i create ContentSource -A
yes
# kubectl auth can-i create ContentLibraryProvider -A
yes
# kubectl auth can-i create RoleBinding
yes
# kubectl auth can-i create ClusterRole -A
yes
- Create a file named ContentSource.yaml with the following content. Replace the UUID with your Content libraries UUID:
apiVersion: vmoperator.vmware.com/v1alpha1 kind: ContentSource metadata: name: vmimages spec: providerRef: apiVersion: vmoperator.vmware.com/v1alpha1 kind: ContentLibraryProvider name: vmimages --- apiVersion: vmoperator.vmware.com/v1alpha1 kind: ContentLibraryProvider metadata: name: vmimages spec: uuid: a424bed0-5d77-4c57-b31c-4b855a674d48 - Apply the configuration
# kubectl apply -f ContentSource.yaml
contentsource.vmoperator.vmware.com/vmimages created
contentlibraryprovider.vmoperator.vmware.com/vmimages created
- After a couple of minutes, Virtual Machine images from both content libraries should be visible
# kubectl get virtualmachineimages
NAME                                                         VERSION                           OSTYPE                FORMAT
ob-17419070-photon-3-k8s-v1.18.10---vmware.1-tkg.1.3a6cd48   v1.18.10+vmware.1-tkg.1.3a6cd48   vmwarePhoton64Guest   ovf
ob-17654937-photon-3-k8s-v1.18.15---vmware.1-tkg.1.600e412   v1.18.15+vmware.1-tkg.1.600e412   vmwarePhoton64Guest   ovf
ob-17658793-photon-3-k8s-v1.17.17---vmware.1-tkg.1.d44d45a   v1.17.17+vmware.1-tkg.1.d44d45a   vmwarePhoton64Guest   ovf
ob-17660956-photon-3-k8s-v1.19.7---vmware.1-tkg.1.fc82c41    v1.19.7+vmware.1-tkg.1.fc82c41    vmwarePhoton64Guest   ovf
photon-hw11-3.0-0a85037c                                     3.0                               other3xLinux64Guest   ovf
photon-hw11-4.0-1526e30ba0                                   4.0                               other3xLinux64Guest   ovf
- The default vSphere with Kubernetes "edit" role does not allow the creation of Virtual Machines. To enable developers to create VMs, I've cloned the edit role and added create, patch, update, and delete verbs for the vmoperator.vmware.com.virtualmachines resource. Additionally, I've added virtualnetworks.vmware.com permissions to allow all verbs. You can clone the role by yourself, or download a prepared ClusterRole yaml file: role_edit-with-vm.yaml
- Create the edit-with-vm ClusterRole
# kubectl apply -f https://www.virten.net/files/k8s/role_edit-with-vm.yaml
clusterrole.rbac.authorization.k8s.io/edit-with-vm created
- Bind the edit-with-vm role to the k8s-vmadmin user in namespace ns2. Create a file named RoleBinding.yaml with the following content:
apiVersion: rbac.authorization.k8s.io/v1
kind: RoleBinding
metadata:
  name: wcp:ns2:user:vsphere.local:k8s-vmadmin
  namespace: ns2
roleRef:
  apiGroup: rbac.authorization.k8s.io
  kind: ClusterRole
  name: edit-with-vm
subjects:
- apiGroup: rbac.authorization.k8s.io
  kind: User
  name: sso:k8s-vmadmin@vsphere.local
- Apply the configuration
# kubectl apply -f RoleBinding.yaml
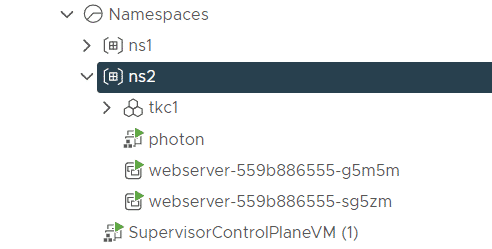
- That's it from the SupervisorControlPlane VM. You can now create Virtual Machines using kubectl.
Step 3: Create Virtual Machines using kubectl
With the Content Library and ClusterRole prepared, you can log in as a developer and create Virtual Machines.
- Login to the Supervisor Cluster with kubectl
# kubectl vsphere login --server=10.99.100.1 -u k8s-vmadmin@vsphere.local
- Create a network for the Virtual Machine. This network is connected to the Namespace Tier-0. You can't deploy Virtual Machines directly to Pod networks.
vmnet.yaml:apiVersion: vmware.com/v1alpha1 kind: VirtualNetwork metadata: name: vmnet namespace: ns2
- Create a Virtual Machine.
vm.yaml:apiVersion: vmoperator.vmware.com/v1alpha1 kind: VirtualMachine metadata: name: photon labels: vm: photon spec: className: best-effort-small imageName: photon-hw11-3.0-0a85037c networkInterfaces: - networkName: vmnet networkType: nsx-t powerState: poweredOn storageClass: gold - Create a Virtual Machine Service. This allows you to access the Virtual Machine using an external IP Address from the ingress pool.
vmsvc.yaml:apiVersion: vmoperator.vmware.com/v1alpha1 kind: VirtualMachineService metadata: name: photon namespace: ns2 spec: ports: - name: ssh port: 22 protocol: TCP targetPort: 22 selector: vm: photon type: LoadBalancer - Use kubectl get service to display the external IP:
# kubectl get service
NAME               TYPE           CLUSTER-IP    EXTERNAL-IP   PORT(S)                      AGE
photon             LoadBalancer   10.96.0.91    10.99.100.6   22:30223/TCP                 10d
- Test the connection. You should be able to login with the default password "changeme".
# ssh root@10.99.100.6