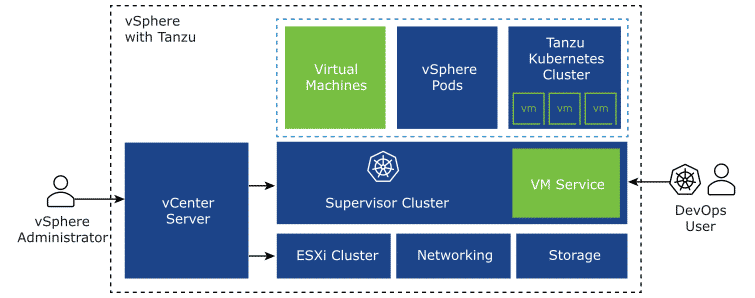
With the release of vCenter 7.0 U2a, VMware has introduced VM Service. VM Service runs on top of vSphere with Tanzu and allows developers to deploy Virtual Machines using kubectl declarative object configuration. The underlying Kubernetes VM Operator was already available in previous versions, but the direct deployments of Virtual Machines was not supported. If you've deployed a TKC using the Tanzu Kubernetes Grid Service, it was already using the VM Operator.
In a previous article, I've explained how to deploy Virtual Machines using kubectl prior to the availability of VM Service. If you are aware of the method explained there, you are going to find a lot of similarities.
Please be aware that this is VMware's first release (v1alpha1) of VM Service with VM Operator and the feature set is quite limited. It's not yet fully ready to be deployed in production, but you can start to evaluate features and provide feedback to VMware to help them shaping its future.
What is VM Service in vSphere with Tanzu
VM Service allows DevOps engineers to deploy and run Virtual Machines in a shared Kubernetes environment. Virtual Machines are deployed using kubectl, like containers, directly to Supervisor Namespaces. When you've deployed a Virtual Machine using the VM Service, it can not be managed from the vSphere Client.
Enable and Configure VM Service Preparation
To get started with VM Service, all you need is a vSphere cluster with Workloadmanagement enabled and a Content Library with supported Virtual Machine Images. At the moment, VM Service only supports special VM Images provided by VMware, which are available at VMware Marketplace as OVF. As of today, the only available Image is CentOS 8.
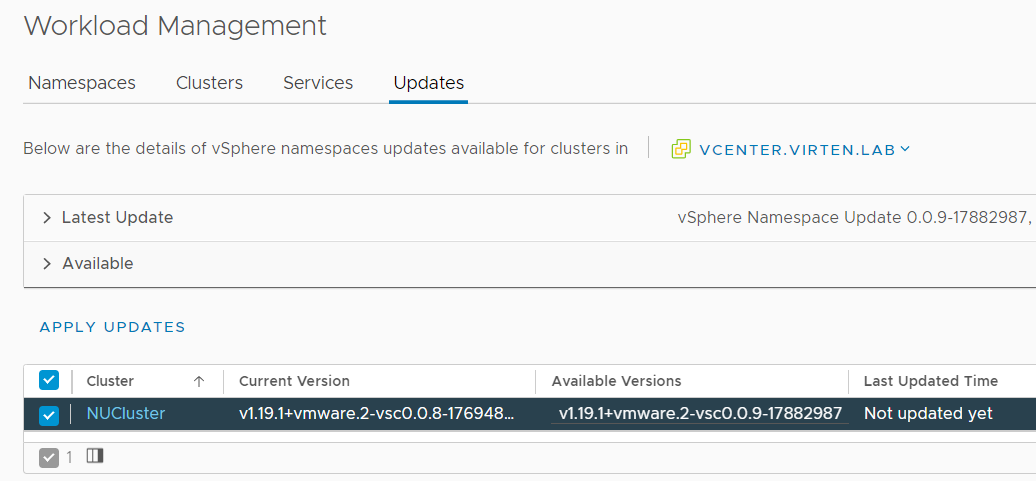
- Make sure that Workloadmanagement is enabled and updated to Version v1.19.1+vmware.2-vsc.0.0.9-17882987. Navigate to Workload Management > Updates to check the version and apply the update if needed.
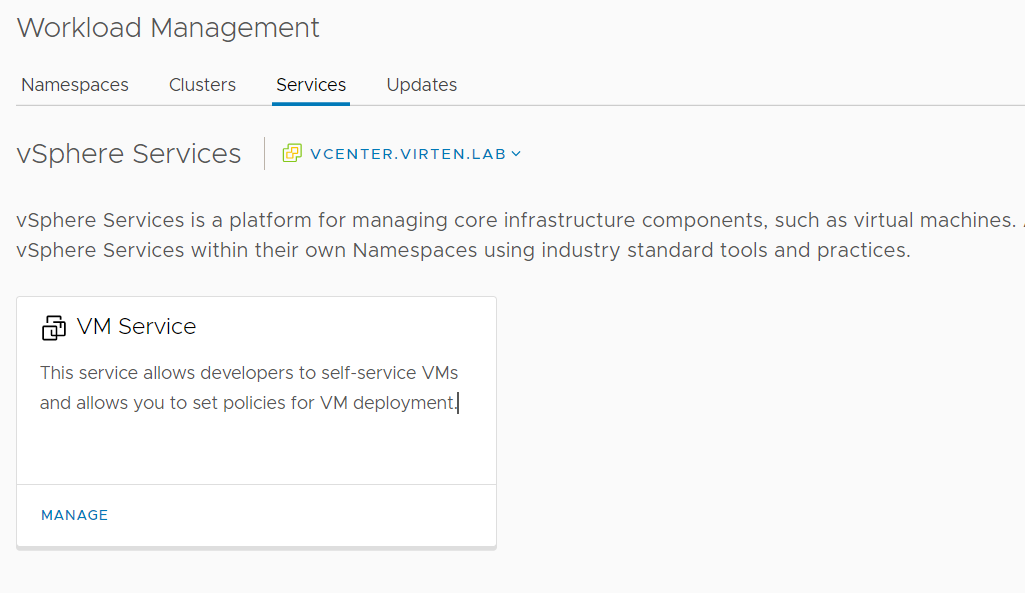
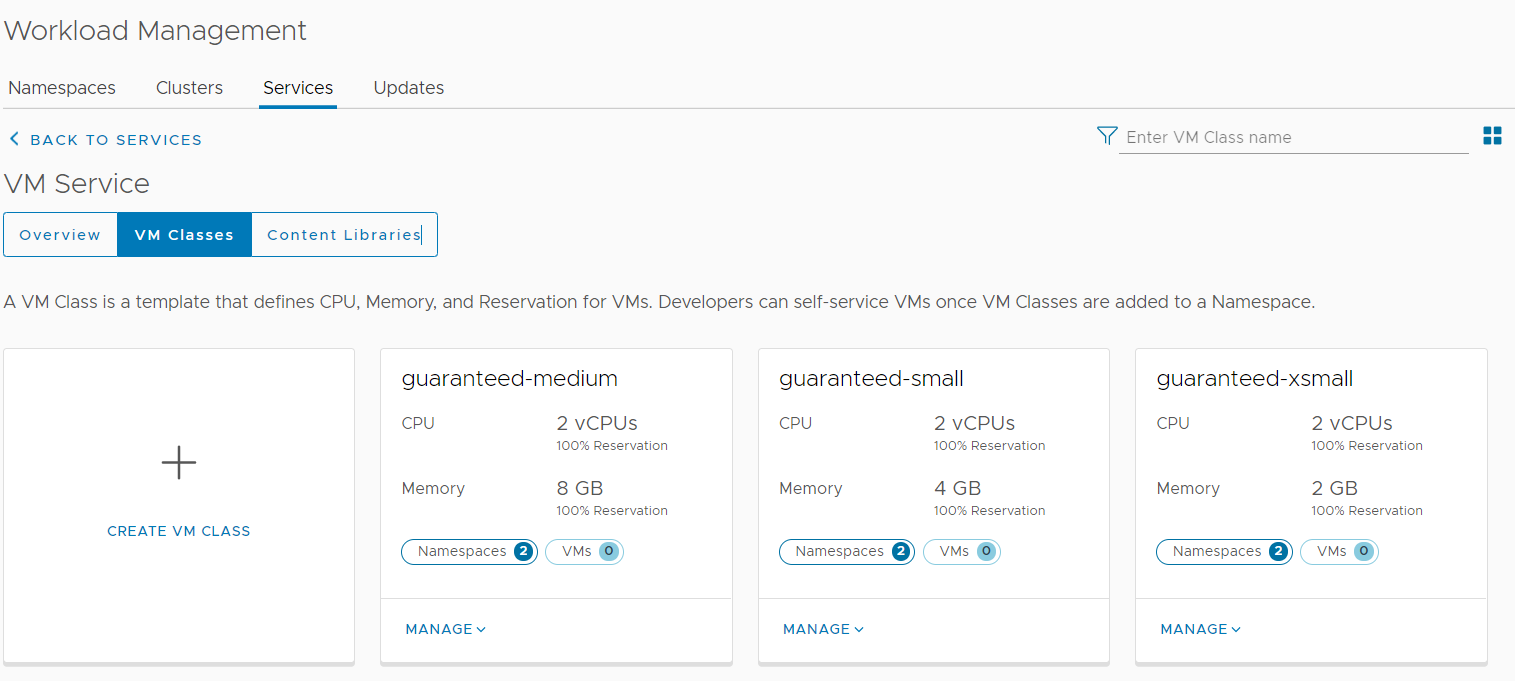
- When the Update is finished, you should see the VM Service within Workload Management > Service.
- Virtual Machines are deployed in predefined sizes. All sizes that are available for TKC Virtual Machines are also available in VM Service. If you want to define custom sizes, navigate to Workload Management > Service > VM Service > VM Classes and add additional VM classes.
Create a Content Library
Virtual Machines in vSphere with Tanzu Namespaces have to be deployed from a content library. VMware provides supported Images in their Marketplace. Just go to VMware Cloud Marketplace and search for VM Service image.
- Download VM Service Image for CentOS
- Open the vSphere Client
- Navigate to Menu > Content Libraries
- Press + Create
- Enter a Name
- Select Local content library
- Select a storage location for the content library
- Finish the wizard
- Import Virtual Machine images using Actions > Import Item
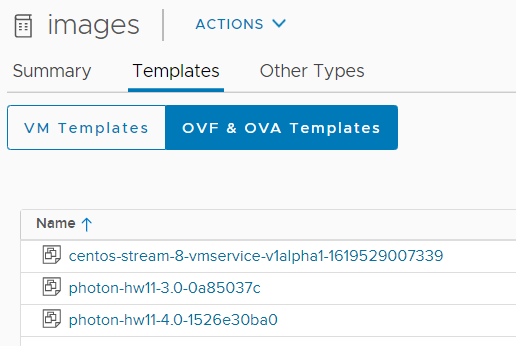
As you can see, I've also added two versions of PhotonOS, but they are not deployable using VM Service. More on that later.
Configure The Supervisor Cluster Namespace
To allow developers to deploy Virtual Machines, you have to assign a Content Libary and Virtual Machine Classes to the Namespace. Navigate to the Namespaces Summary page and associate VM Classes and The Content Library. Also, make sure that the Namespace has a Storage Policy assigned.
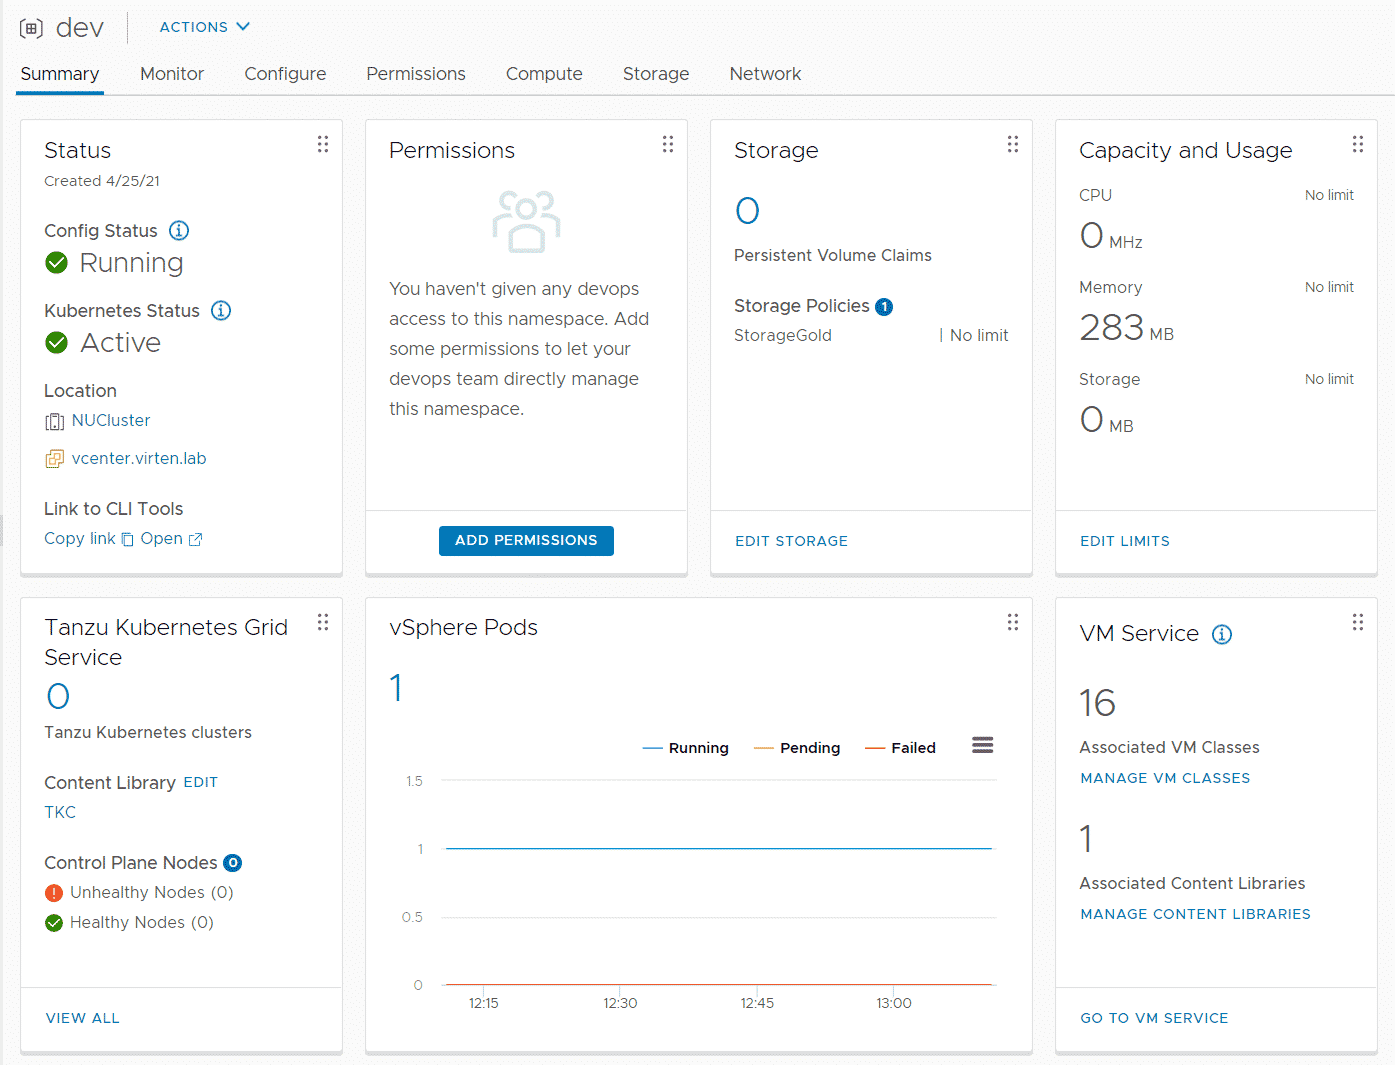
That's it from the vSphere Client.
Explore VM Service Objects using kubectl
VirtualMachineImages (short: vmimage) are OVF templates added to the Content Library. The IMAGESUPPORTED attribute displays which Images are supported by VM Service.
# kubectl get virtualmachineimages -o wide
NAME                                              VERSION  OSTYPE                FORMAT  IMAGESUPPORTED  AGE
centos-stream-8-vmservice-v1alpha1-1619529007339           centos8_64Guest       ovf     true            4d3h
photon-hw11-3.0-0a85037c                          3.0      other3xLinux64Guest   ovf     false           4d4h
photon-hw11-4.0-1526e30ba0                        4.0      other3xLinux64Guest   ovf     false           4d4h
To configure the Virtual Machine using a declarative configuration, you have to know which OVF options are available in the image. This is what you usually fill out in a form when deploying VMs using the vSphere Client.
# kubectl get virtualmachineimage centos-stream-8-vmservice-v1alpha1-1619529007339 -o jsonpath='{.spec.ovfEnv}' | jq
{
  "hostname": {
    "default": "centosguest",
    "key": "hostname",
    "type": "string"
  },
  "instance-id": {
    "default": "id-ovf",
    "key": "instance-id",
    "type": "string"
  },
  "password": {
    "key": "password",
    "type": "string"
  },
  "public-keys": {
    "key": "public-keys",
    "type": "string"
  },
  "seedfrom": {
    "key": "seedfrom",
    "type": "string"
  },
  "user-data": {
    "key": "user-data",
    "type": "string"
  }
Those are the options that can be set using a ConfigMap when creating a VM object.
VirtualMachineClasses (short: vmclass) are the predefined sizes in which Virtual Machines can be deployed. You can't individually configure vCPU and Memory as you know it from the vCenter Server.
# kubectl get virtualmachineclasses
NAME                  CPU   MEMORY   AGE
best-effort-large     4     16Gi     7d15h
best-effort-medium    2     8Gi      7d15h
best-effort-small     2     4Gi      7d15h
best-effort-xsmall    2     2Gi      7d15h
guaranteed-large      4     16Gi     7d15h
guaranteed-medium     2     8Gi      7d15h
guaranteed-small      2     4Gi      7d15h
guaranteed-xsmall     2     2Gi      7d15h
Networking
To deploy Virtual Machines, it required to know in which networking mode the Supervisor Cluster is running. VM Service supports both modes, NSX-T and Bring-Your-Own using Distributed Portgroups. The spec.networkInterfaces configuration is slightly different:
Network with NSX-T
When using NSX-T, VM Operator will automatically create the required network segments and attach virtual machine interfaces. In that case, you just set the networkType to nsx-t.
spec:
  networkInterfaces:
  - networkType: nsx-t
Note: VMware has a typo in some of its documentation where the dash ("-") is missing, falsely setting networkInterfaces not to be an array. If you get the following error message, make sure that there is a dash before networkType:
error: error validating "centos-basic.yaml": error validating data: ValidationError(VirtualMachine.spec.networkInterfaces): invalid type for com.vmware.vmoperator.v1alpha1.VirtualMachine.spec.networkInterfaces: got "map", expected "array"; if you choose to ignore these errors, turn validation off with --validate=false
Bring-Your-Own networking using Portgroups
Set the networkType to vsphere-distributed and configure networkName.
spec:
  networkInterfaces:
  - networkType: vsphere-distributed
    networkName: "pod"
You can retrieve the network name by querying available networks (# kubectl get network)
Create a Basic Virtual Machine (Simple Configuration)
Now the actual creation begins. Using the information gathered above, create the following file:
centos-basic.yaml
apiVersion: vmoperator.vmware.com/v1alpha1
kind: VirtualMachine
metadata:
  name: centos-basic
  namespace: dev
  labels:
    app: centos-basic
spec:
  imageName: centos-stream-8-vmservice-v1alpha1-1619529007339
  className: best-effort-xsmall
  powerState: poweredOn
  storageClass: storagegold
  networkInterfaces:
  - networkType: nsx-t
  vmMetadata:
    configMapName: centos-basic
    transport: OvfEnv
---
apiVersion: v1
kind: ConfigMap
metadata:
    name: centos-basic
    namespace: dev
data:
  hostname: centos-basic
  password: VMware1!
  public-keys: ssh-rsa AAACAB3NzDaC1yc2EADAAAAADAQABAAAB[...] fgrehl
Make sure to set an SSH Public key, as password authentication is disabled in the CentOS 8 image. Apply the config file:
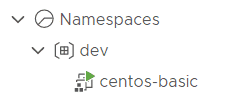
# kubectl apply -f centos-basic.yaml
virtualmachine.vmoperator.vmware.com/centos-basic created
configmap/centos-basic created
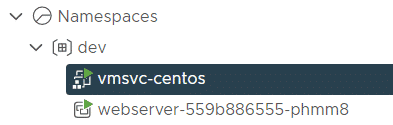
You should see the Virtual Machine in the vSphere Client.
When the deployment is finished, retrieve the virtual machine's IP address from the VM object status.
# kubectl get vm centos-basic -o jsonpath='{.status.vmIp}'
10.244.0.82'
You should be able to access the Virtual Machine using SSH. You have to login with cloud-user and the SSH key set in your centos-basic.yaml. The system asks you to change the password and closes the connection. From then, you can log in without using a password, just by using your SSH key.
# ssh cloud-user@10.244.0.82
The authenticity of host '10.244.0.82 (10.244.0.82)' can't be established.
ECDSA key fingerprint is SHA256:NHjlVh8GnjbAlll2hqnXUNLVORYY3zjLUefSSXqHwIg.
Are you sure you want to continue connecting (yes/no)? yes
Warning: Permanently added '10.244.0.82' (ECDSA) to the list of known hosts.
You are required to change your password immediately (administrator enforced)
WARNING: Your password has expired.
You must change your password now and login again!
Changing password for user cloud-user.
Current password:
New password:
Retype new password:
passwd: all authentication tokens updated successfully.
Connection to 10.244.0.82 closed.
# ssh cloud-user@10.244.0.82
Last login: Sun May  2 09:02:28 2021 from jumper
[cloud-user@centos-basic ~]$
Now you are connected to the Virtual Machine running in your vSphere with Tanzu Kubernetes Namespace.
Create a Virtual Machine Service
If your pod network is not routed externally, which I assume should be common in a production environment, you have to create a VirtualMachineService object. This will create a Loadbalancer that is externally available using an IP address from the Supervisor Clusters ingress pool.
centos-basic-service.yaml
apiVersion: vmoperator.vmware.com/v1alpha1
kind: VirtualMachineService
metadata:
  name: centos-basic-ssh
  namespace: dev
spec:
  selector:
    app: centos-basic
  type: LoadBalancer
  ports:
  - name: ssh
    port: 22
    protocol: TCP
    targetPort: 22
Create the service object and query the external IP address.
# kubectl apply -f centos-basic-service.yaml
virtualmachineservice.vmoperator.vmware.com/centos-basic-ssh created

# kubectl get service centos-basic-ssh
NAME               TYPE           CLUSTER-IP    EXTERNAL-IP   PORT(S)        AGE
centos-basic-ssh   LoadBalancer   10.96.0.183   10.99.100.5   22:32350/TCP   92s
Create a Virtual Machine with cloud-init
VM Service also supports the customization of Gust OS using cloud-init. The cloud-config needs to be passed base64 encoded to the ConfigMap in the data.user-data field. Here is an example that configures a user with an SSH key and installs additional packages:
Create the cloud-config:
#cloud-config
users:
  - default
  - name: fgrehl
    ssh-authorized-keys:
      - ssh-rsa AAAAB3NzaC1yc2EAAAAD[...] fgrehl
    sudo: ALL=(ALL) NOPASSWD:ALL
    groups: sudo, docker
    shell: /bin/bash
package_upgrade: true
packages:
 - wget
 - tcpdump
final_message: "The system is finally up, after $UPTIME seconds"
Encode the cloud-config using base64 -w0. The output should be a very long string:
# cat cloud-init |base64 -w0
I2Nsb3VkLWNvbmZpZw0KdXNlcnM6DQogIC0gZGVmYX[....]
Use the following
apiVersion: vmoperator.vmware.com/v1alpha1
kind: VirtualMachine
metadata:
  name: centos-cloudinit
  namespace: dev
  labels:
    app: centos-cloudinit
spec:
  imageName: centos-stream-8-vmservice-v1alpha1-1619529007339
  className: best-effort-xsmall
  powerState: poweredOn
  storageClass: storagegold
  networkInterfaces:
  - networkType: nsx-t
  vmMetadata:
    configMapName: centos-cloudinit
    transport: OvfEnv
---
apiVersion: v1
kind: ConfigMap
metadata:
    name: centos-cloudinit
    namespace: dev
data:
  user-data: |
    I2Nsb3VkLWNvbmZpZw0Kd[...]
  hostname: centos-cloudinit
---
apiVersion: vmoperator.vmware.com/v1alpha1
kind: VirtualMachineService
metadata:
  name: centos-cloudinit
  namespace: dev
spec:
  selector:
    app: centos-cloudinit
  type: LoadBalancer
  ports:
  - name: ssh
    port: 22
    protocol: TCP
    targetPort: 22
See the official cloud-init documentation to learn more about the cloud-init options.
Great post! Very helpful and worked perfect!