![]() With the NSX Advanced Load Balancer integration in Cloud Director 10.2 or later, you can enable SSL offloading to secure your customer's websites. This article explains how to request a Let's Encrypt certificate, import it to VMware Cloud Director and enable SSL offloading in NSX-ALB. This allows tenants to publish websites in a secure manner.
With the NSX Advanced Load Balancer integration in Cloud Director 10.2 or later, you can enable SSL offloading to secure your customer's websites. This article explains how to request a Let's Encrypt certificate, import it to VMware Cloud Director and enable SSL offloading in NSX-ALB. This allows tenants to publish websites in a secure manner.
Prerequisites
NSX-ALB should be integrated and fully configured in VMware Cloud Director, as explained in this article. The versions used in this article are: Cloud Director 10.3, NSX-T 3.1.3.1 and NSX-ALB 21.1.1
Step 1 - Allow Tenants to Upload Certificates (System Administrator)
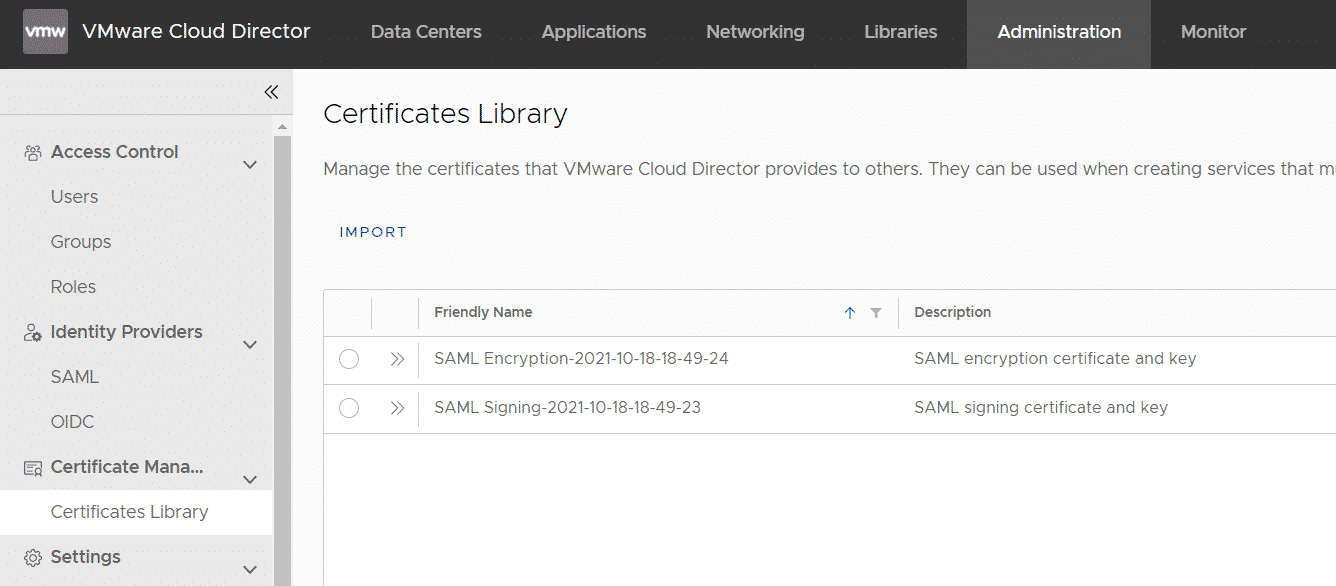
To secure websites with SSL, the tenant has to import a server certificate to the integrated Certification Library. The Manage Certificate Library right is required to upload certificates. This right is not included in the "Default Rights Bundle", which is shipped with Cloud Director. When the tenant tries to import a certificate (Administration > Certificate Management > Certificate Library), the IMPORT button is missing.
As a VCD System Administrator, you can regulate which rights are included in roles, and which rights are available to a customer. The customer needs both, a role that includes the "Manage Certificate Library" right, and the right must be published to a customer with a role bundle.
- Open VCD as System Administrator and navigate to Administration > Tenant Access Control > Global Roles and edit the "Organization Administrator" role.
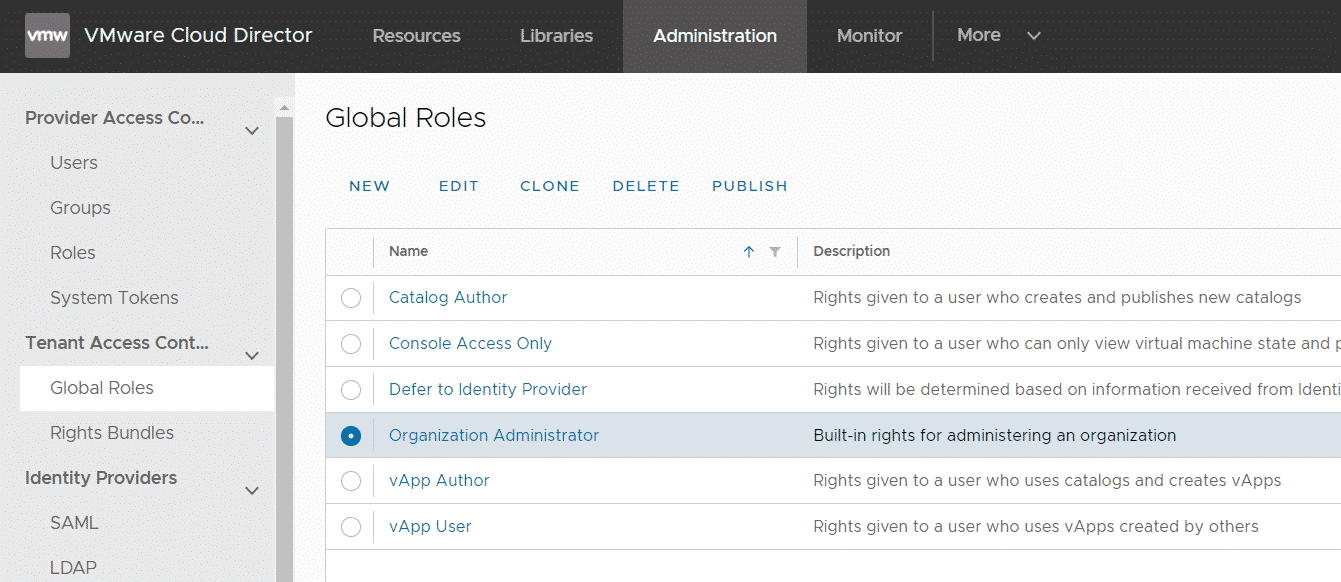
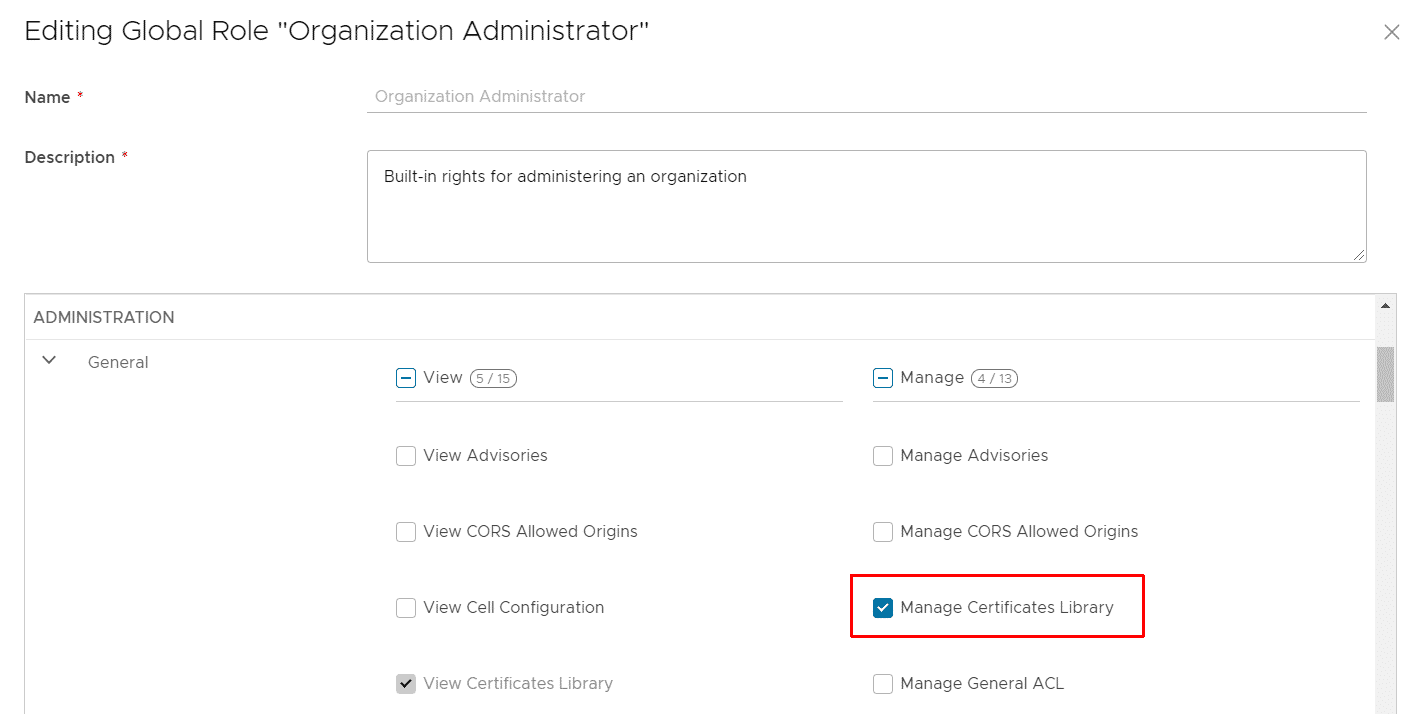
- Make sure that the Manage Certificates Library role (ADMINISTRATION > General) is included.
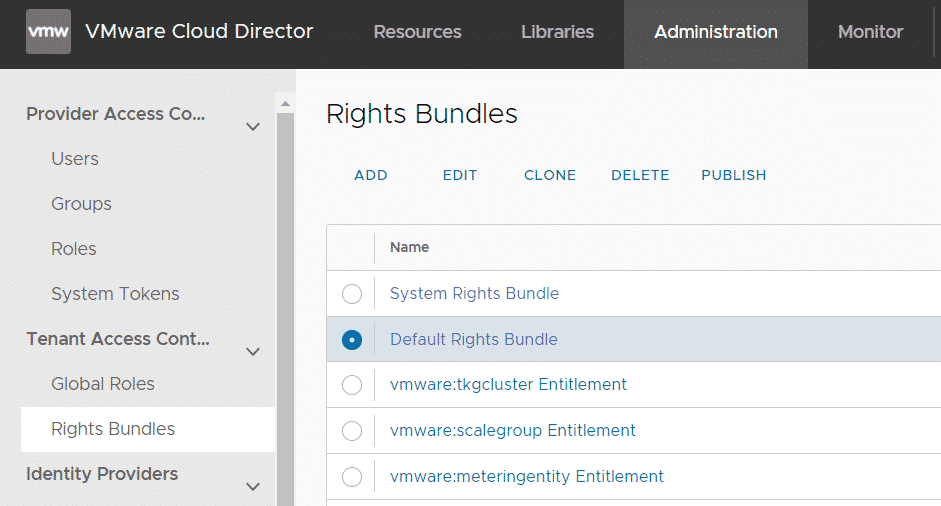
- Navigate to Administration > Tenant Access Control > Right Bundles and edit the "Default Rights Bundle".
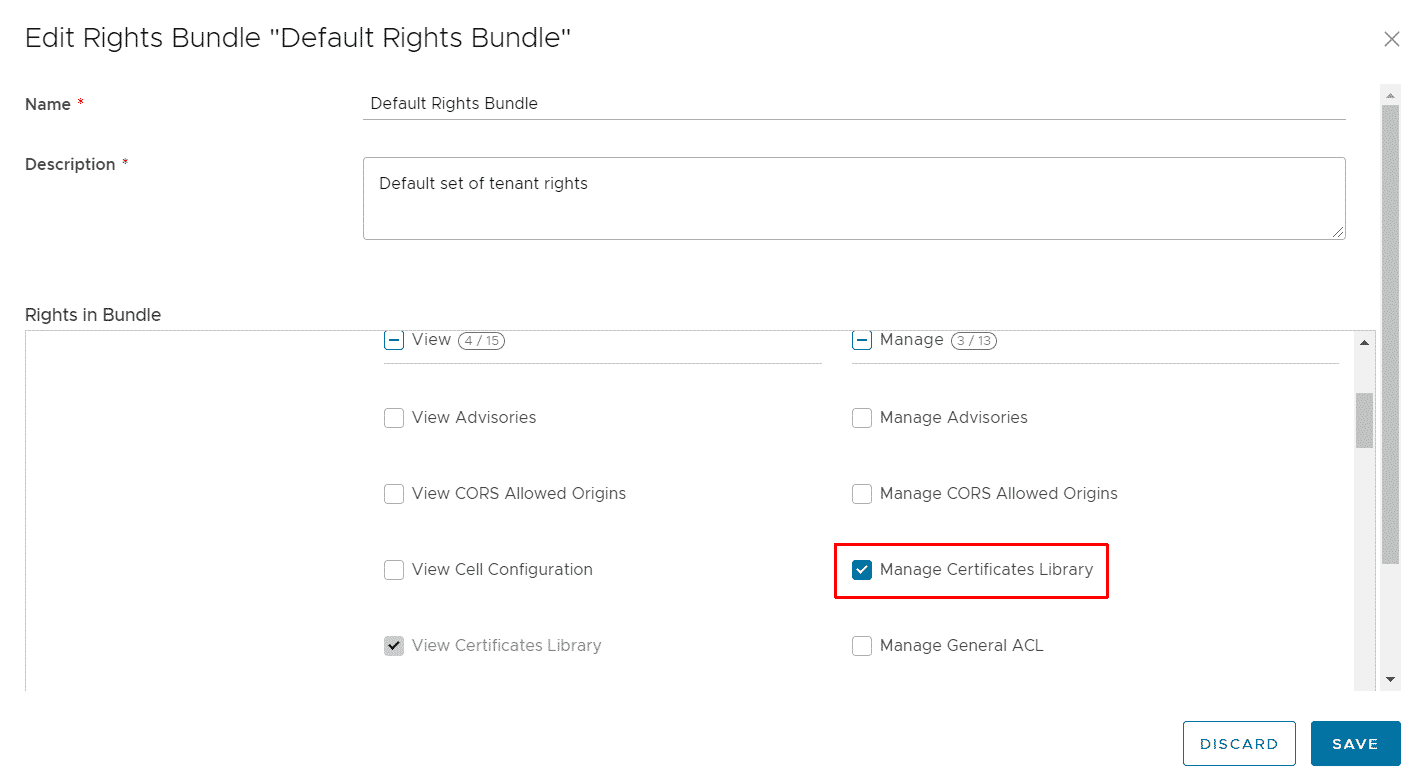
- Add the Manage Certificates Library right to the bundle.
- That's it. Tenants should now be able to import certificates with the Org Admin. The tenant can also create custom roles and include the right himself.
Step 2 - Create a Certificate
There are various options available to get a certificate. For this article, I'm using a Let's Encrypt certificate. Let's Encrypt is a non-profit certificate authority that provides X.509 certificates at no charge. I've created a certificate with certbot in standalone mode. See the official website for different supported deployment options.
To request Let's Encrypt certificates you need a domain and you must be able to create A records. I've created a domain that is pointed to the public IP address of a Linux box.
Verify that no webserver is running at port 80 (HTTP). This allows me to run certbot in standalone mode.
# ss -tl
State     Recv-Q    Send-Q       Local Address:Port        Peer Address:Port
LISTEN    0         80               127.0.0.1:mysql            0.0.0.0:*
LISTEN    0         128              127.0.0.1:11211            0.0.0.0:*
LISTEN    0         128                0.0.0.0:ssh              0.0.0.0:*
LISTEN    0         128              127.0.0.1:6010             0.0.0.0:*
LISTEN    0         128                   [::]:ssh                 [::]:*
LISTEN    0         128                  [::1]:6010                [::]:*
Install Certbot (Debian 10):
# apt install snapd
# snap install core
# snap refresh core
# snap install --classic certbot
Request a Certificate:
# certbot certonly --standalone
Saving debug log to /var/log/letsencrypt/letsencrypt.log
[...]
Please enter the domain name(s) you would like on your certificate (comma and/or
space separated) (Enter 'c' to cancel): cloudlab.virten.net
Requesting a certificate for cloudlab.virten.net

Successfully received certificate.
Certificate is saved at: /etc/letsencrypt/live/cloudlab.virten.net/fullchain.pem
Key is saved at:         /etc/letsencrypt/live/cloudlab.virten.net/privkey.pem
This certificate expires on 2022-01-25.
These files will be updated when the certificate renews.
Certbot has set up a scheduled task to automatically renew this certificate in the background.
Copy fullchain.pem and privkey.pem from the path in the output.
Step 3 - Import the Certificate to Cloud Director
Log in to VCD as Organization Administrator and navigate to Administration > Certificate Management > Certificate Library and press IMPORT.
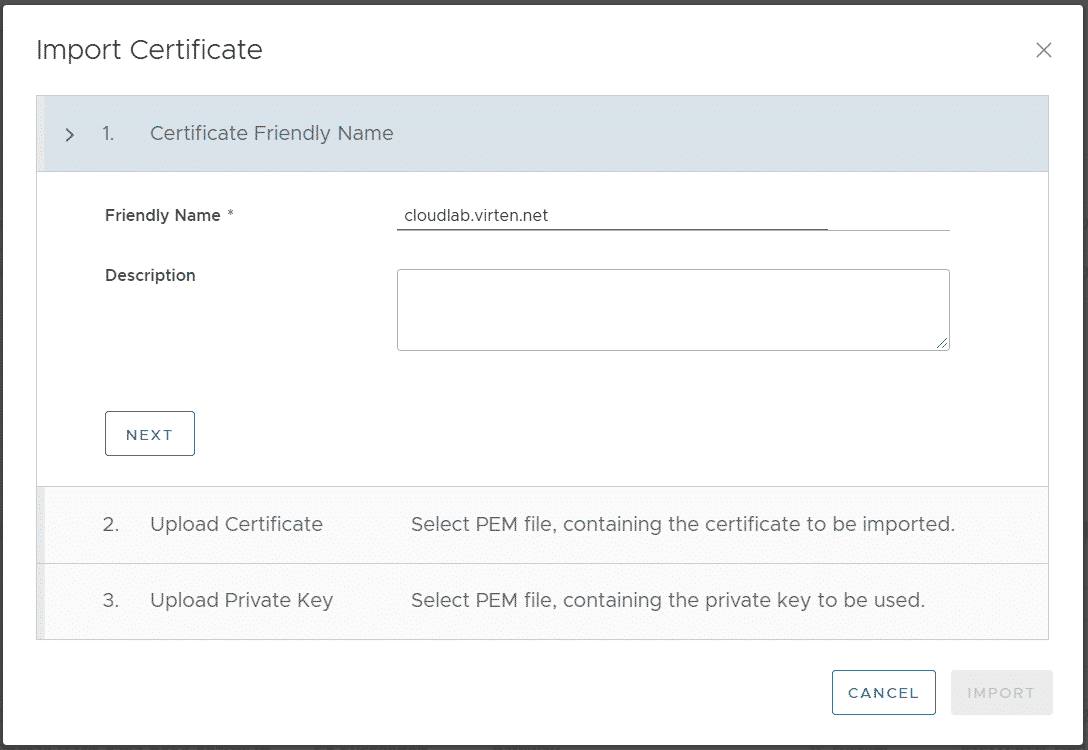
Give the Certificate a Name
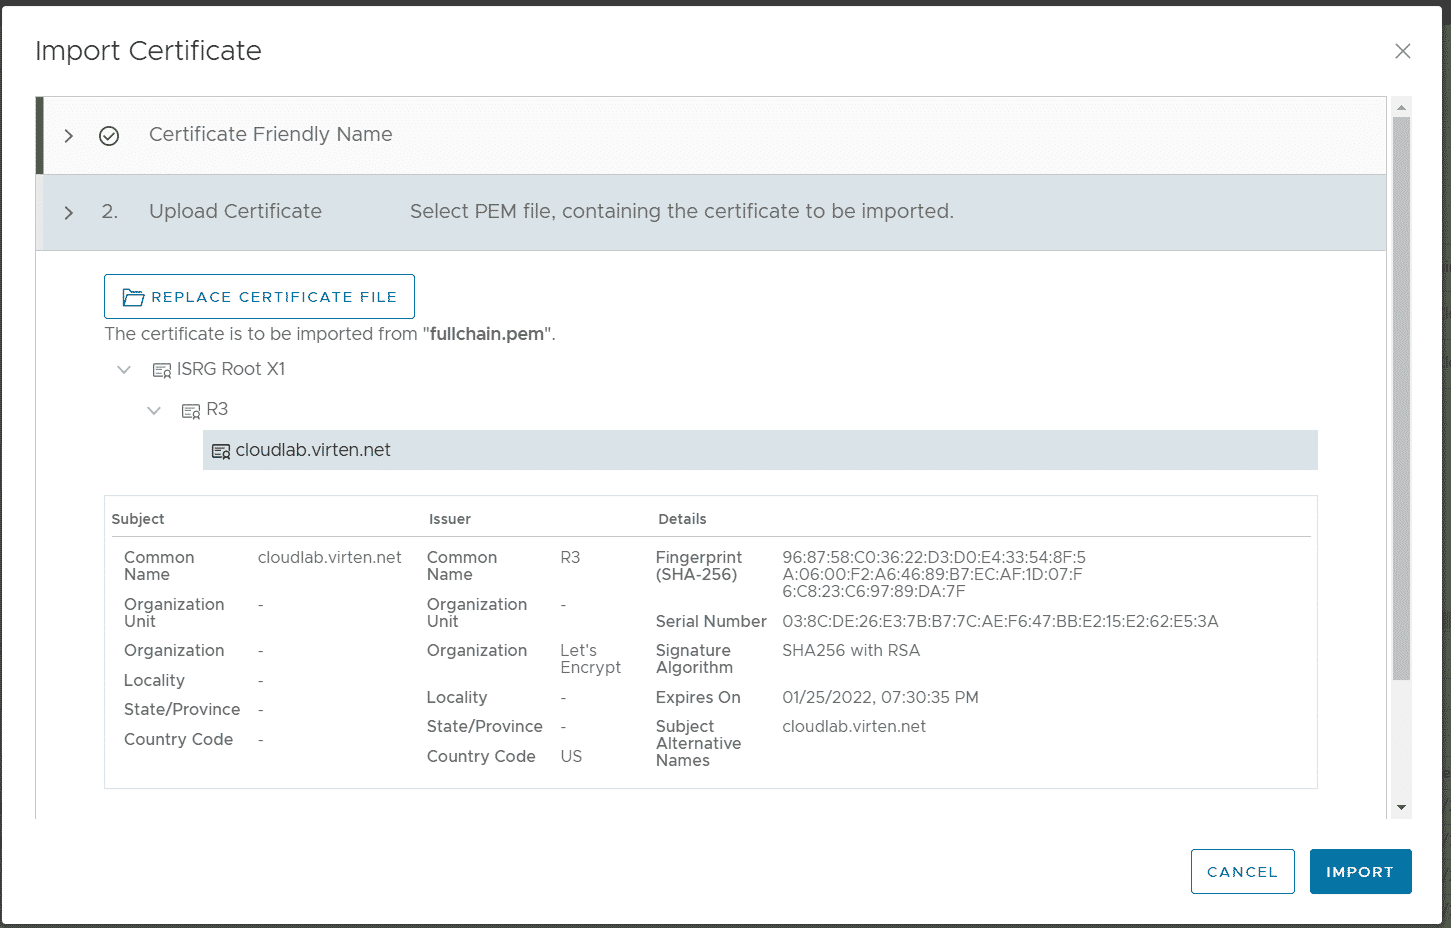
At the second step, import the certificate chain (fullchain.pem).
At the third step, import the private key (privkey.pem).
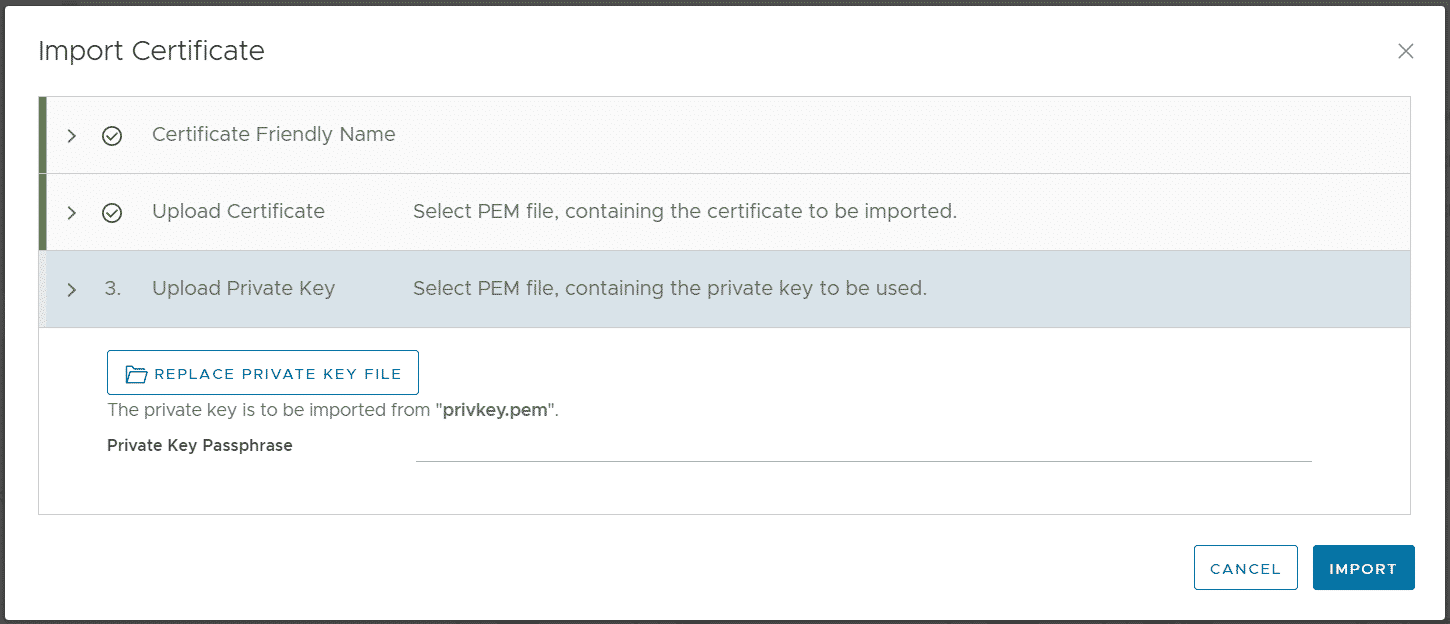
Press IMPORT to finish the wizard.
Note: If you get the error message "Bad request: Specified key is not a valid PKCS8 encoded private key", you have to transform the private key to PKCS8.

This can be easily done with the OpenSSL CLI tool.:
# openssl pkcs8 -topk8 -inform PEM -outform PEM -nocrypt -in privkey.pem -out pkcs8.pem
Step 4 - Create Load Balancer Pool and Virtual Service
I've deployed two Virtual Machines running an nginx Webserver which are used as Pool for the Virtual Service. As Organization Administrator and Navigate to Networking > Edge Gateway > Load Balancer > Pools
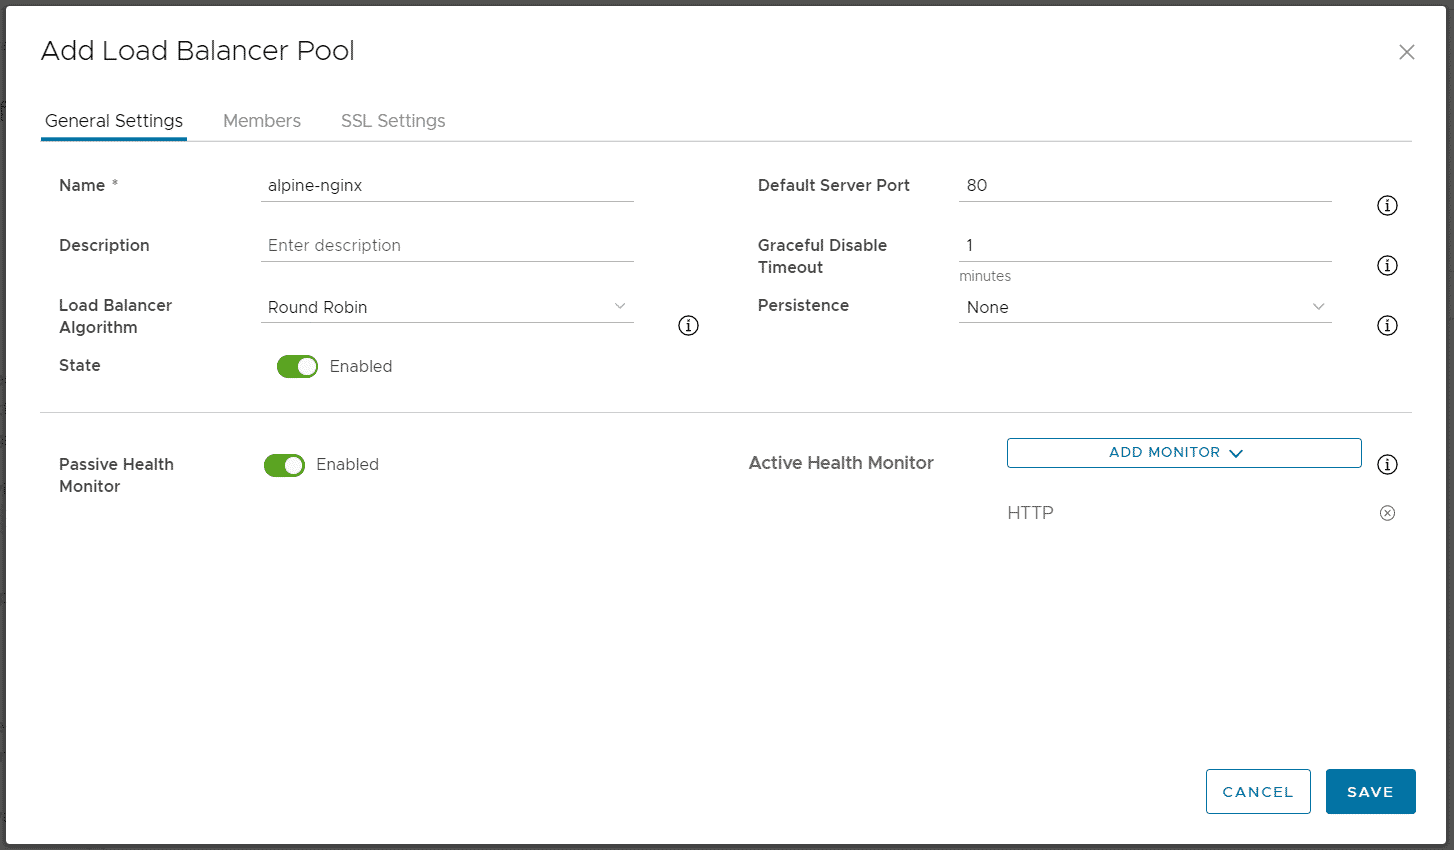
Press ADD to Create a Load Balancer Pool and configure the Pool. Please note that backend traffic is not encrypted. SSL offloading happens in the Load Balancer. The pool configuration is identical to configuration Non-SSL Virtual Services.
- General Settings Tab
- Name: alpine-nginx
- Default Server Port: 80
- Load Balancer Algorithmn: Round Robin
- Persistence: None
- Active Health Monitor: HTTP (This will send periodic HTTP HEAD request to each server in the Pool to check the availability)
- In the Members Tab, add two entries and enter the IP Addresses from the Virtual Machines running the Webserver.
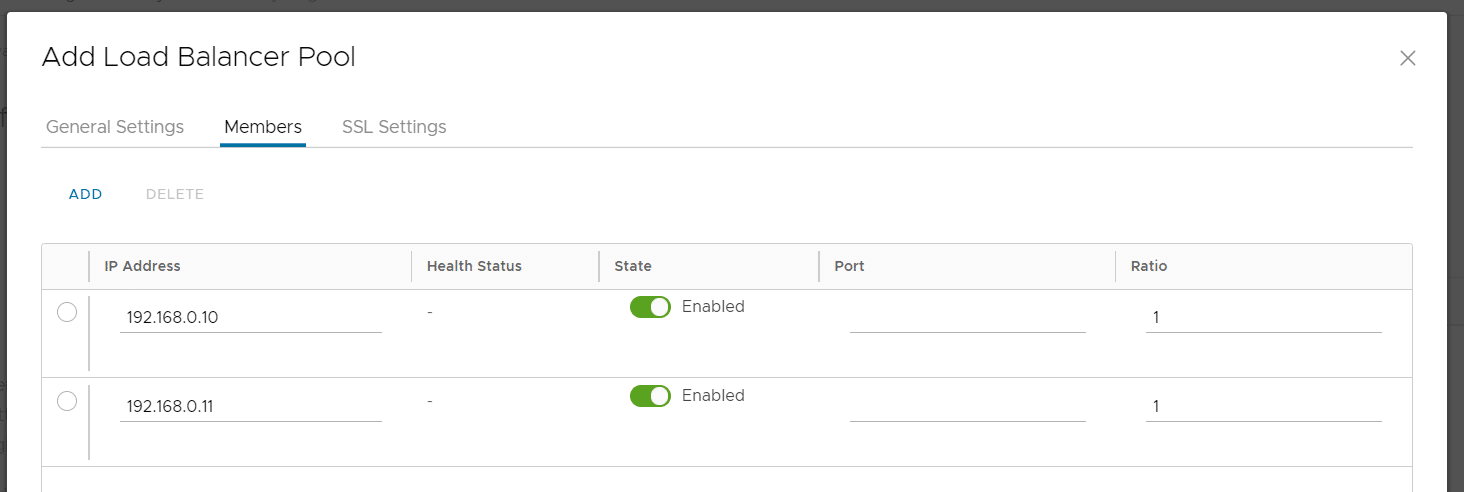
- Press SAVE to create the pool
Navigate to Networking > Edge Gateway > Load Balancer > Virtual Services and press ADD.
- Name: alpine-nginx-https
- Service-Engine-Group: seg-tenant-fgr
- Load Balancer Pool: alpine-nginx
- Virtual IP: 203.0.113.14 (Available Address from the pool, assigned to the tenant's edge gateway)
- Service Type: HTTPS
- Certificate: Select the previously added certificate
- Port: 443
- SSL: Enabled
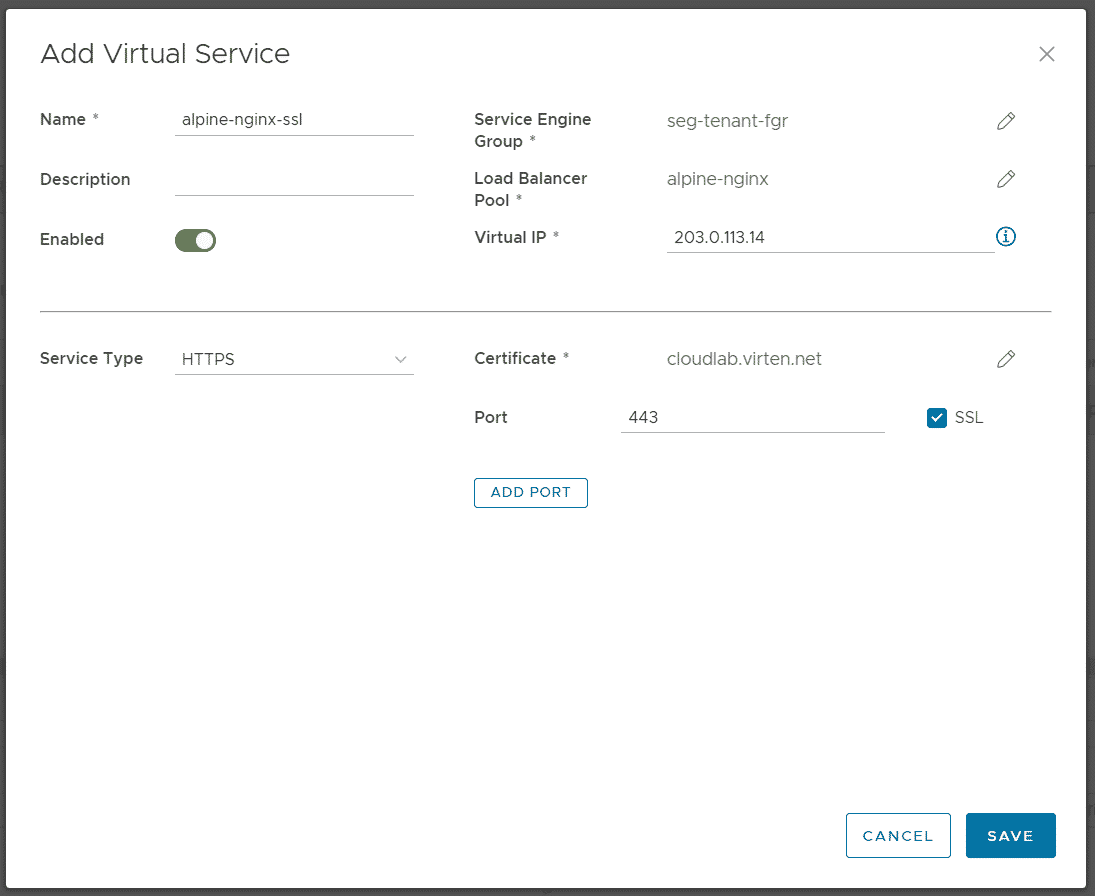
Press SAVE to create the Virtual Service.
Verify that you can access your website.
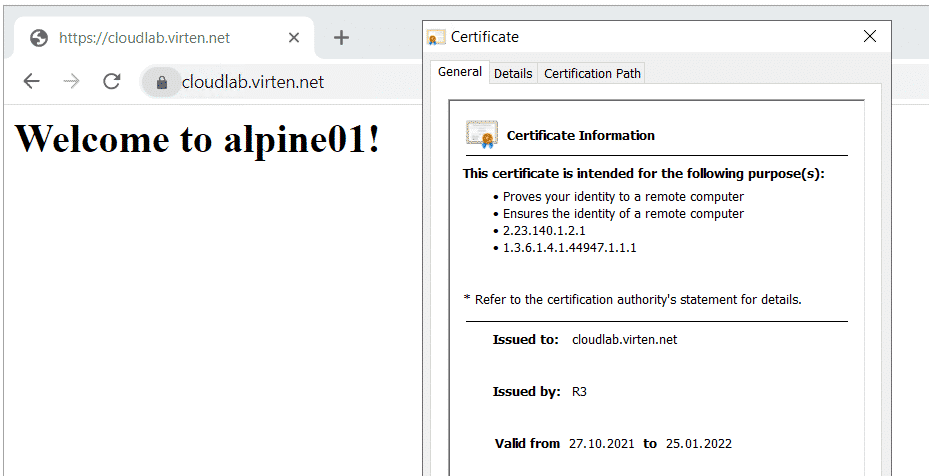
# curl -v --resolve cloudlab.virten.net:443:203.0.113.14 https://cloudlab.virten.net
* Expire in 0 ms for 6 (transfer 0x55bf66426fb0)
* Added cloudlab.virten.net:443:203.0.113.14 to DNS cache
* Hostname cloudlab.virten.net was found in DNS cache
* Trying 203.0.113.14...
* TCP_NODELAY set
* Expire in 200 ms for 4 (transfer 0x55bf66426fb0)
* Connected to cloudlab.virten.net (203.0.113.14) port 443 (#0)
* ALPN, offering h2
* ALPN, offering http/1.1
* successfully set certificate verify locations:
* CAfile: none
CApath: /etc/ssl/certs
* TLSv1.3 (OUT), TLS handshake, Client hello (1):
* TLSv1.3 (IN), TLS handshake, Server hello (2):
* TLSv1.2 (IN), TLS handshake, Certificate (11):
* TLSv1.2 (IN), TLS handshake, Server key exchange (12):
* TLSv1.2 (IN), TLS handshake, Server finished (14):
* TLSv1.2 (OUT), TLS handshake, Client key exchange (16):
* TLSv1.2 (OUT), TLS change cipher, Change cipher spec (1):
* TLSv1.2 (OUT), TLS handshake, Finished (20):
* TLSv1.2 (IN), TLS handshake, Finished (20):
* SSL connection using TLSv1.2 / ECDHE-RSA-AES128-GCM-SHA256
* ALPN, server accepted to use http/1.1
* Server certificate:
* subject: CN=cloudlab.virten.net
* start date: Oct 27 18:30:36 2021 GMT
* expire date: Jan 25 18:30:35 2022 GMT
* subjectAltName: host "cloudlab.virten.net" matched cert's "cloudlab.virten.net"
* issuer: C=US; O=Let's Encrypt; CN=R3
* SSL certificate verify ok.
> GET / HTTP/1.1
> Host: cloudlab.virten.net
> User-Agent: curl/7.64.0
> Accept: */*
>
< HTTP/1.1 200 OK
< Content-Type: text/html
< Content-Length: 31
< Connection: keep-alive
< Server: nginx
< Date: Sat, 30 Oct 2021 18:59:02 GMT
< Last-Modified: Thu, 28 Oct 2021 16:30:39 GMT
< ETag: "617ad02f-1f"
< Accept-Ranges: bytes
< Strict-Transport-Security: max-age=31536000; includeSubDomains
<
<h1>Welcome to alpine02!</h1>

* Connection #0 to host cloudlab.virten.net left intact