While writing the Getting Started with NSX Advanced Load Balancer Integration in VMware Cloud Director 10.3 guide, I came across a couple of issues. In this article, I'm going through those issues explaining what I did to solve them.
Product Interoperability
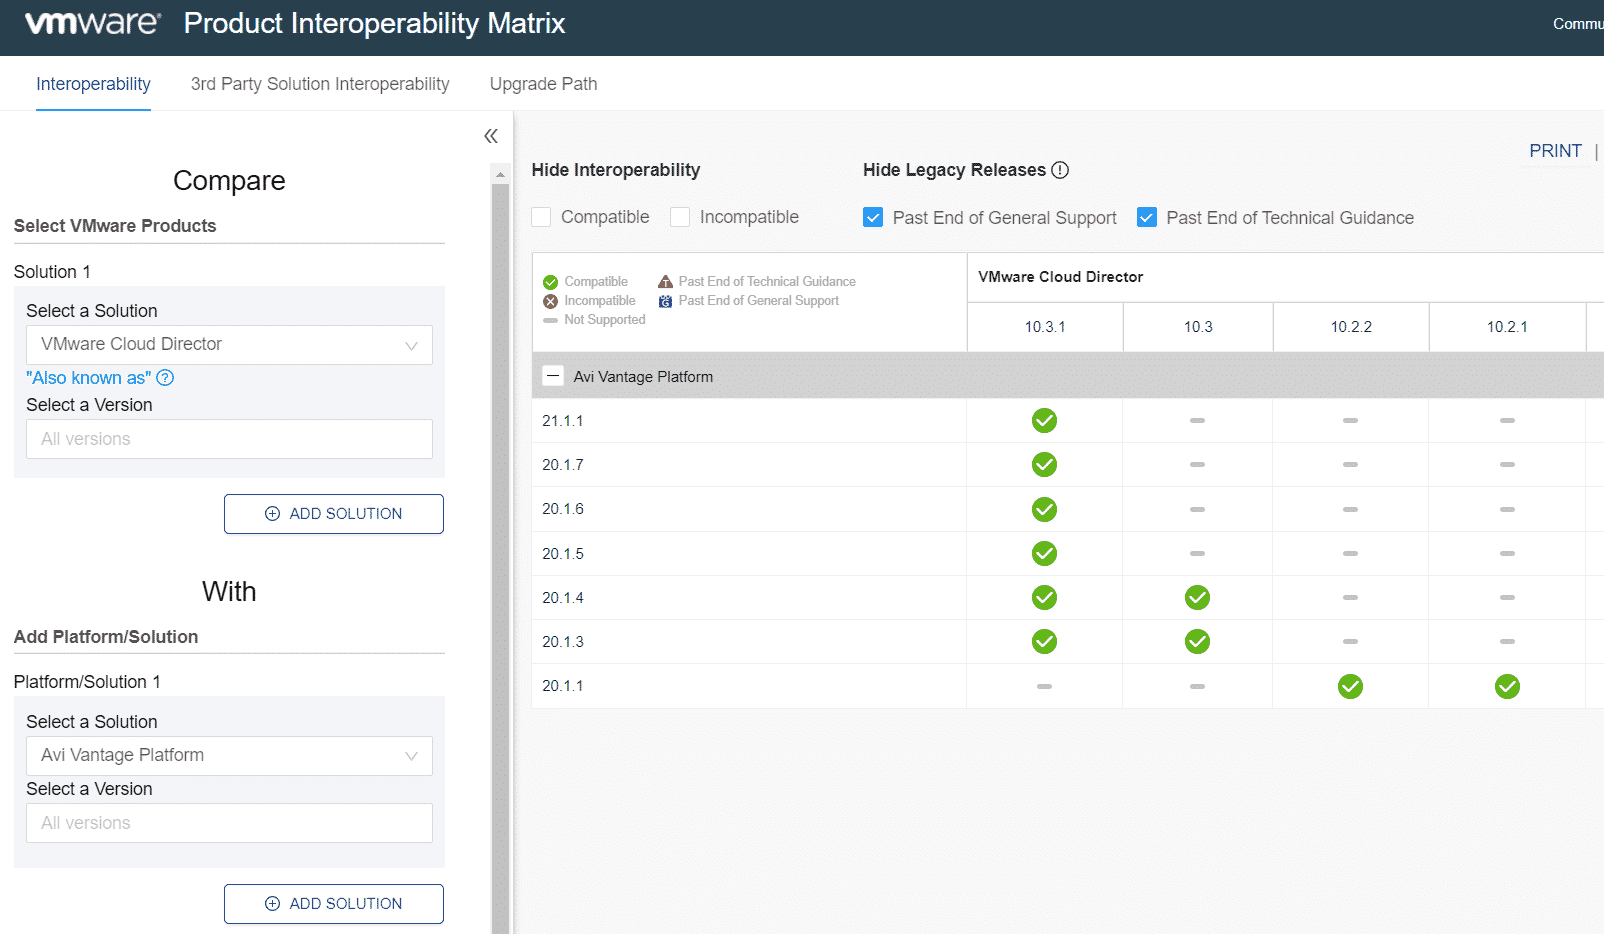
The more products you combine with each other, the more it gets complicated when it comes to product interoperability. Whenever you plan to implement a solution, make sure to check VMware Interop Matrix. Don't rush and run the latest version. When checking NSX ALB, you have to select "AVI Vantage Platform".
If you are planning a Greenfield deployment, currently those versions are fully compatible with each other.
- vSphere 7.0 Update 3 (ESXi and vCenter Server)
- NSX-T 3.1.3.1.0.18504668
- NSX Advanced Load Balancer 21.1.1 (AVI Vantage Platform)
- VMware Cloud Director 10.3.1.18738571
If you are updating, follow the update sequence: VMware Cloud Director > NSX ALB > NSX-T > vCenter > ESXi
Unable to add NSX-T Cloud in Cloud Director
You have to be consistent in the usage of FQDN or IP addresses through your platform. You can't add the NSX-T Manager with its IP Address in VCD and with the hostname in AVI. Compare VCD > Resources > Infrastructure Resources > NSX-T Manager with the Cloud configuration in NSX-ALB. Always be consistent to either use the FQDN or the or IP address when registering components with each other. This issue is also described in KB83889.
Cannot update Load Balancer configuration for Edge Gateway [NAME] as there is no Load Balancer Cloud backing for the edge gateway.
When you try to activate the Load Balancer in VMware Cloud Director, the following error is displayed:
Cannot update Load Balancer configuration for Edge Gateway [NAME] as there is no Load Balancer Cloud backing for the edge gateway.
An NSX-T backed Cloud Director requires NSX Advanced Load Balancer to be integrated. Refer to this article for instructions.
Cloud Director Edge Gateway Load Balancer Configuration is greyed-out
As Org Admin, you can't enable the Load Balancer by yourself. Ask the Service Provider to enable the Load Balancer.
Certificate [CN=Default Portal EC Cert] is already trusted.
When you add the NSX-ALB Controller to VMware Cloud Director, you are prompted to trust the Certificate. When pressing TRUST, the following message is displayed:
Certificate [CN=Default Portal EC Cert] is already trusted.
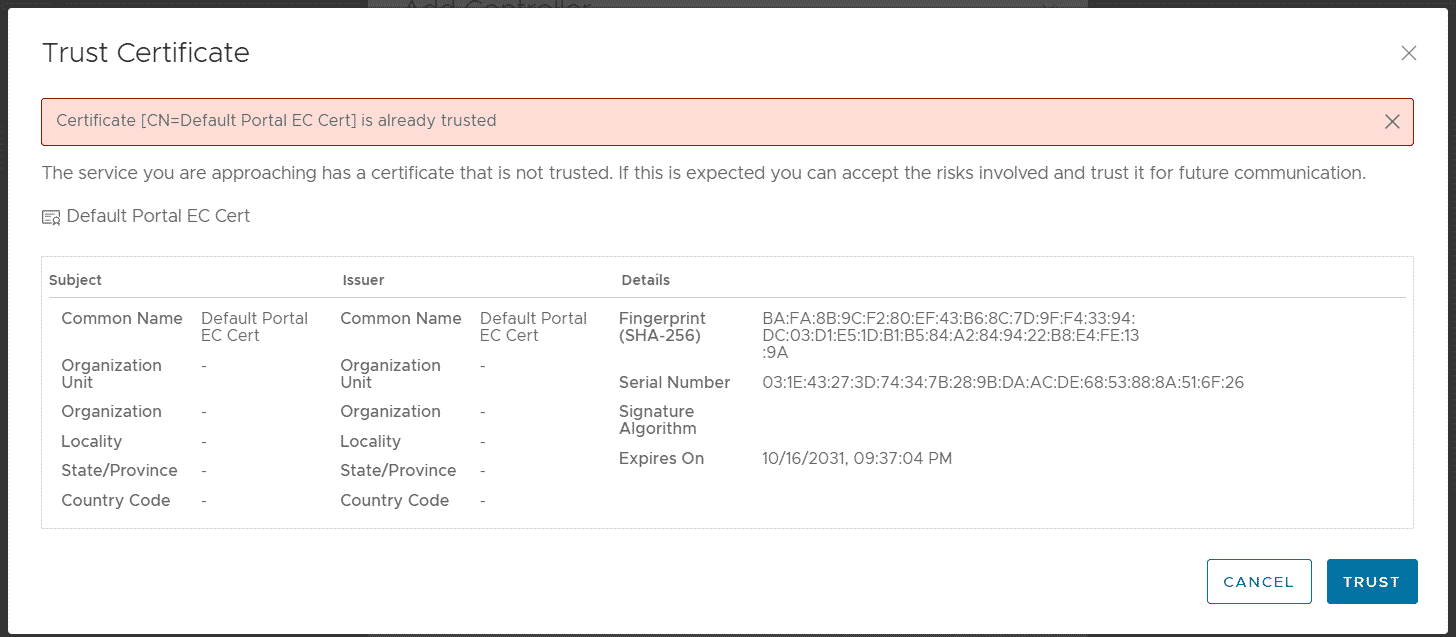
You can't proceed and add the NSX-ALB Controller.
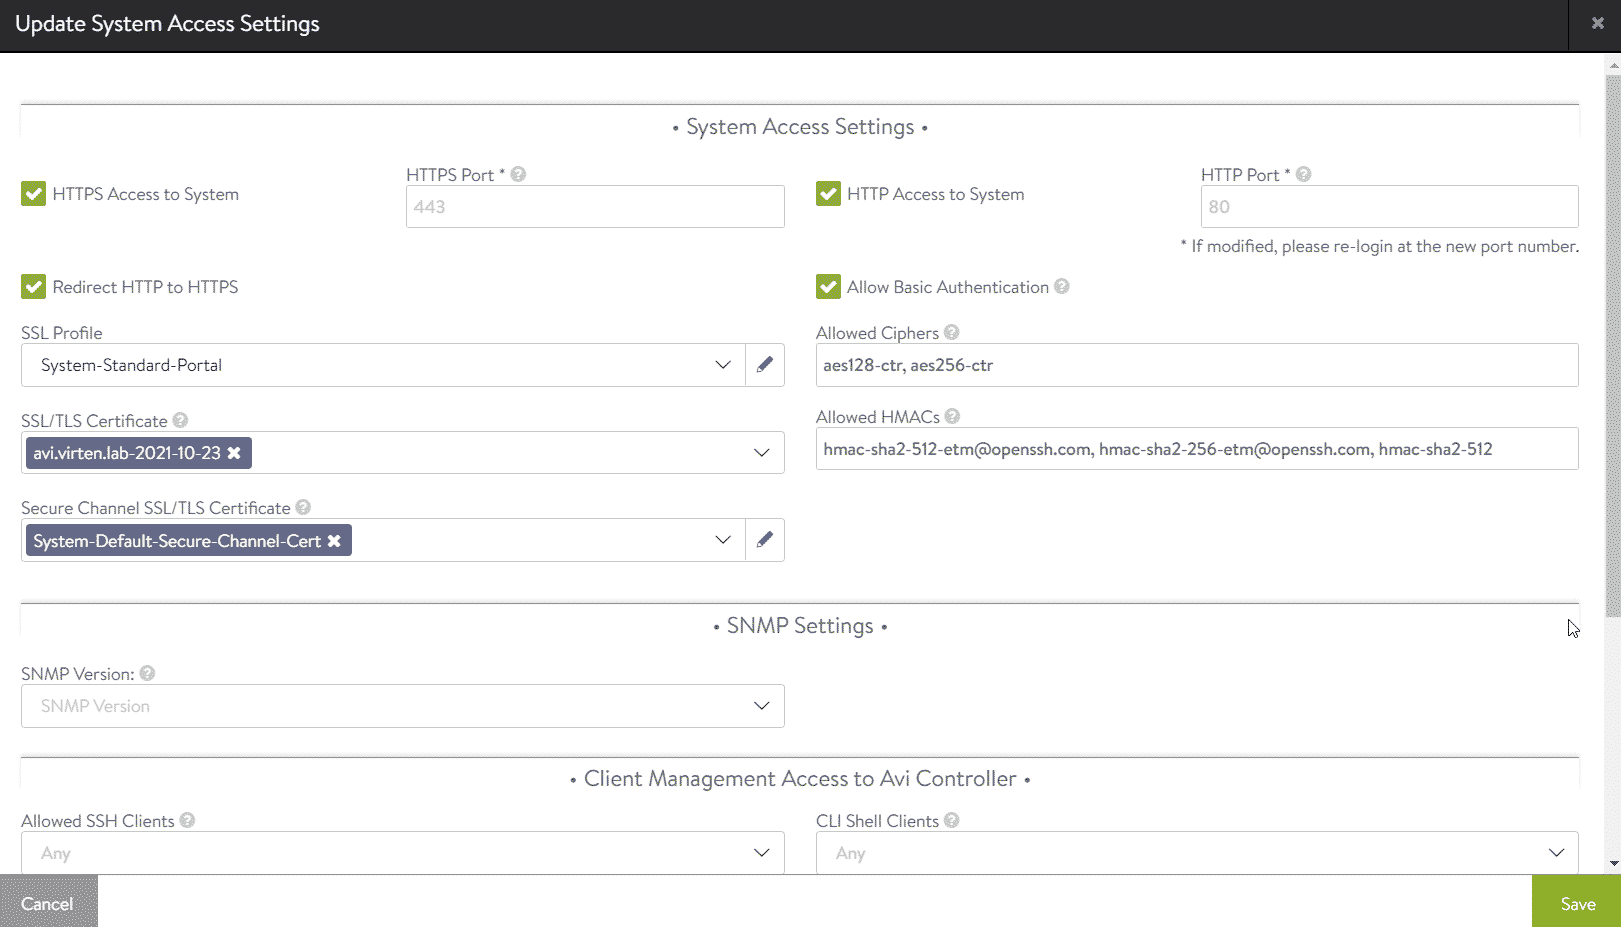
This happens when you are using the default NSX-ALB certificate. Replace the certificate with a valid CA-signed or self-signed certificate. In NSX-ALB, navigate to Administration > Settings > Access Settings and press the pen in the upper right corner to edit access settings.
- Enable Allow Basic Authentication
- In the SSL/TLS Certificate field, remove System-Default-Portal-Cert and System-Default-Portal-Cert-EC256
- Click the SSL/TLS Certificate Drop-Down menu and press Create Certificate
- Enter a Name for the Certificate (This is only a display name)
- Set the Common name to the FQDN of the System
- Enter Email, Org, OU, Location, State and Country (You can use dummy values, but do not leave them blank!)
- Add two Subject Alternative Names and, one for the IP Address and the second for the FQDN of the system.
- Press Save
This is what the configuration should look like:
"Error: Failed to connect to Load Balancer Controller" when trying to add the NSX-ALB Controller in VCD
When you try to add the NSX-ALB Controller in VMware Cloud Director, the following error message is displayed:
ERROR: [ID] Failed to connect to Load Balancer Controller: https://URL
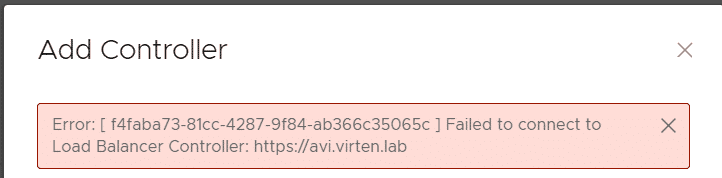
This happens when you are using an invalid certificate in the NSX-ALB controller. Replace the certificate and double-check that...
- all fields (including Email, Org, OU, Location, State and Country) are filled
- the FQDN is used as "Common Name (CN)"
- the certificate has the ALB Controllers IP Address and FQDN added as "Subject Alternate Name" (SAN)
Available Service Engine Groups in Cloud Director only contains Default-Group
When you've added a Service Engine Group (SEG) in NSX-ALB and it is not available for import in VCD, double-check that you've created it in the correct Cloud. When you are navigating to Infrastructure > Cloud Resources > Service Engine Groups, you always end up in the Default-Cloud. Make sure to select the correct NSX-T Cloud at the top of the page.

Edge Gateway [EGW] already registered on Load Balancer Cloud [CLOUD]
This might happen during the initial integration with NSX-ALB, when you preconfigured the Edge Gateway in the NSX-T Cloud configuration. Just try to enable it again. It should work with the 2nd try. If not, open NSX-ALB and navigate to Infrastructure > Clouds > NSX-T Cloud > Edit and check if the Logical Router is already added within Data Networks.
Virtual Server Display Names appear in other Tenants Application Port Profile Config
Tenant A has created a Virtual Service called my-secret-domain.tld.
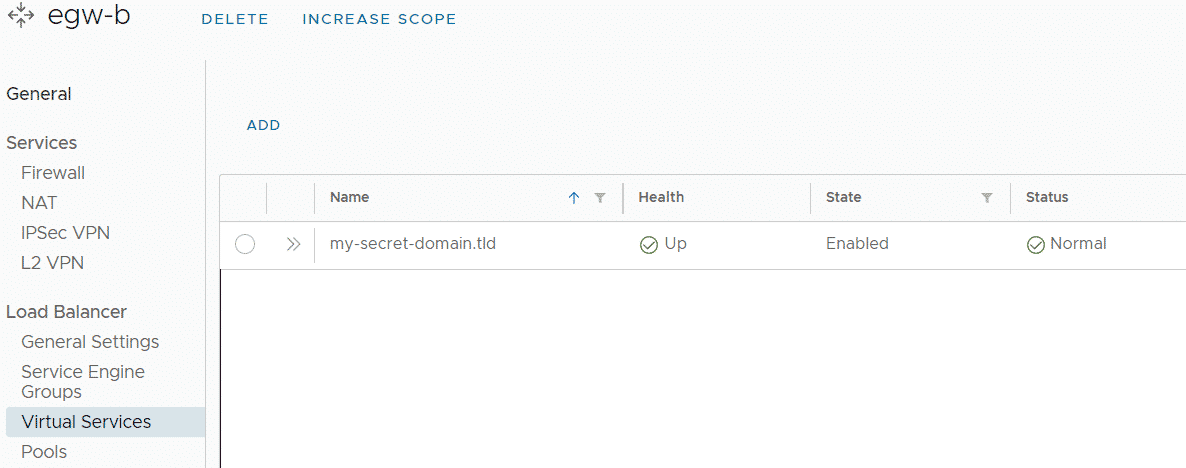
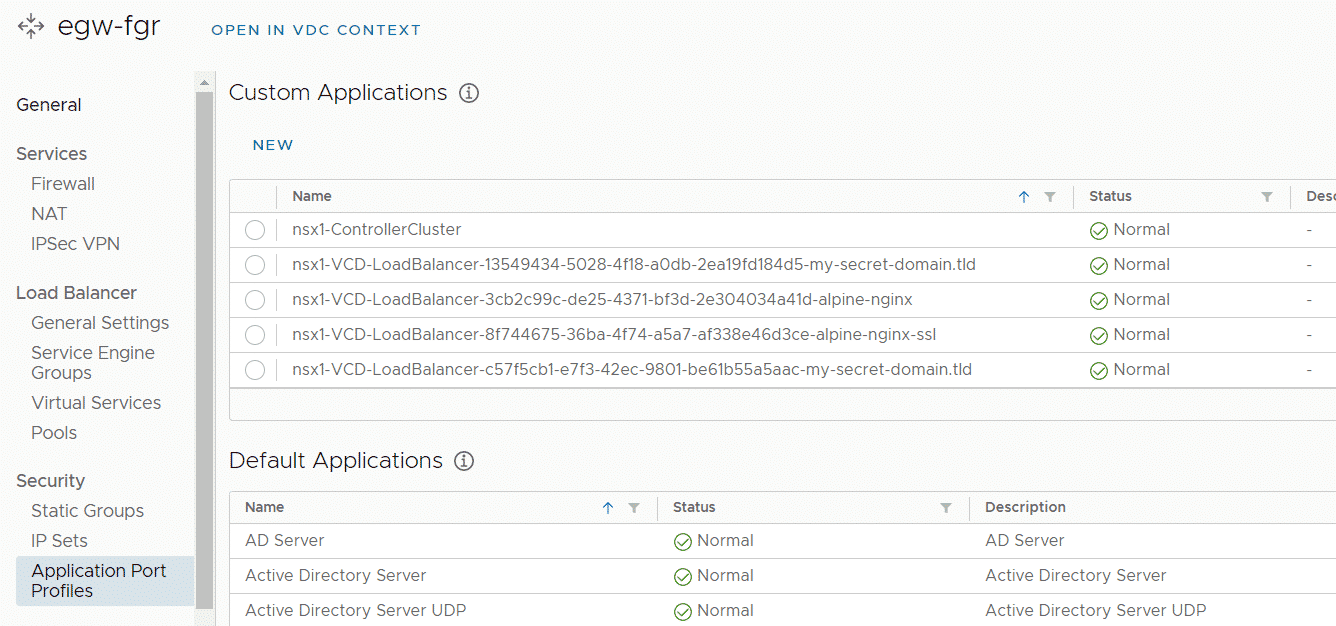
All Virtual Services and Pools that are created by tenants in VCD are added as service definitions in NSX-T. Those Service definitions are imported back into VCD and all tenants can see them in their Edge Gateway configuration as Custom Application Port Profile. This unwanted behavior might reveal what other tenants are hosting.
Workaround: Until fixed, you can manually tag the Service Definition in NSX-T with the Org ID of the tenant that is hosting the given service. The service will then vanish from all other tenant's configurations.
- Get the Customers Org ID (Easiest way is to navigate to Resources > Cloud Resources > Organizations, click on the Organization and copy the ID including urn:vcloud:org: from the URL)
- Open NSX-T and navigate to Inventory > Services
- Search the affected service and press Edit
- Add a Tag with the Org ID as TAG and SYSTEM as Scope. (For example: SYSTEM/urn:vcloud:org:e9abdd36-92bb-49d5-81c7-5b84a50bf37c)

- Press +
- Press SAVE
The Application Port Profile should now disappear from all tenants, except the tagged one.

Note: Profiles Sync is a periodic task. It might take some time for profiles to appear and disappear. You can force a sync using the Cloud API. Get the Network Provider ID (NSX-T Manager) from Resources > Infrastructure Resources > NSX-T Managers and run the following API call:
POST {{ vcd_url }}/cloudapi/1.0.0/applicationPortProfiles/sync?filter=_context%3D%3Durn%3Avcloud%3Ansxtmanager%3Abde9ca8b-d9fd-47db-8abf-7f42d94c9788Or use Swagger, which is included in VCD (? > API Explorer)
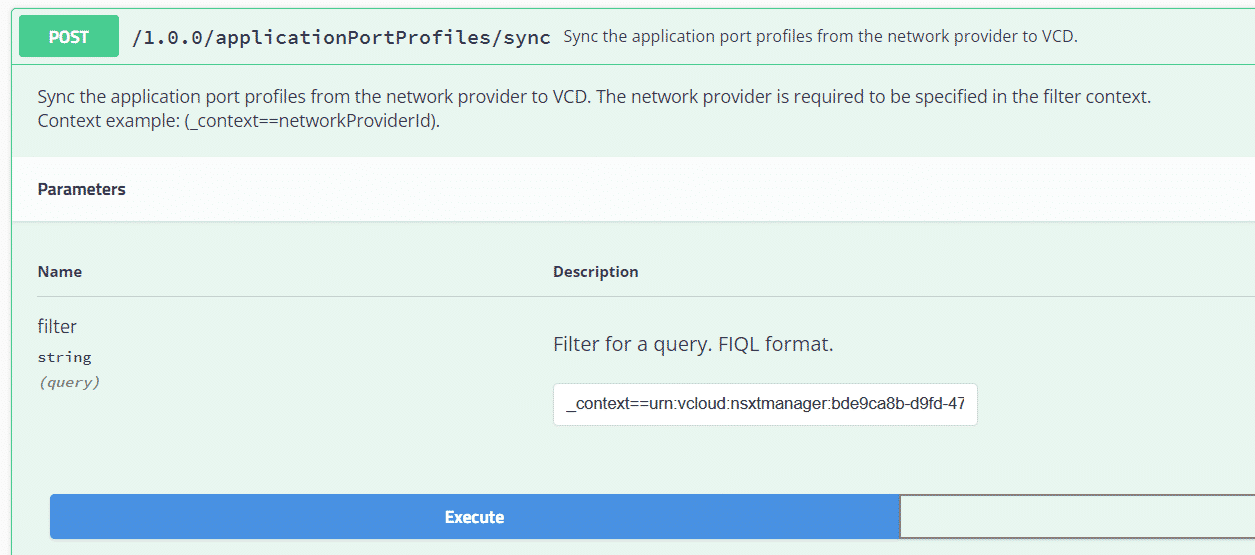
In Swagger, go to applicationPortProfiles, open POST /1.0.0/applicationPortProfiles/sync and add the following FIQL filter:
_context==urn:vcloud:nsxtmanager:bde9ca8b-d9fd-47db-8abf-7f42d94c9788
Certificate Import fails with: Bad request: Specified key is not a valid PKCS8 encoded private key
When you try to import a server certificate, the following error message is displayed:
Bad request: Specified key is not a valid PKCS8 encoded private key

You have to transform the private key to PKCS8. This can be easily done with the OpenSSL CLI tool.:
# openssl pkcs8 -topk8 -inform PEM -outform PEM -nocrypt -in privkey.pem -out pkcs8.pem
Thanks for sharing
Thanks for the info! I was wondering why my SEGs weren't showing up. I had them in the wrong cloud just as you noted.