When you want to use the same public IP address for multiple websites, you have to leverage the SNI extension. Server Name Indication (SNI) is an extension to the Transport Layer Security (TLS) protocol which allows a client to indicate which hostname it wants to connect to. This allows a server to present specific certificates on the same IP address and hence allows multiple secure (HTTPS) websites to be served by the same server.
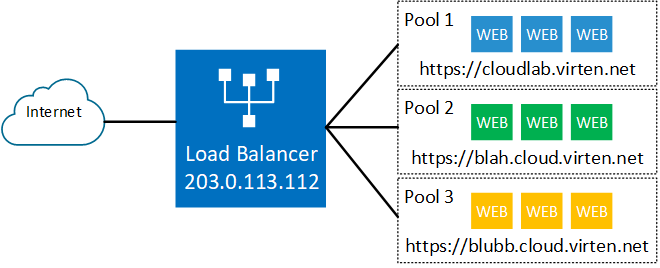
The NSX-T Load Balancer supports SNI Certificates on a single Virtual Server (IP Address) with different Server Pools in the backend. This article explains how to configure SNI-based Load Balancing with 3 different secure HTTPS Websites on a single IP Address with the NSX-T 3.1 Load Balancer.
As a prerequisite, you should already have NSX-T configured to have a working Overlay, Tier-0 and a Tier-1 Gateway. The NSX-T Load Balancer runs as "Edge Service" on a Tier-1 Gateway. The backend webservers are already configured and run unencrypted HTTP (Port 80).
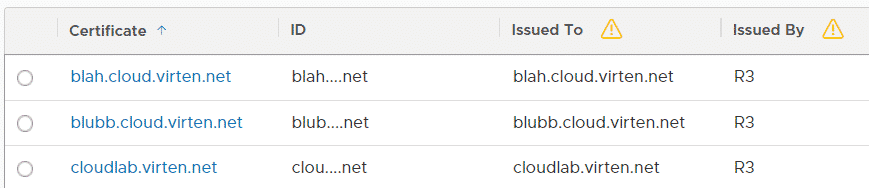
The first step in NSX-T is to upload certificates for the 3 domains. I'm using certificates created by Let's encrypt, but any Server Certificate will do. To upload certificates, navigate to System > Settings > Certificates and press IMPORT > Import Certificate. Make sure to enable the "Server Certificate" option or the certificate will not available be available for the Load Balancer. See this article if you have problems uploading Let's Encrypt certificates in NSX-T.
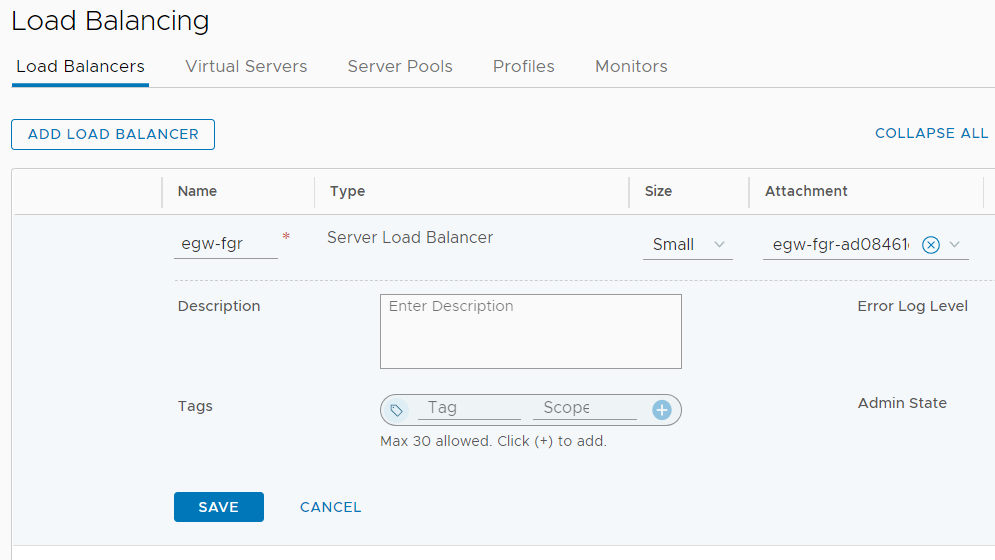
Now you have to create the Load Balancer Service on a Tier-1 Gateway. Navigate to Networking > Network Services > Load Balancing and press ADD LOAD BALANCER. I usually give the LB Service the same name as the Tier-1 Gateway it runs on. You can only have one LB Service per Tier-1 Gateway. Select the Tier-1 Gateway in this Attachment column.
The next step is to create Server Pools. A Server Pool is a group of Virtual Machines where the website is running. I want to host 3 websites, so I have to create 3 pools. Navigate to Networking > Network Services > Load Balancing > Server Pools and press ADD SERVER POOL. Give the pool a Name and press Select Members. Add all webservers that are running the website with their IP address. Make sure to set Port 80 for HTTP as I want to offload SSL to the Load Balancer.
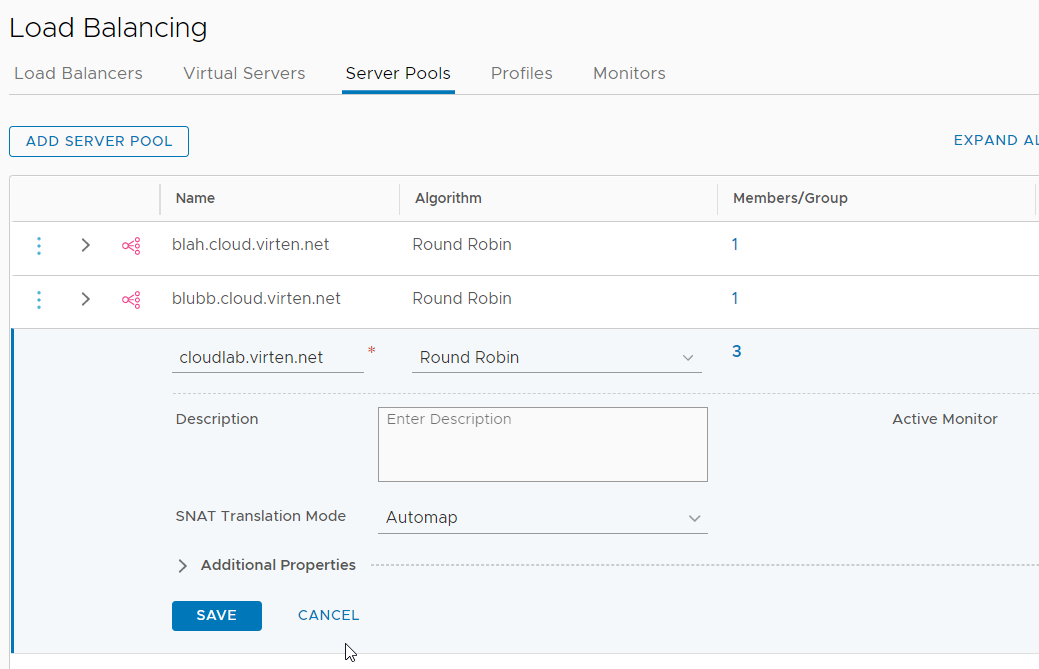
If you don't set the port, NSX-T tries to connect the backend server on HTTPS port 443. When HTTPS is not enabled on the webserver, NSX-T throws a "502 Bad Gateway - NSX LB" error.

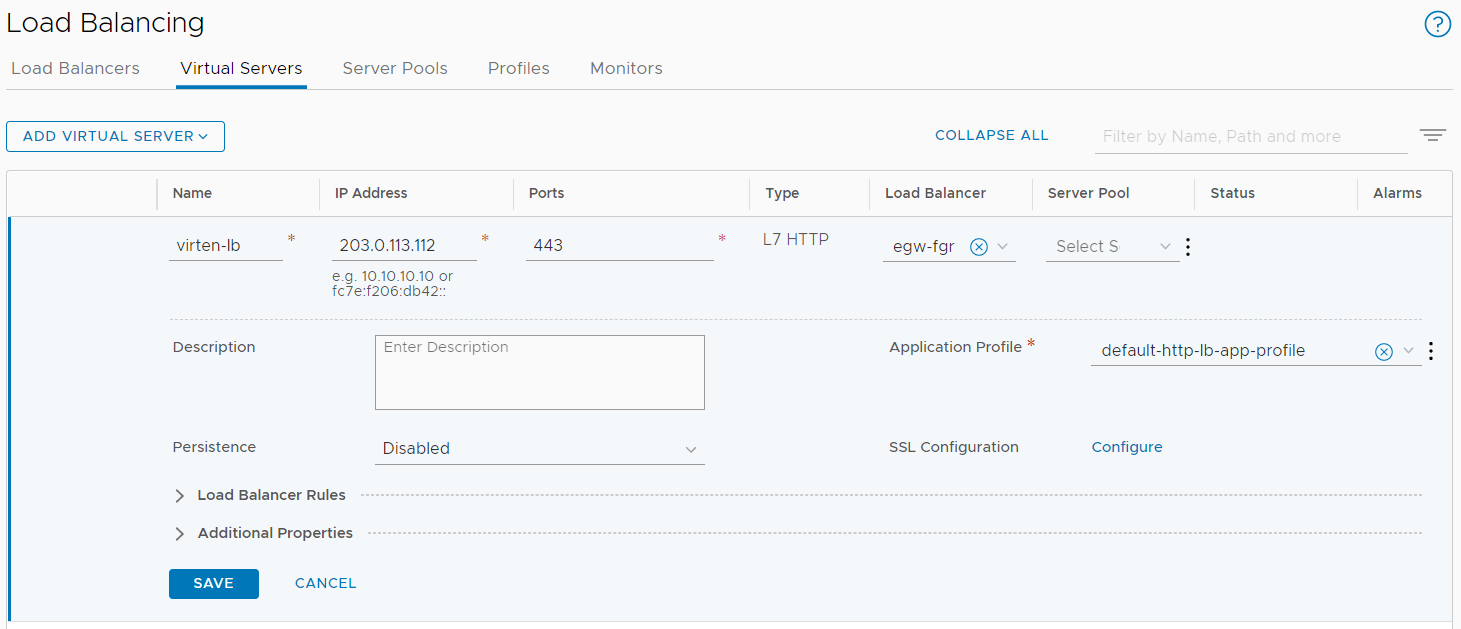
With the Pools created, you can configure the Virtual Server. Navigate to Networking > Network Services > Load Balancing > Virtual Servers and press ADD VIRTUAL SERVER > L7 HTTP and configure the VS as follows:
- Name: virten-lb (Display name for the Virtual Server)
- IP Address: 203.0.113.112 (IP Address the Virtual Server is listening to)
- Port: 443 for HTTPS
- Type: L7 HTTP (The Layer 7 Load Balancer is required for SSL offloading)
- Load Balancer: egw-fgr (The LB Service configured earlier)
- Server Pool: empty (Configured later using SSL SNI conditions)
- Application Profile: default-http-lb-app-profile
Now press Configure, next to SSL Configuration.
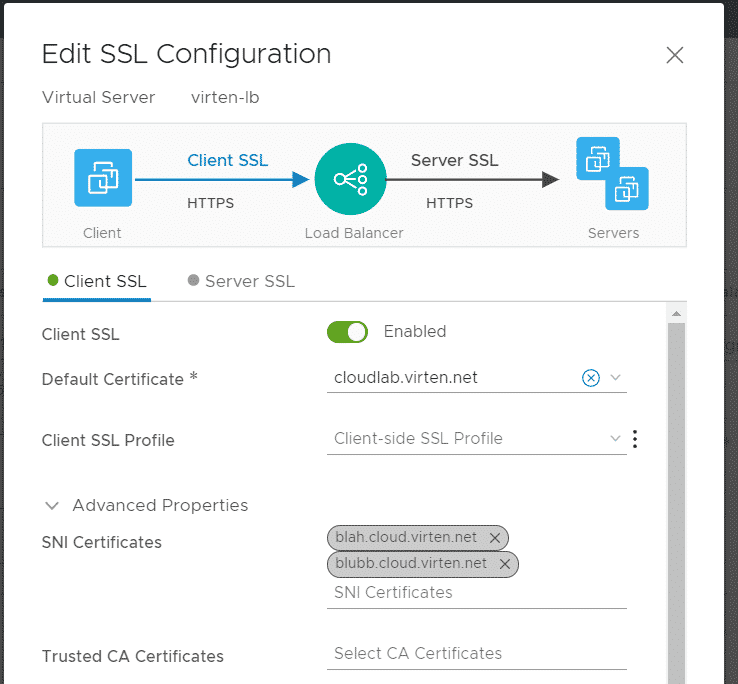
In the SSL configuration, you have to configure a default certificate. This certificate is used when no SNI certificate matches, for example when accessing the IP address directly (https://203.0.113.112).
- Client SSL: Enabled
- Default Certificate: cloudlab.virten.net
- Advanced Properties > SNI Certificates: All other certificates
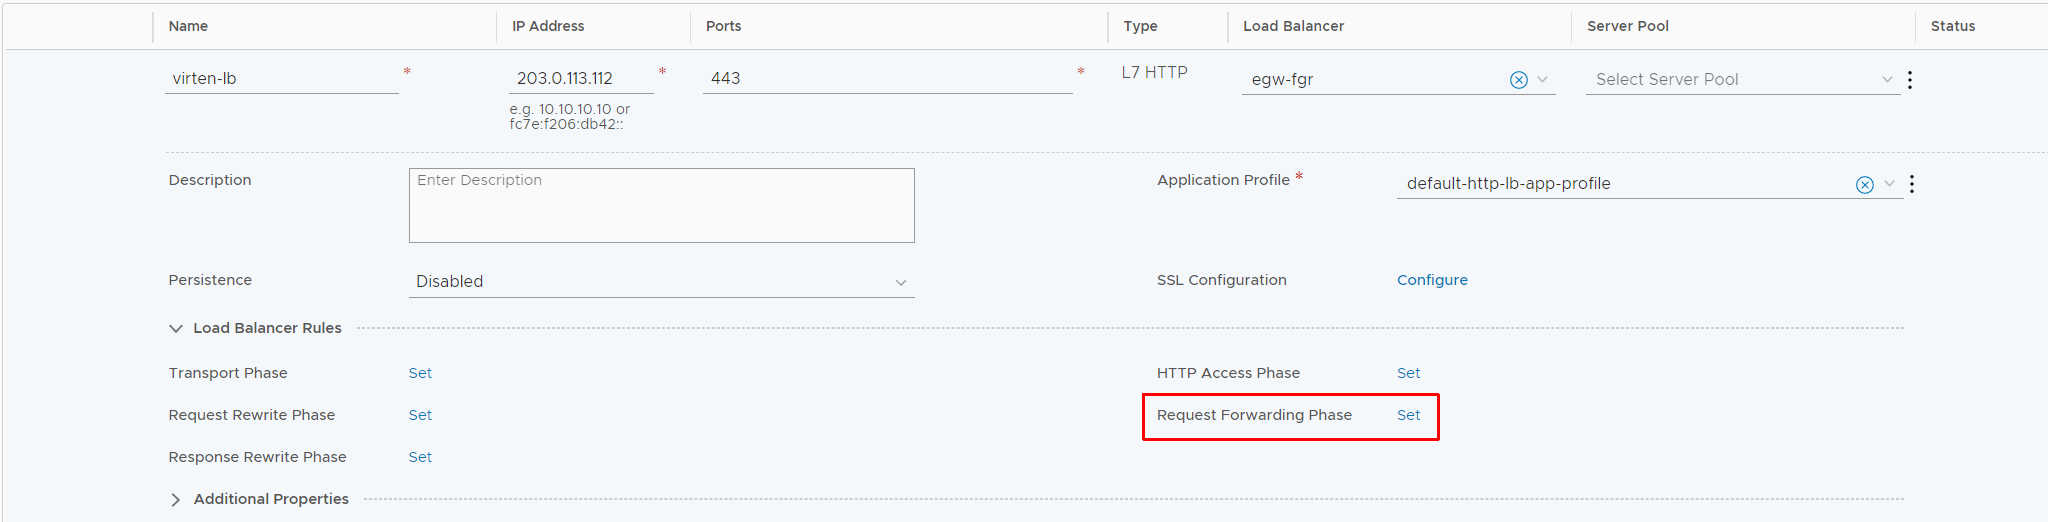
Press SAVE to finish the SSL configuration. At this point, the webserver is already able to present a matching certificate when accessed, but it does not use the matching backend pool. To configure pools, you have to set up Request Forwarding Conditions in the Load Balancer Rule Configuration. In the Virtual Server configuration, expand Load Balancer Rules and press Set next to Request Forwarding Phase.
Make sure that you are in the D. Request Forwarding section and press ADD RULE to configure the rule as follows:
- Condition: SSL SNI
- Match Type: Equals
- SNI Name: cloud.virten.net
- Match Strategy: ALL
- Action: Select Pool
- Select Pool: cloudlab.virten.net
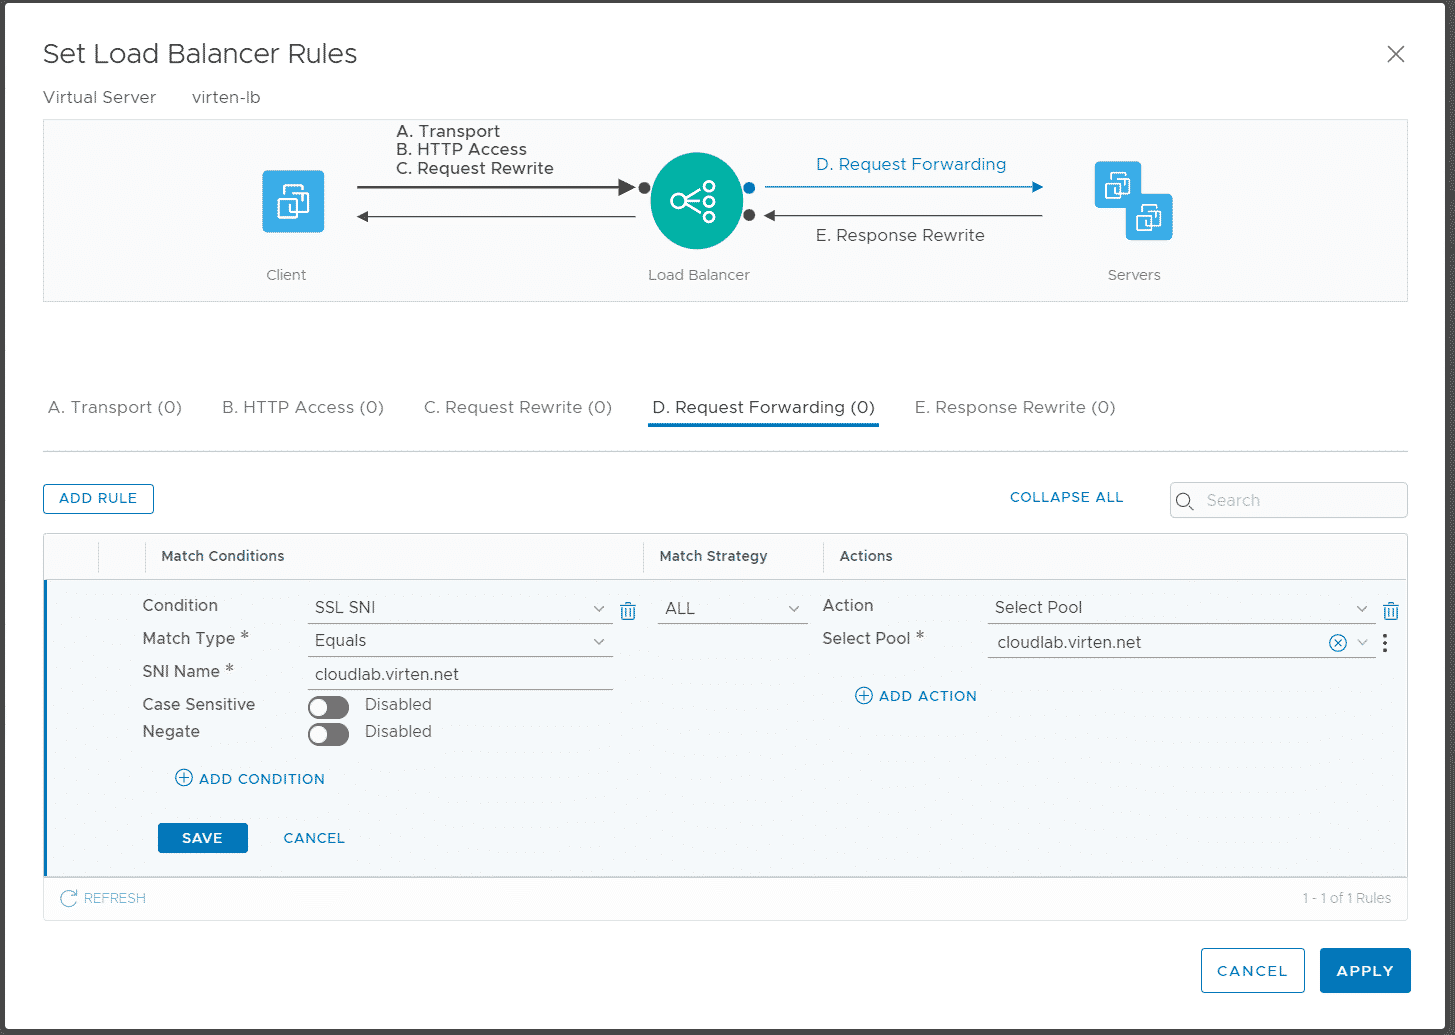
Press SAVE and add two additional rules for the other domains.
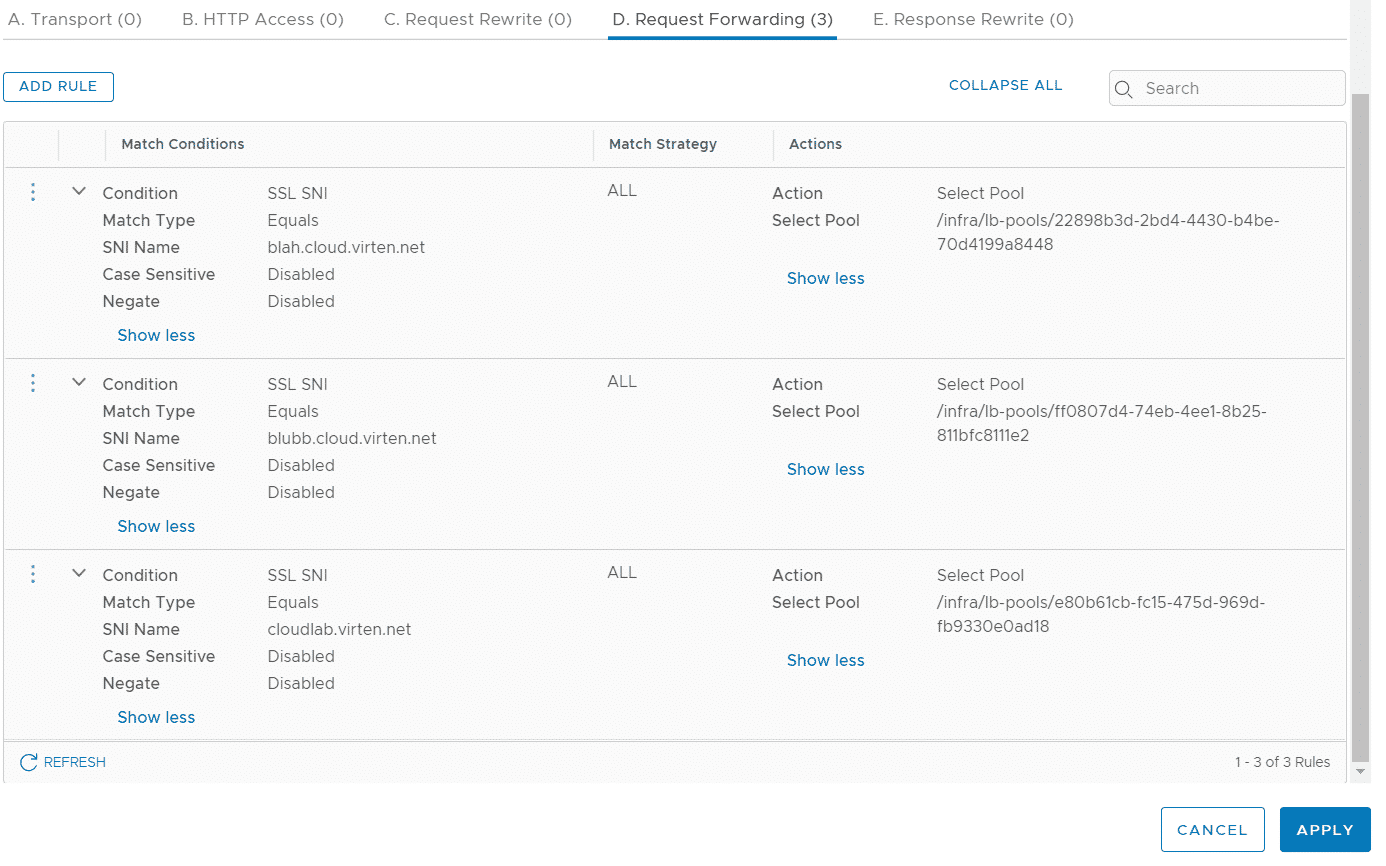
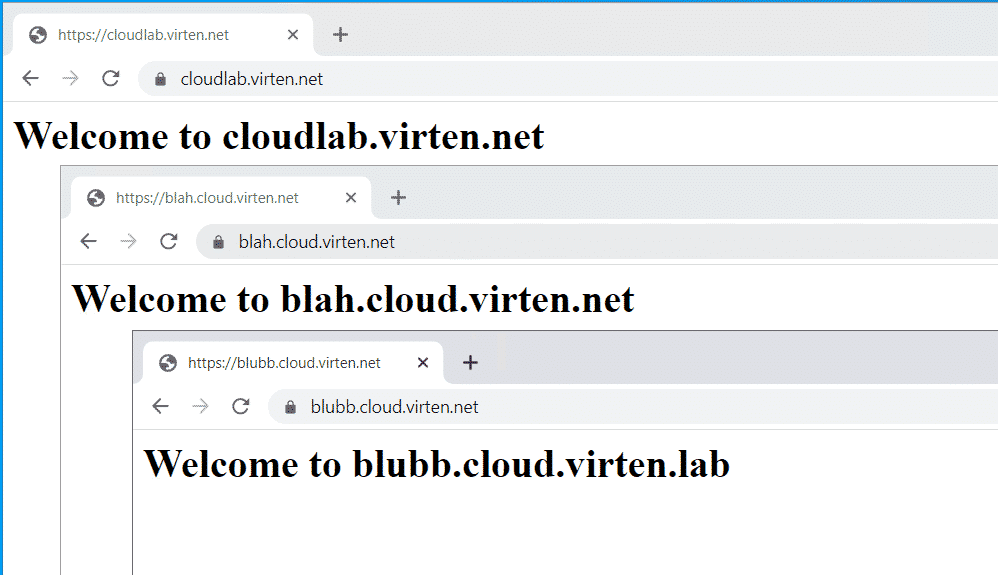
Press APPLY and SAVE to finish the Virtual Server configuration. You should now be able to access all 3 domains with the their appropriate certificate and webserver pool.