When you try to import a Let's Encrypt SSL Server Certificate in NSX-T, the following error message is displayed:
Error: You have 1 Error(s)
Certificate chain validation failed. Make sure a valid chain is provided in order leaf,intermediate,root certificate. (Error code: 2076)

Update 2021-11-15: Apparently, the problem is specific to certbot using the Cross-Signed X1. There is a much easier and more stable solution by replacing the Cross-Signed X1 with the Self-Signed X1. See "Solution 2 - Replace Cross-Signed X1 with Self-Signed X1" for instructions.]
Problem
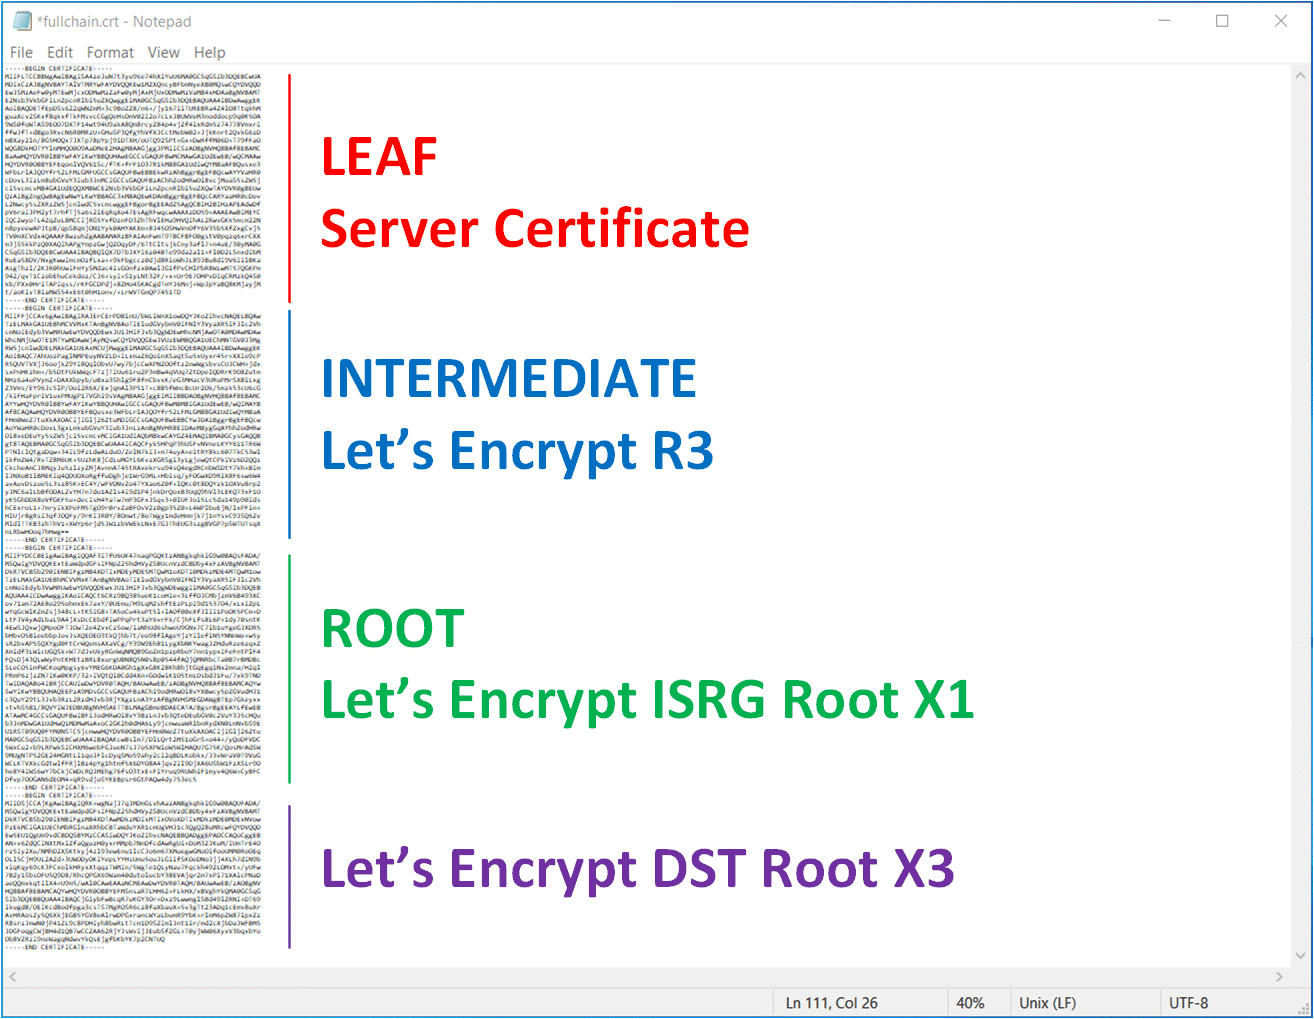
When you create a Let's Encrypt certificate with certbot for example, it automatically generates the Full-Chain certificate that is intended to be used for Webservers or Load Balancers. The file should look like this, which is the correct order (lead, intermediate, root) as explained in the error message.
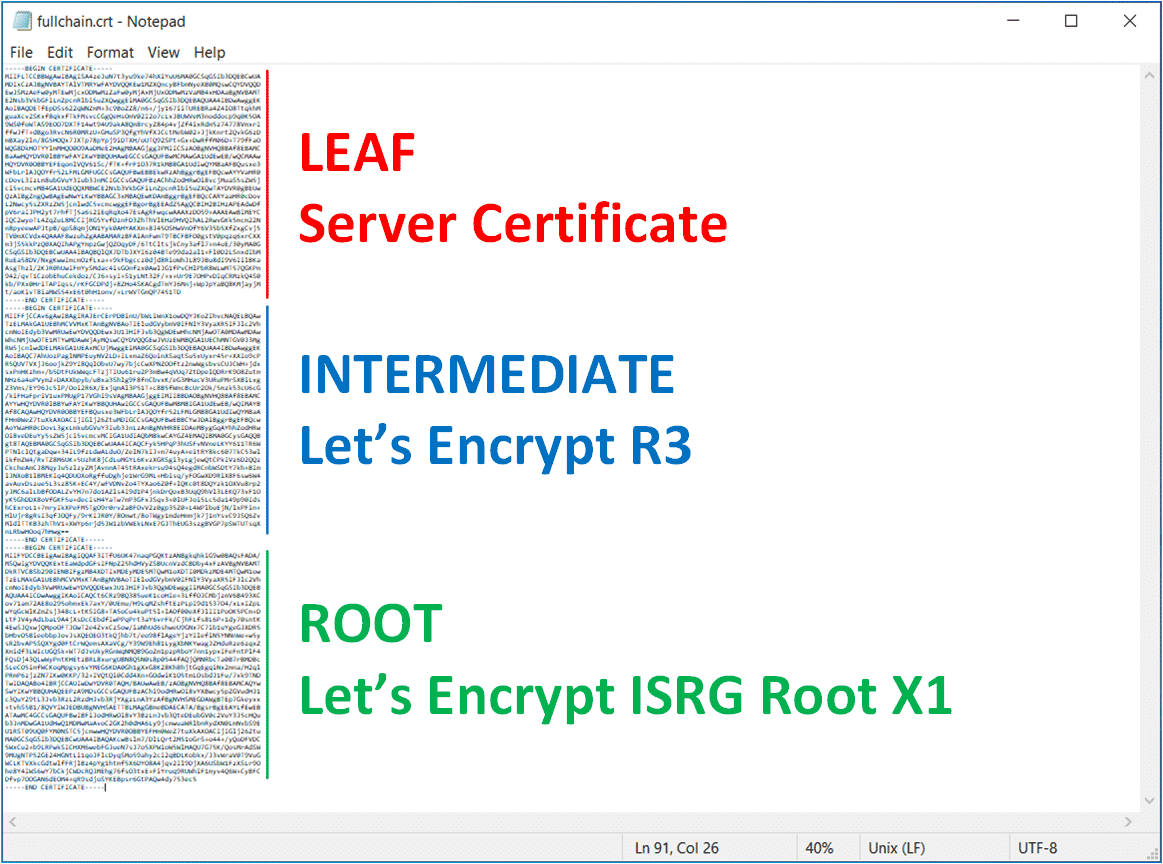
This Full-Chain works fine in most web servers like Apache, nginx, or with VMware Cloud Director, but for any reason, it does not work with NSX-T. To understand why let's have a look at the Let's Encrypt Chain of Trust.
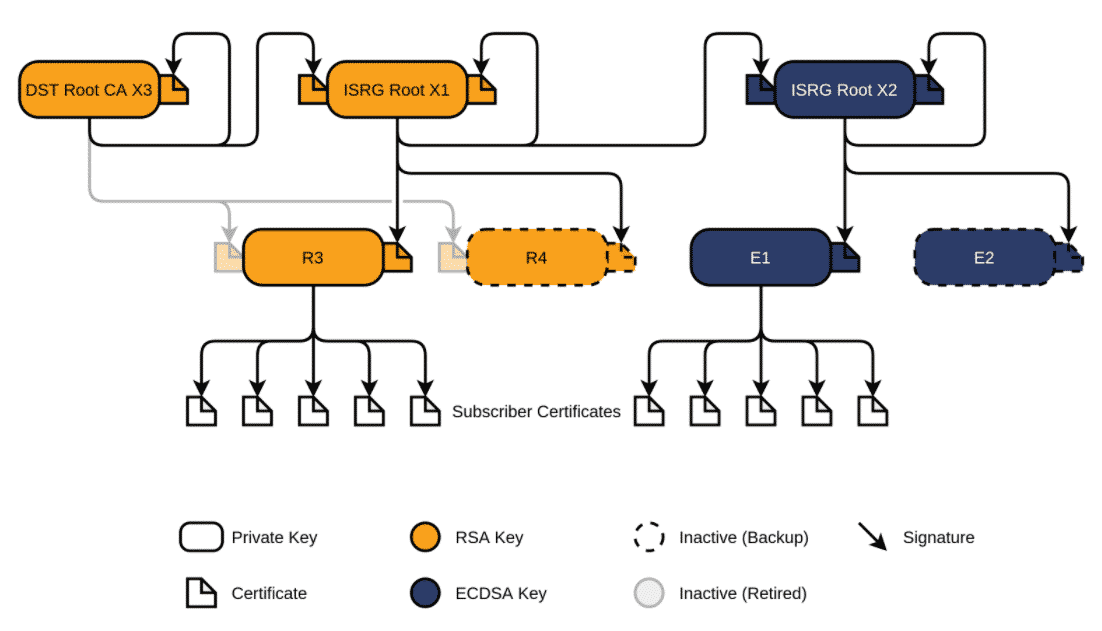
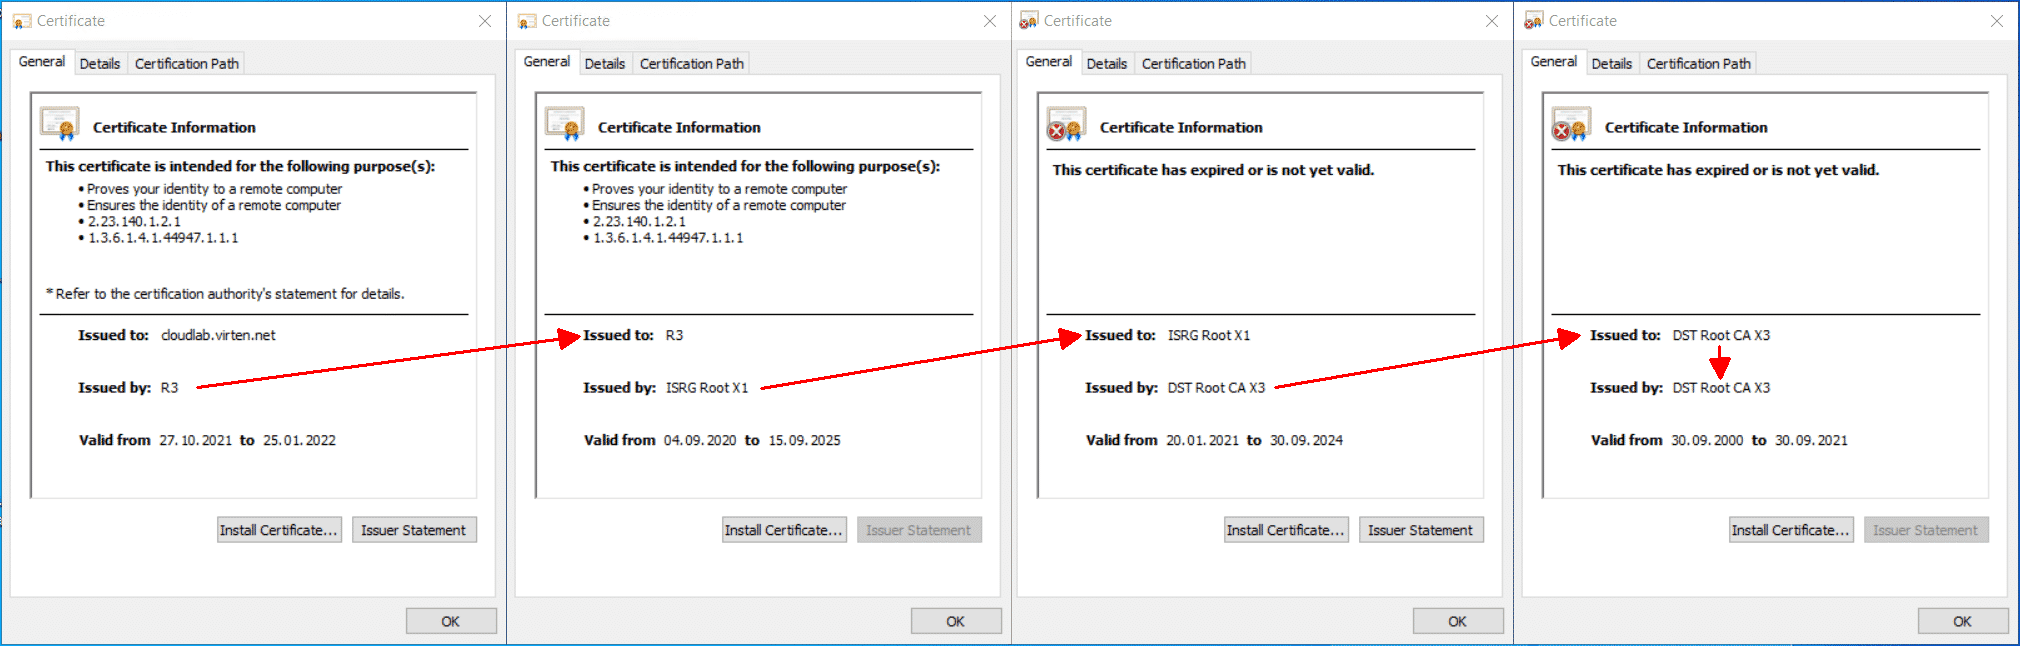
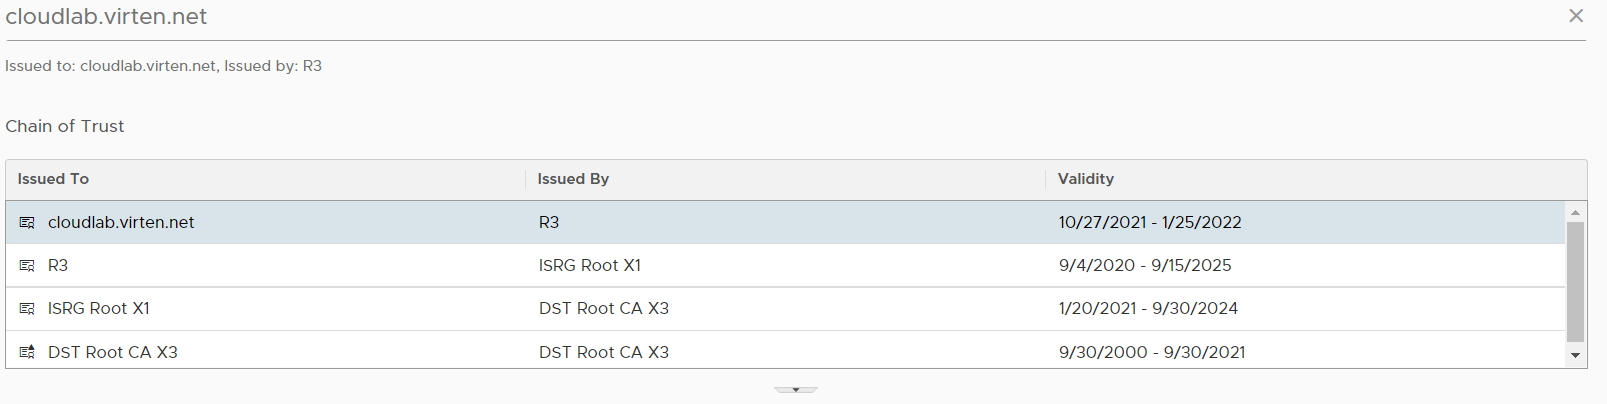
As you can see in the picture, the Server Certificate (Subscriber Certificates) is signed by R3 (Intermediate), which is signed by ISRG Root X1. The ISRG Root X1 itself is signed by itself (Self-Signed) and Cross-Signed by DST Root CA X3 certificate (which is expired in September 2021). To complete the chain, you have add the X3 certificate to the end of the fullchain.
If you look at all 4 certificates next to each other, you can see that the chain is only completed with the DST Root CA X3 certificate.
Solution 1 - Add "DST Root CA X3" to the Chain
[Note: Solution 1 is no longer the preferred option. Please refer to Solution 2 - Replace Cross-Signed X1 with Self-Signed X1]
Go to Let's Encrypt Chain of Trust and download the X3 certificate. You can find the link in the Cross Signing section.
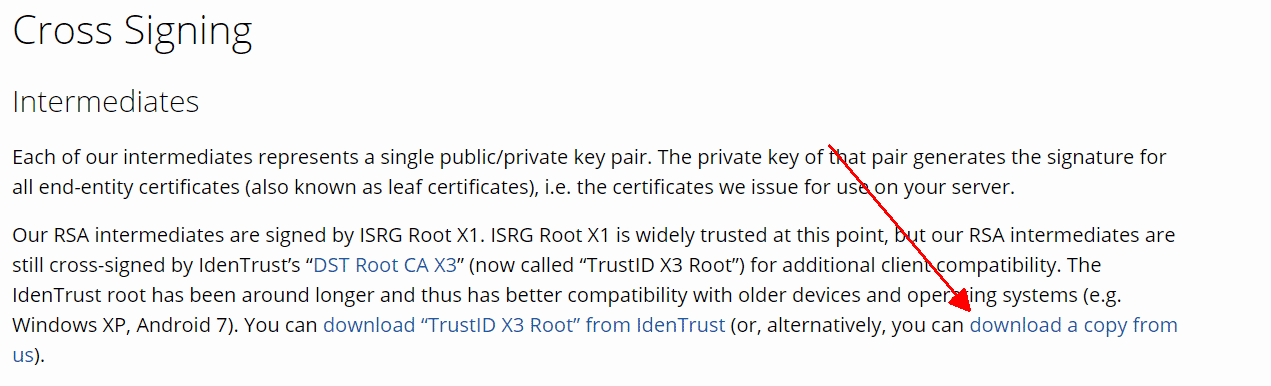
Or just use this direct link: DST Root CA X3
Copy the X3 certificate at the end of your Full-Chain, which then should look like this:
You should now be able to import the certificate in NSX-T (NSX-T Manager > System > Settings > Certificates).
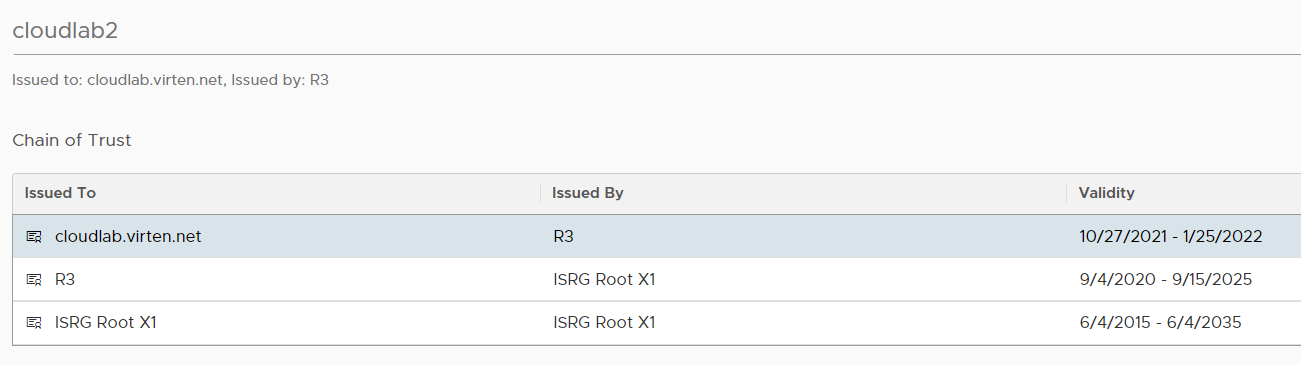
Solution 2 - Replace Cross-Signed X1 with Self-Signed X1
The second option is to replace the Cross-Signed X1 added by certbot with the Self-Signed X1, which can be downloaded from letsencrypt.org.
Download Self-Signed X1: letsencrypt.org/certs/isrgrootx1.pem
The full chain should look like this. The GREEN part is to be replaced with the Self-Signed X1:
You can also create the full chain yourself by adding both, the R3 and X1 to your Server certificate. Just make sure to keep the order Server > R3 > X1.
R3: letsencrypt.org/certs/lets-encrypt-r3.pem
Self-Signed X1: letsencrypt.org/certs/isrgrootx1.pem
When I try to activate the certificate, I get the following error:
{"error_code": 36432, "error_message": "Certificate validation failed. Reason : Certificate was rejected: Certificate expired for CN=DST Root CA X3,O=Digital Signature Trust Co.", "module_name": "node-services"}
Which Feature (Load Balancer, Principal Identity, NSX UI) are you planning to use the certificate for?
Also getting the same error. Have you found a solution tho this?
Which Feature (Load Balancer, Principal Identity, NSX UI) are you planning to use the certificate for?
NSX UI
Tried to reproduce and added "Solution 2 - Replace Cross-Signed X1 with Self-Signed X1". Please give it a try.
Certs is outdated!
Thanks. Solution 2 works.