In an earlier article, I've explained how to integrate VMware NSX-T Advanced Loadbalancer (formerly known as AVI) into VMware Cloud Director. Today, I want to show how to automate those steps with Terraform. Terraform is an open-source infrastructure as code software tool created by HashiCorp. The following steps are part of the automated configuration:
- Create vCenter Content Library for SE Images
- Create Service Engine Management Network with DHCP in NSX-T
- Create NSX-T Cloud in NSX-ALB
- Create Service Engine Group in NSX-ALB
- Add NSX-ALB Controller to VMware Cloud Director
- Import NSX-T Cloud to VMware Cloud Director
- Import Service Engine Group to VMware Cloud Director
Prerequisites
Similar to the manual version, there should be an existing NSX-T, vCenter and VCD basic configuration:
- vCenter, ESX, Cloud Director and NSX-T installed and configured.
- NSX-T: Tier-0 Gateway with any kind of external connection.
- Cloud Director: Network Pool, Tier-0 Gateway (External Network) and Provider VDC ready to host tenants.
- Check the Interoperability of VMware Cloud Director and the version of ALB you are planning to use. Go to VMware Interop Matrix and Compare VMware Cloud Director with Avi Vantage Platform to find supported Versions. For this article, I'm using Cloud Director 10.3.1, NSX-T 3.1.3.1 and ALB 21.1.1.
The OVA deployment and initial configuration are not part of the manifest. While it is technically possible to deploy an OVA with Terraform, mixing of deployment and configuration is tricky. An easy way to deploy appliances is by using my PowerShell OVF-Helper for NSX-T Advanced Load Balancer. After deploying the appliance, you must:
- Change NSX-ALB admin password (Happens at the first login. It's called "set" it the UI, but it is actually "change" from the default admin password "58NFaGDJm(PJH0G")
- Finish the NSX-ALB initial Configuration (See Step 1)
- Replace the NSX-ALB Certificate (See Step 1)
- Import the NSX-ALB Certificate into Cloud Director (VCD > Administration > Certificate Management > Trusted Certificate > TEST REMOTE CONNECTION > Enter URL > CONNECT > TRUST)
Download and Prepare the Terraform Manifest
The manifest is available on Github: github.com/fgrehl/terraform-examples/tree/main/vcd-nsx_alb_integration
# git clone https://github.com/fgrehl/terraform-examples
# cd terraform-examples/vcd-nsx_alb_integration/
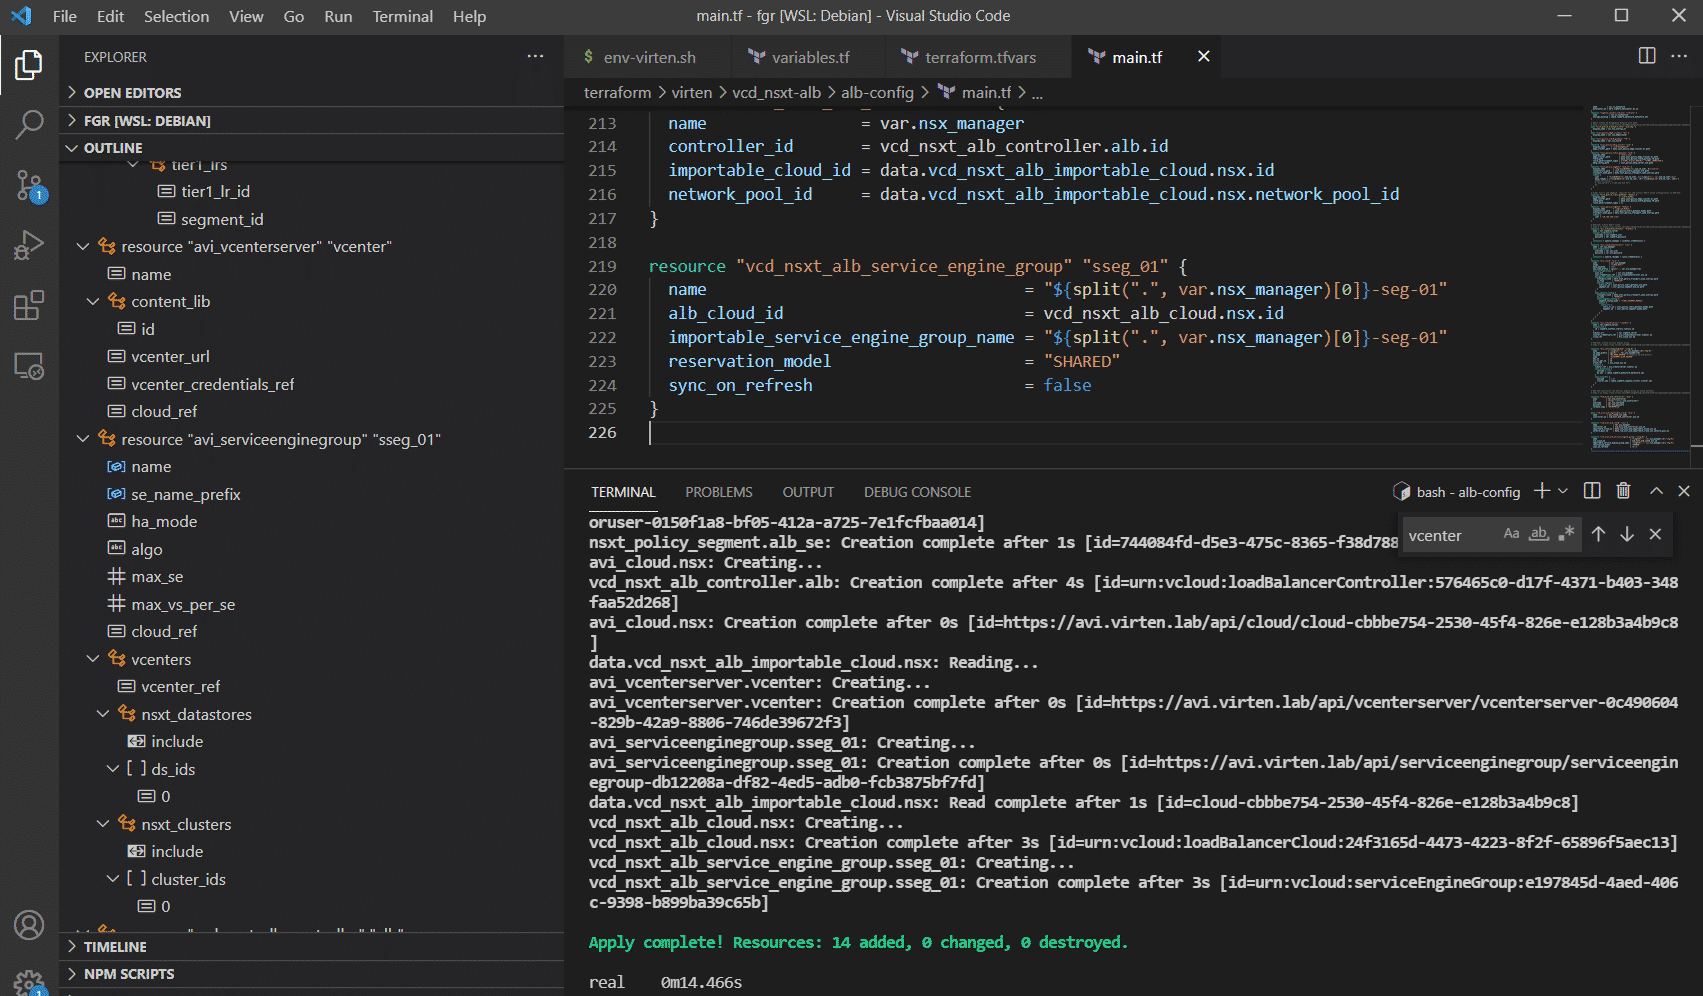
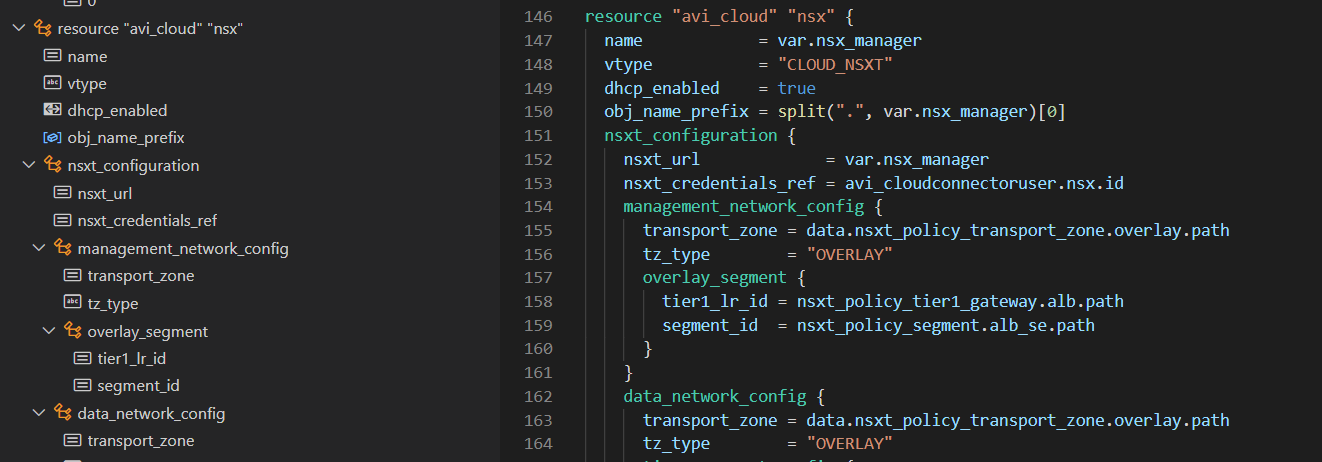
In terraform.tfvars, you can configure the variables to fit your environment. All objects, except for the Content Library (vc_contentlib) and SE Management Tier-1/Segment (alb_se_cidr), must already exist. The magic happens in main.tf. The steps are annotated and exactly the same as in the Getting Started article.
Terraform Init / Plan / Apply
When everything is configured, you have to initialize terraform, which will download the required modules. Terraform commands need to be run in the directory where the .tf files are.
# terraform init
Initializing the backend...

Initializing provider plugins...
- Finding latest version of vmware/vcd...
- Finding vmware/avi versions matching "21.1.1"...
- Finding latest version of hashicorp/vsphere...
- Finding latest version of vmware/nsxt...
- Installing vmware/avi v21.1.1...
- Installed vmware/avi v21.1.1 (signed by a HashiCorp partner, key ID 6B6B0F38607A2264)
- Installing hashicorp/vsphere v2.0.2...
- Installed hashicorp/vsphere v2.0.2 (signed by HashiCorp)
- Installing vmware/nsxt v3.2.4...
- Installed vmware/nsxt v3.2.4 (signed by a HashiCorp partner, key ID 6B6B0F38607A2264)
- Installing vmware/vcd v3.4.0...
- Installed vmware/vcd v3.4.0 (signed by a HashiCorp partner, key ID 8BF53DB49CDB70B0)

Partner and community providers are signed by their developers.
If you'd like to know more about provider signing, you can read about it here:
https://www.terraform.io/docs/cli/plugins/signing.html

Terraform has created a lock file .terraform.lock.hcl to record the provider
selections it made above. Include this file in your version control repository
so that Terraform can guarantee to make the same selections by default when
you run "terraform init" in the future.

Terraform has been successfully initialized!

You may now begin working with Terraform. Try running "terraform plan" to see
any changes that are required for your infrastructure. All Terraform commands
should now work.

If you ever set or change modules or backend configuration for Terraform,
rerun this command to reinitialize your working directory. If you forget, other
commands will detect it and remind you to do so if necessary.
Start a dry run to see what Terraform is going to do.
# terraform plan
[....]
Plan: 14 to add, 0 to change, 0 to destroy.
This command should run without errors. You are now ready to deploy.
# terraform apply
[....]
Plan: 14 to add, 0 to change, 0 to destroy.
Do you want to perform these actions?
  Terraform will perform the actions described above.
  Only 'yes' will be accepted to approve.

  Enter a value: yes