With all the equipment that is necessary to run a homelab, it can be challenging to keep the space organized. I'm running Intel NUCs in my homelab since the early generations and never found a good solution to organize them, so they were always laying around on a shelf. With the help of a 3D printer and a 10 Inch rack, I started building custom rackmount kits for my equipment.
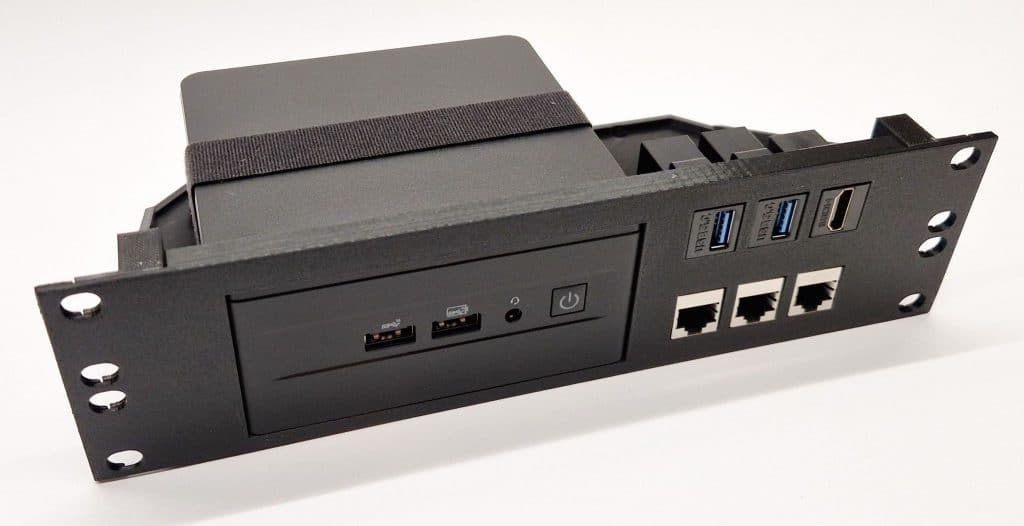
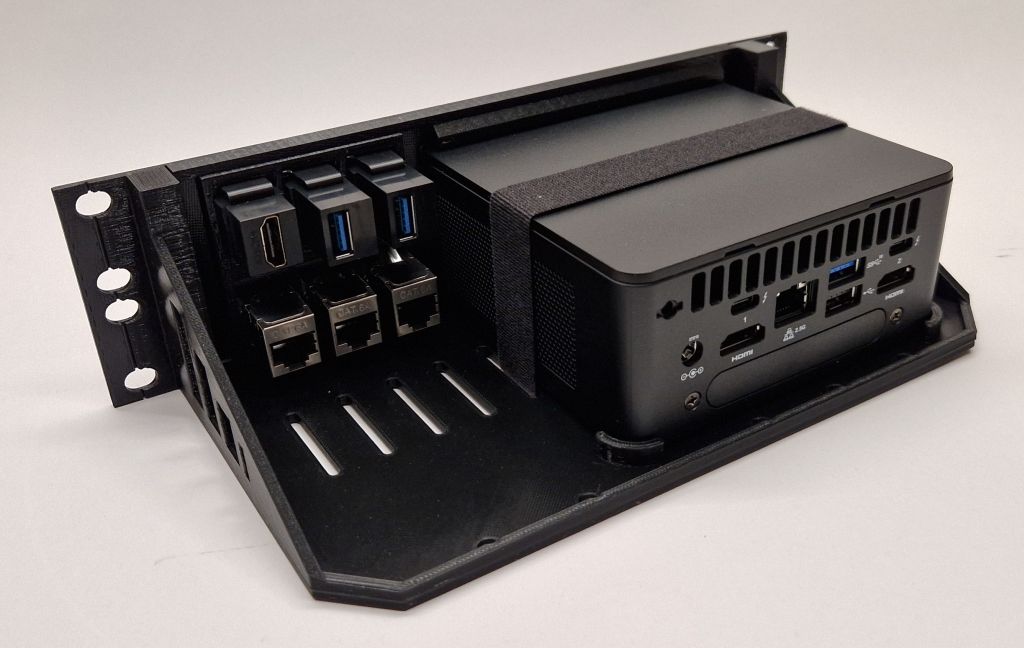
The first project is my latest 12th Gen Intel NUC and the final result looks like this:
I wanted to achieve the following goals:
- The design should be reproducible for other NUC Generations
- The rackmount should be easy to print and sturdy
- The NUC should be attached to the Rackmount so that it doesn't move
- All Ports should be accessible from the front
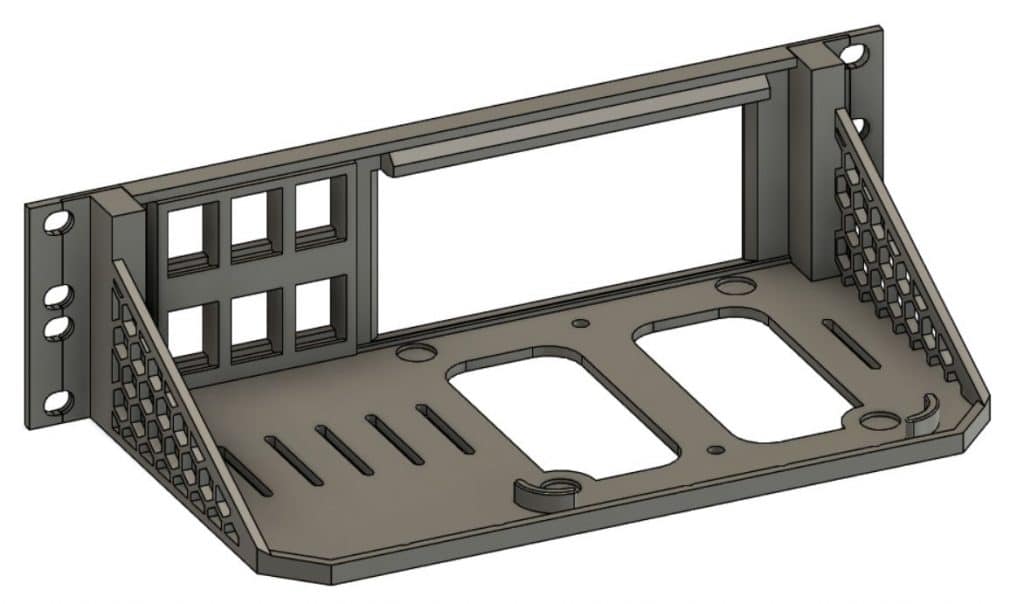
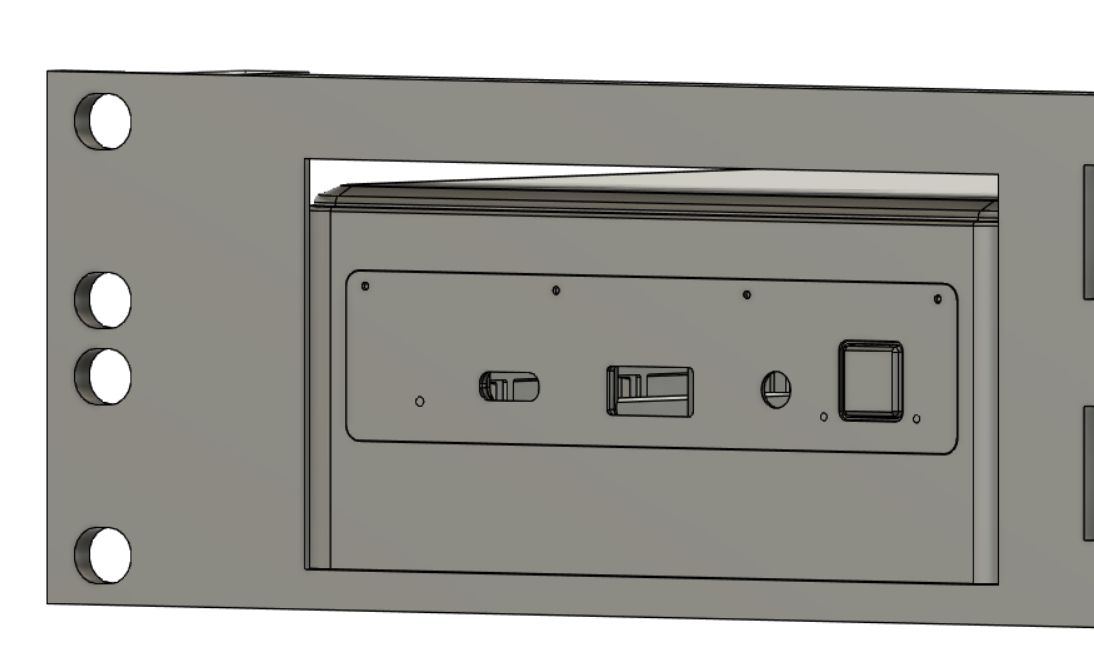
- With the NUC being too large for 2U (1U = 44,45mm or 1¾ Inch) and too small for 1U, I want to create a 1.5 HE solution that allows mounting 2 NUCs in 3U.
Designing the basic rackmount dimensions itself was quite easy because 10-inch server cabinets are similar to the well-known 19-inch racks well documented. Also, Intel offers great help for designing accessories by providing Mechanical Drawings for each of their Intel NUCs.
With a usable width of about 218mm in a 10-inch rack, there is enough space to add 6 keystone ports to the front panel. Keystone modules are available with a broad range of options, including couplers for RJ45, USB, and HDMI ports. With a Keystone coupler and a short cable, you can make all ports accessible from the front.
There are two options available to attach the NUC to the Rackmount. The first option is a velcro strap that holds the NUC tight to the bottom. That already creates a sturdy connection as the NUC sits tight in the base. The second option is to use the two VESA screws that are provided with the NUC Kit to attach it from the bottom.
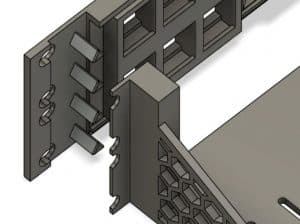
To be able to print sharp edges in a horizontal and vertical direction, the print needs to be in two parts. For achieving a sturdy connection, I created triangle-shaped connectors which also make the assembly very easy.
Both parts should be glued together using hard plastic glue on the triangle connectors, and the surrounding faces. This creates a connection that is as strong as a one-part print.
The 4 mounting holes are aligned so that two can be used to attach the Rackmount to the Rack. Which holes are fitting depends on whether the unused 0.5U is on the top or bottom. This allows the seamless installation of two systems in 3U.
Now it's time to put everything together. Additionally to the Rackmount, you need:
- 12th Gen NUC (Tall)
- 3 RJ45 Keystone coupler + 0,25m cable
- 2 USB 3.0 Keystone couple + 0,25m cable
- 1 HDMI Keystone couple + 0,25m cable
- 400x20mm double-sided velcro tape
- Small cable ties
The 3D model and print files are available on Printables for free.
Hi , it is fit also for 10th generation?
Or any recommendations for fitting 3x Intel nuc10 rack mount case.
Thanks
The 10th was smaller and had bigger feet. It would create a gap and wouldn't fit nicely. Give me some time, I am going to publish Rackmounts for other NUC Generations too.
This is what it would look like:
Thank you very.
God bless you.
Here is the 10th Gen Model:
https://www.printables.com/model/450104-10th-gen-intel-nuc-10-inch-rackmount
Mine may not be a typical home lab, but I have seven NUC's screwed on planks of wood with their supplied VESA mounts. The wood is angled so the servers van be removed up while the cables run horizontally out of the back ports.
Power goes down to the UPS feed and network is kept tidy with varying cable lengths and velcro strips.
It saves on floor space and gives me the satisfaction of using all that Intel sold me :-)
wow
so great!
This is exactly what I was searching for and you just posted it yesterday. Thanks!