Last week I published 3D models for a 12th Generation NUC 10-inch Rack Kit. This was only the start of a series I'm going to publish. The second model is for one of my older systems, the 7th Generation NUC. If you have access to a 3D FDM printer, you can easily print one for yourself. All print files are available for free.
Download: 7th Gen Intel NUC - 10 Inch Rackmount (Printables.com)
Features
- Modular and reproducible Design
- Easy to print and sturdy
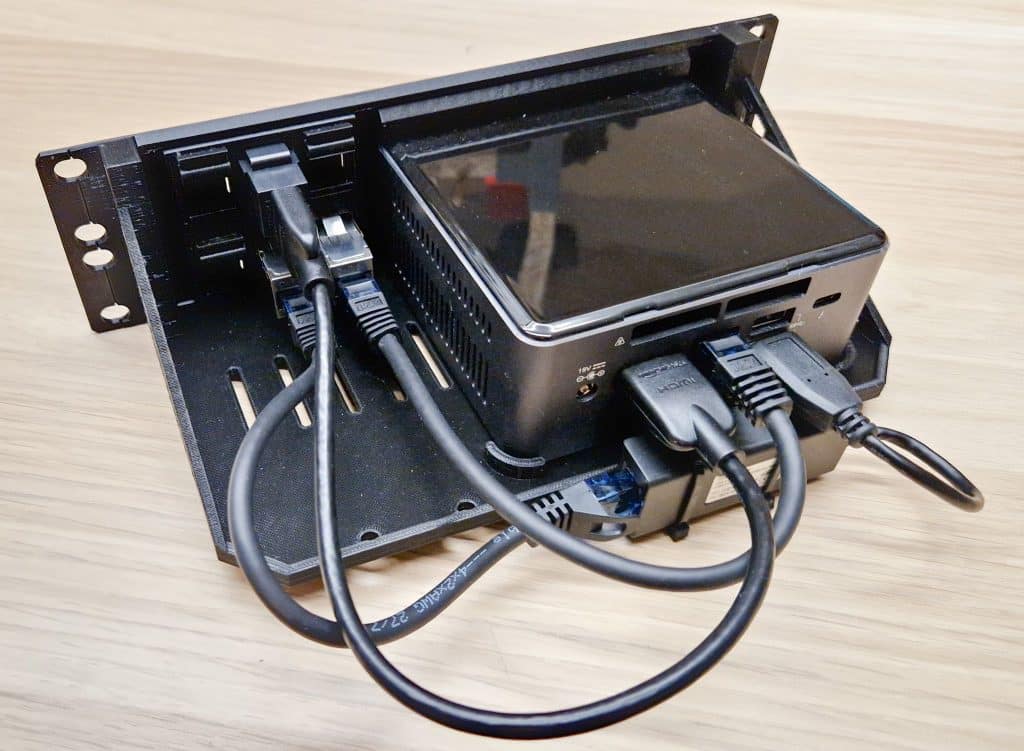
- NUC is attached to the Rackmount using VESA mounts or Velcro Straps
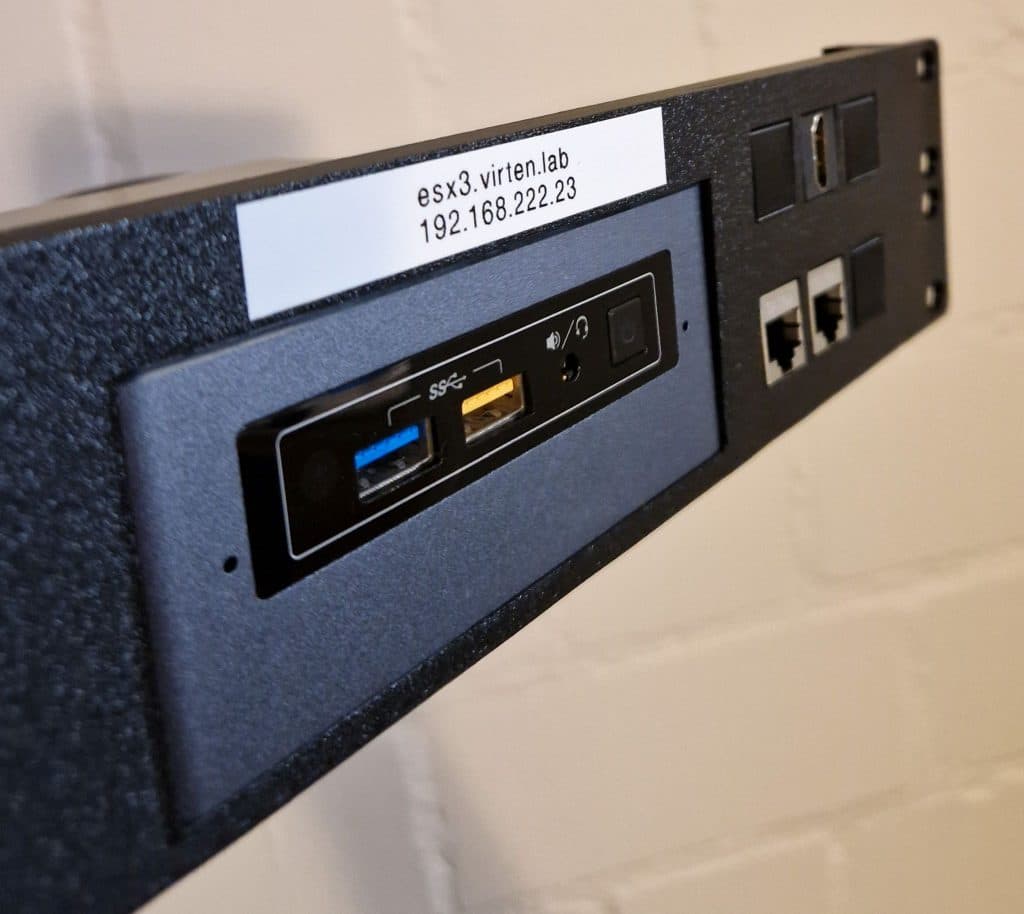
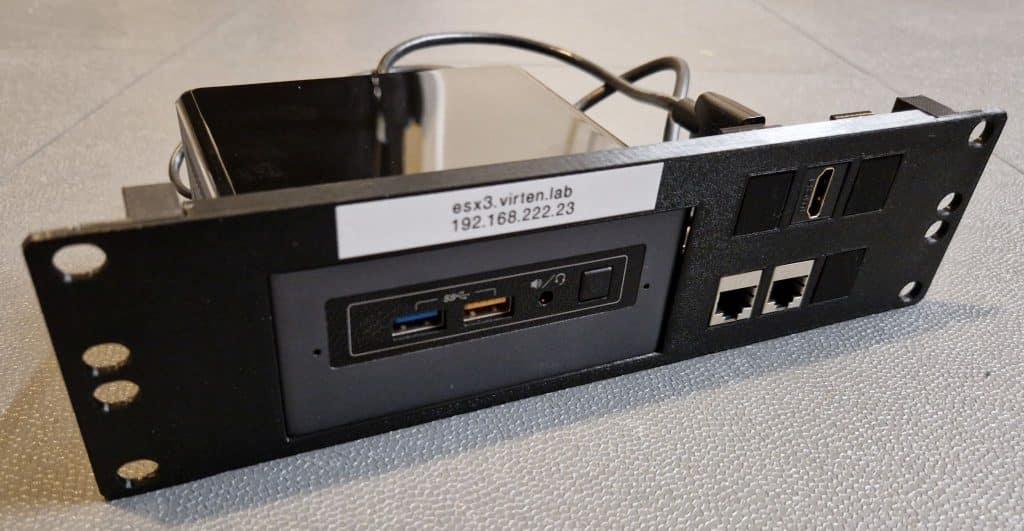
- Front Access for Ports using Keystone Adapters
- 1.5 HE design that allows mounting 2 NUCs in 3U
Design
The design is very similar to the base model, create for the 12th Gen NUC. With the set of Mechanical Drawings provided by Intel, the adaption to the Rackmount kit is simple. The chassis dimensions are only a few millimeters different and the feet are slightly larger. Also, the front needed a small modification to fit the curved top.
With a usable width of about 218mm in a 10-inch rack, there is enough space to add 6 keystone ports to the front panel. Keystone modules are available with a broad range of options, including couplers for RJ45, USB, and HDMI ports. With a Keystone coupler and a short cable, you can make all ports accessible from the front.
Printing
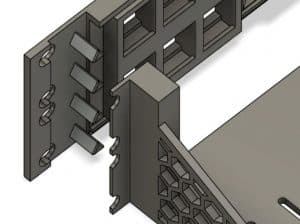
To be able to print sharp edges in a horizontal and vertical direction, the print needs to be in two parts. For achieving a sturdy connection, I created triangle-shaped connectors which also make the assembly very easy.
Both parts should be glued together using hard plastic glue on the triangle connectors, and the surrounding faces. This creates a connection that is as strong as a one-part print.
I recommend printing in PETG because the weight and heat might deform PLA over time. You might also want to increase the bed temperature if you have problems with the edges lifting up (The edges of the print bed are usually about 5-10°C cooler).
The model takes about 11 hours to print and consumes 125 grams of filament (which is worth roughly 3-4 €).
Installation
There are two options available to attach the NUC to the Rackmount. The first option is a velcro strap that holds the NUC tight to the bottom. That already creates a sturdy connection as the NUC sits tight in the base. The second option is to use the two VESA screws that are provided with the NUC Kit to attach it from the bottom.
The 4 mounting holes are aligned so that two can be used to attach the Rackmount to the Rack. Which holes are fitting depends on whether the unused 0.5U is on the top or bottom. This allows the seamless installation of two systems in 3U.
Additionally to the Rackmount, you need:
- 7th Gen NUC (Tall)
- RJ45 Keystone coupler + 0,25m cable
- USB 3.0 Keystone couple + 0,25m cable
- HDMI Keystone couple + 0,25m cable
- 400x20mm double-sided velcro tape
- Small cable ties
The 3D model and print files are available on Printables for free.