This article describes how to integrate VMware vCenter Server into your authentication infrastructure. Identity sources can be Microsoft Active Directory installations or OpenLDAP.
Bundled with the vCenter Servers is an internal user database that allows you to add and manage Users from the vCenter UI. Users management and Single Sign-On are provided by the embedded Platform Service Controller. In a large environment, you might want to connect your virtualization infrastructure to a centrally managed identity provider.
As compared to previous versions, please note that VMware has announced the deprecation of Integrated Windows Authentication (IWA). IWA was the authentication method where you joined the vCenter Server into your Active Directory domain. While Active Directory is still supported for authentication, it is recommended to use AD over LDAP or Identity Federation with ADFS for authentication. See KB78506 for further information.
Obtain LDAPS Certificate
Due to security risks, LDAPS is replacing LDAP as the accepted directory protocol. It is highly recommended to use LDAPS which uses SSL to establish a secure connection between client and server before any data is exchanged. Currently, there is no process to get the certificate available in the vCenter UI so the certificate needs to be obtained upfront.
- Connect to the vCenter Server Appliance (or any system with OpenSSL CLI installed) with SSH and login as root.
- Run the following command to show the LDAP certificate
# openssl s_client -showcerts -connect [LDAPS-Server]:636
- The command displays the certificate chain and SSL session information. You can either use the CA certificate or the server certificate. Using the CA certificate has the advantage that you don't have to reconfigure the identity provider when the LDAPS certificate is replaced.
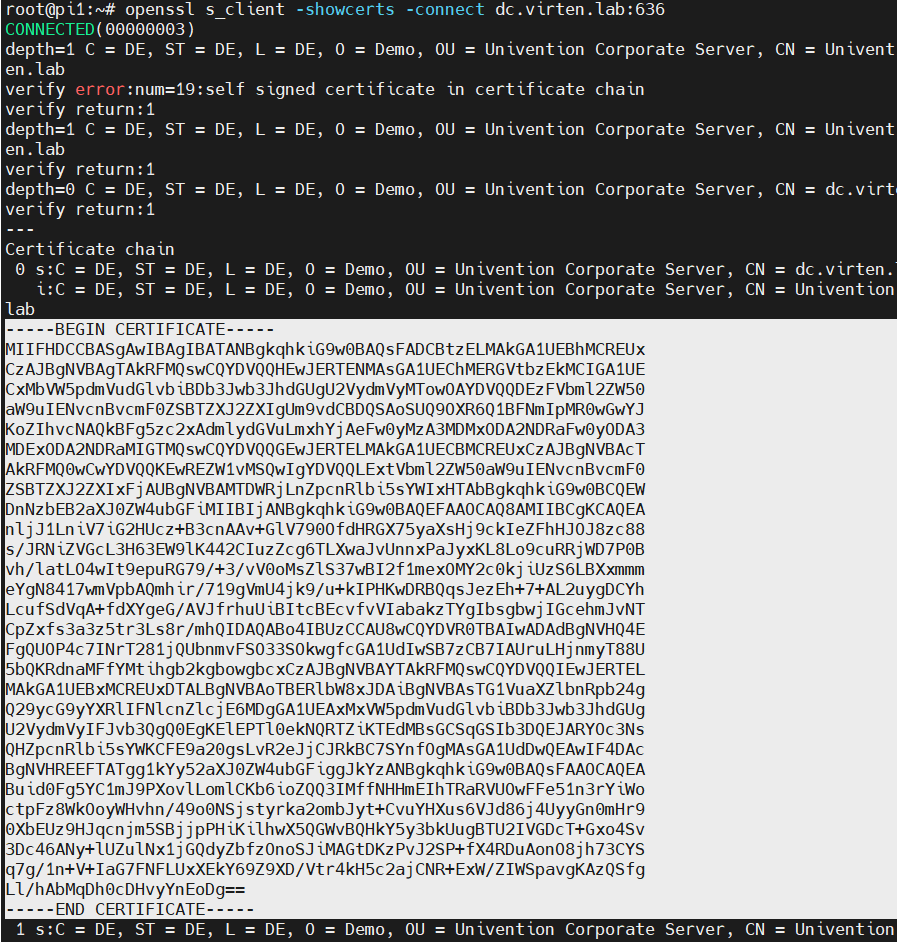
- Copy everything between (and including) -----BEGIN CERTIFICATE----- and -----END CERTIFICATE----- to a text file.
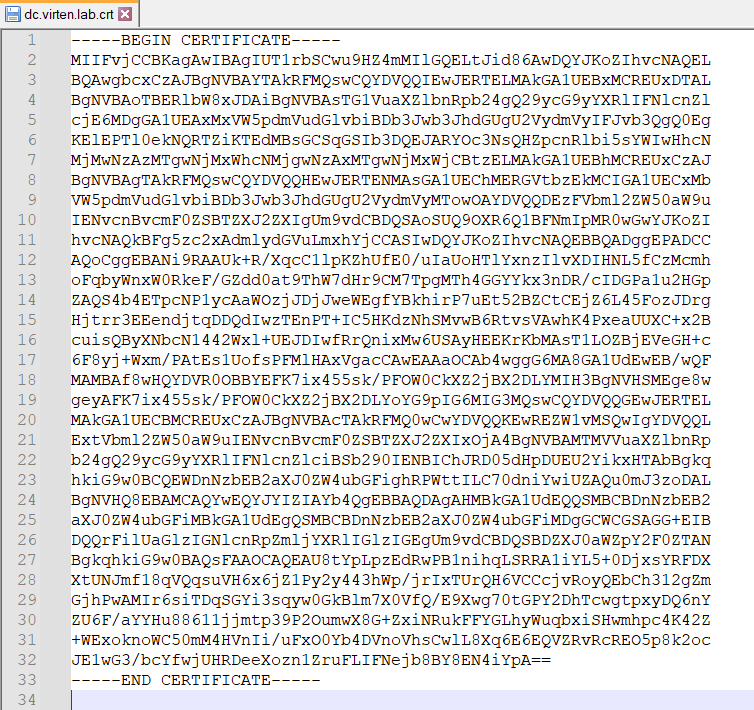
- Save the file with a .crt extension.
Add Identity Provider
- Open vSphere Client
- Login as Single Sign-On Administrator
- Navigate to Administration > Single Sign On > Configuration
- In the Identity Provider tab, open Identity Sources
- Click ADD

- Change the Identity Source Type to Active Directory over LDAP

- Fill out the remaining fields as follows:
Identity source name: Label for identification (Should be the Domain Name)
Base distinguished name for users: The Distinguished Name (DN) of the starting point for directory server searches. Example: If your domain name is virten.lab the DN for the entire directory is "DC=virten,DC=lab".
Base distinguished name for groups: The Distinguished Name (DN) of the starting point for directory server searches.
Domain name: Your domain name. Example: "virten.lab"
Domain alias: Your NetBIOS name. Example: "virten"
Username: Domain user with at least browse privileges.
If you get an "Invalid DN syntax." error, try to enter the user in DN format: "uid=administrator,cn=users,dc=virten,dc=lab"
Password: The domain user's password.
Connect to: Select "Connect to any domain controller in the domain" if you want to use DNS to identify domain controllers or configure static primary and secondary URLs. When using static entries, you can either query the local directory (Port 636), or the global catalog (Port 3269). (For legacy unsecured connections, use 389/3268)
Example: "ldap://dc.virten.lab:636".
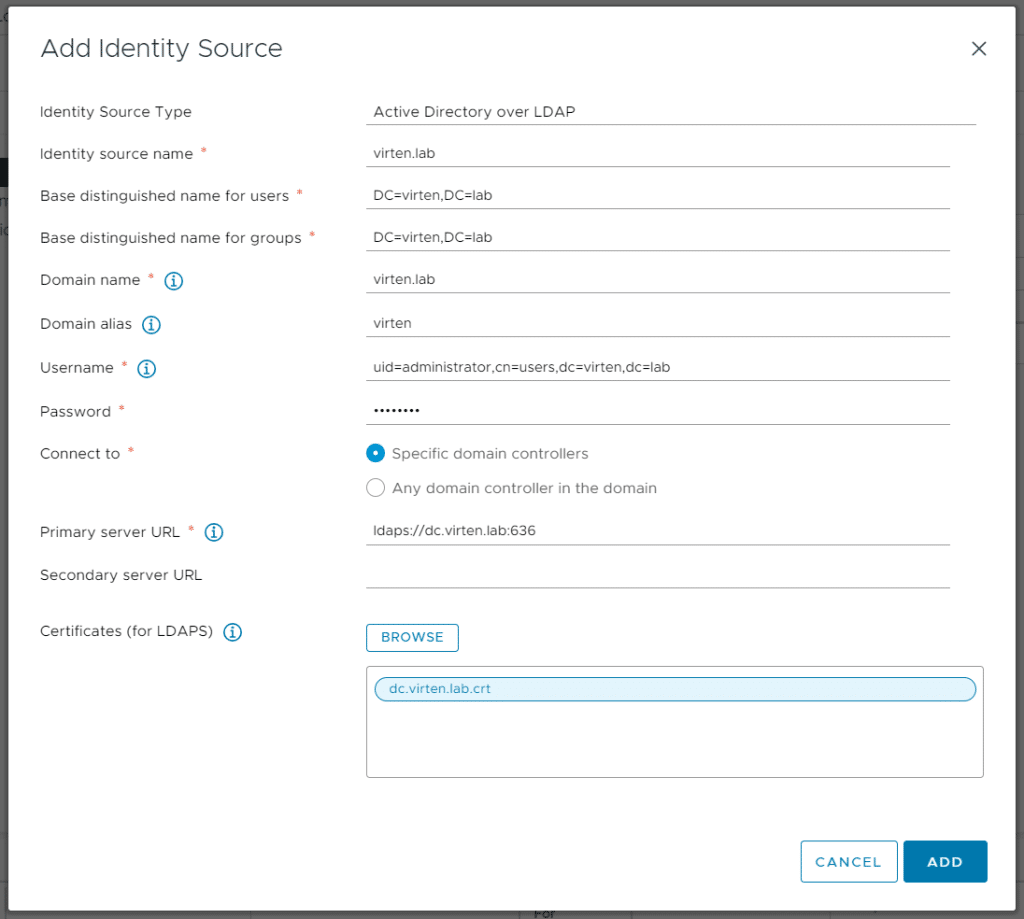
- Click Browse next to Certificate (for LDAPS)
- Select the .crt file, obtained from the LDAP Server
- Click ADD and finish the configuration wizard
- Back at Identity Sources your LDAP should appear in the list and from now on you are able to assign vCenter permissions to users and groups from your active directory.
- Select your Active Directory and click the SET AS DEFAULT button to make it to your vCenters default domain for authentication which means that everyone who does not specify the domain name to log in gets automatically authenticated against this domain.
- To log in with AD users, you have to set permissions. To add an AD User/Group as Global Administrator navigate to Administration > Access Control > Global Permissions
- Click ADD
- Select the domain and start typing in the User/Group search field to select a Domain entity.
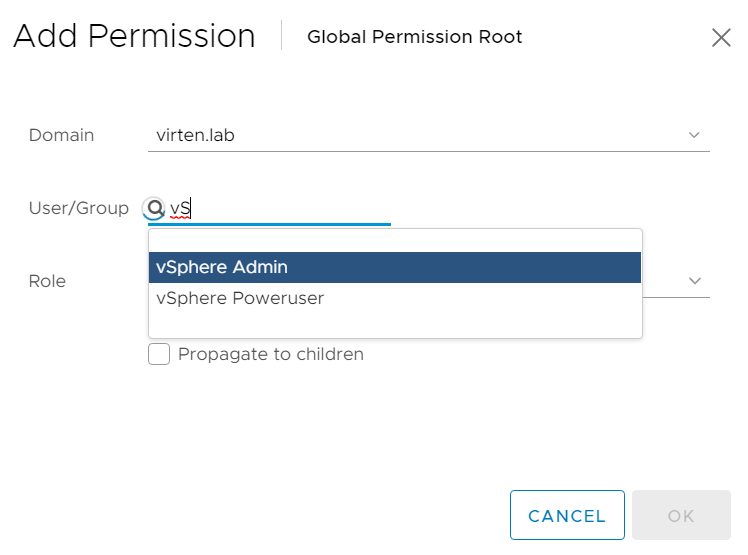
- Press OK
You should now be able to log in with your Active Directory account. To troubleshoot any authentication-related issues, check the log files on the vCenter Server Appliance in /var/log/vmware/sso
It is unfortunate that there is no corresponding API for configuring LDAPS.
Thank you, this was very helpful.