This article explains various options to use USB drives as Datastores in VMware ESXi 8.0. Using USB-based Datastores can be useful for migrations, backups, testing, or in lab environments.
Please be aware that using USB devices as Datastore is not supported by VMware so be careful when using this method with sensitive data.
USB Drive Recommendations
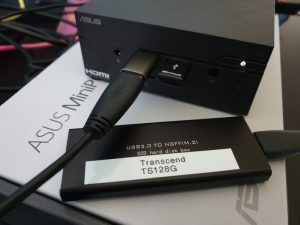
There are no limitations when it comes to the form factor or USB drives. You can use small USB flash drives, large 3.5" USB Hard Drives with high capacity, or USB-based External Solid State Drives. Due to performance and endurance issues, I would not recommend using inexpensive USB thumb drives for Datastores.
Prerequisites
Some commands require SSH access to the ESXi host, which can be enabled from the vSphere Client > ESXi Host > Configure > System > Services > SSH > Start or from the ESXi Host Client > Host > Manage > Services > TSM-SSH > Start. When enabled, you can login to the ESXi host using an SSH client like PuTTY.
Step 1 - Disable USB Passthrough
The default behavior when connecting USB drives to an ESXi host is to make the device available for connecting to Virtual Machines using USB Passthrough. You have 3 options to disable USB Passthrough:
- On per Device basis using esxcli passthrough command
- On per Model basis using USB quirks advanced settings
- Completely by disabling usbarbitrator
Option 1 - Disable USB Passthrough per Device
The first option is based on USB Bus and Vendor IDs. While this setting persists reboots generally, it might get lost when the Bus or Device ID changes which might happen when the drive is plugged into another port or another USB device is connected and displaces the device ID.
- Plug the USB drive into your ESXi
- Connect to the ESXi host using SSH and login as root
- List available USB devices and locate your drive
esxcli hardware usb passthrough device list

- Note connection IDs in the following format: Bus#:Dev#:vendorId:productId (eg. 1:4:1058:1140)
- Disable USB passthrough using the following command:
esxcli hardware usb passthrough device disable -d 1:4:1058:1140
- There is no need to reboot the system for the configuration to become active
Option 2 - Disable USB Passthrough using USB Quirks
The second option disables USB Passthrough for a specific Model (Vendor ID/Product ID combination) using USB Quirks advanced settings.
- Plug the USB drive into your ESXi
- Connect to the ESXi host using SSH and login as root
- List available USB devices. The first number is the Vendor ID, the second number is the Product ID.
lsusb

- To set USB Quirks, the ID needs to be specified in the following format: 0xDeviceID:0xVendorID (eg. 0x1058:0x1140)
- Disable USB passthrough using the following command (Replace with ID from step 3
esxcli system settings advanced set -o /USB/quirks -s 0x1058:0x1140:0:0xffff:UQ_MSC_NO_UNCLAIM
- Reboot ESXi to make the changes active
Option 3 - Disable USB Arbitrator
Disabling the USB arbitrator can be done from the UI or CLI.
UI:
- Open the vSphere Client
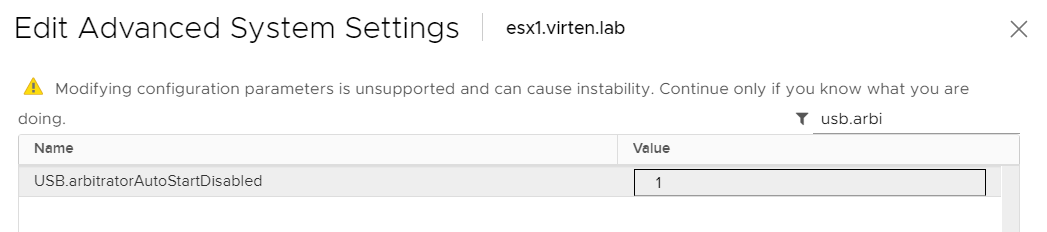
- Navigate to ESX > Configure > System > Advanced System Settings and click Edit...
- Search for USB.arbitratorAutoStartDisabled and set the Value to 1
- Reboot the ESXi
- Plug the USB drive into your ESXi
CLI:
- Connect to the ESXi host using SSH and login as root
- Stop the USB arbitrator service.
/etc/init.d/usbarbitrator stop
- Plug the USB drive into your ESXi
- Permanently disable the USB arbitrator service after reboot.
# chkconfig usbarbitrator off
- No reboot is required
Step 2 - Create VMFS Datastore
When passthrough is disabled you should be able to create a Datastore using the vSphere Client by Right-Clicking the ESXi host and selecting Actions > Storage > New Datastore... or from the ESXi Host Client within Storage > New Datastore.
If the drive does not show up in the New Datastore wizard, perform a rescan (Right-Click > Rescan Storage) and verify that the device is listed in Storage Device. If that does not help, you have to create the Datastore using the CLI:
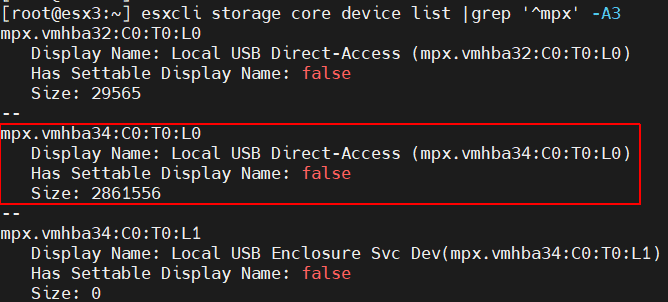
- Identify your Device Path (mpx.vmhba##). Run the following command and try to identify your disk based on the Size:
esxcli storage core device list |grep '^mpx' -A3
If in double, reconnect the drive and check /var/log/vmkernel.log for the following message:
vmkernel: Successfully registered device "mpx.vmhba34:C0:T0:L0" from plugin "NMP" of type 0
- Create a helper variable with the path of the disk:
DISK="/vmfs/devices/disks/mpx.vmhba34:C0:T0:L0"
- Create a new label on the drive (All existing data will be lost!)
partedUtil mklabel ${DISK} gpt - Create a VMFS partition (GUID AA31E02A400F11DB9590000C2911D1B8) - Start and end sectors are calculated by the command:
partedUtil "setptbl" "${DISK}" "gpt" "1 2048 $(eval expr $(partedUtil getptbl ${DISK} | tail -1 | awk '{print $1 " \\* " $2 " \\* " $3}') - 1) AA31E02A400F11DB9590000C2911D1B8 0" - Format the partition using vmfstools
vmkfstools -C vmfs6 -S usbdrive ${DISK}:1
The USB Datastore should now appear in your datastores view.
Additional Tips
USB Drive as Backup for ESXi with ghettoVCB
Use the external drive to create a backup of your Virtual Machines with ghettoVCB.
Copy to USB Drive is Slow - Use vMotion or vmkfstools
Copying data to the USB Drive using cp, mv or scp is slow. Instead, use Storage vMotion or the vmkfstools utility to clone virtual disks to the USB Datastore.
vmkfstools -i <src>.vmdk <dst>.vmdk
Known Problems
Wrong Device ID as "Display Name"
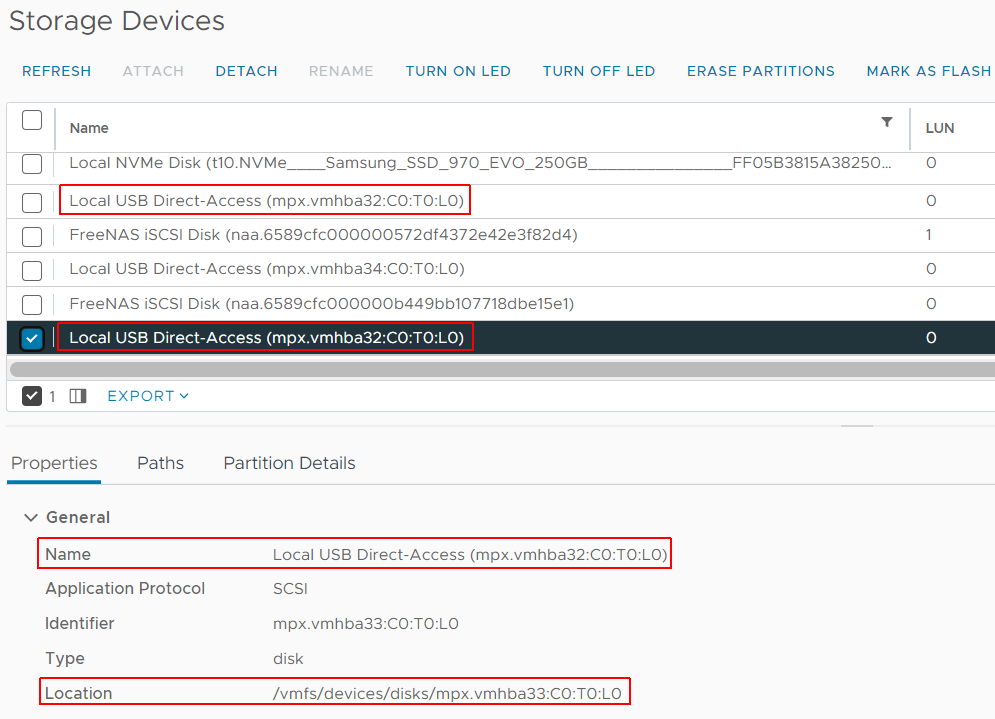
When you try to identify the disk, double-check that you did not mix up your drives. The name shown in the UI does not change when the ID changes. Here is an example where the highlighted drive has been pushed to mpx.vmhba33 by a new device. The display name stays mpx.vmhba32.
Existing Datastores are not mounted automatically
A problem that I run into during migration scenarios is that when you connect a drive that already contains a VMFS datastore, the datastore does not show up. You can see the device but the Datastore remains offline. The vmkernel.log hints at the problem:
cpu0:65593)LVM: 11136: Device mpx.vmhba34:C0:T0:L0:1 detected to be a snapshot:
The Datastore is detected as a snapshot. Get a list of VMFS snapshots with esxcli:
# esxcli storage vmfs snapshot list
583b1a72-ade01532-55f6-f44d30649051
 Volume Name: usbflash
 VMFS UUID: 583b1a72-ade01532-55f6-f44d30649051
 Can mount: true
 Reason for un-mountability:
 Can resignature: true
 Reason for non-resignaturability:
 Unresolved Extent Count: 1
Use the VMFS UUID to mount the datastore:
# esxcli storage vmfs snapshot mount -u 583b1a72-ade01532-55f6-f44d30649051
The Datastore should now be accessible.
Hi, your tutorial helped me to mount my USB hard disk as a datastore. Greatly appreciated! But I found that I can only mount one USB hard disk, when I connect two USB hard disks, only one will work and appear on the device. If I want the second one to work, I need to disconnect the first USB drive before the second one will work. Do you have any solution for this? Was looking forward to your reply! By the way, I used the method to disable the USB Arbitrator.
Great tutorial!
Works like a charm :)
At first I was a little confused as to why I the newly created USB drive showed up, but I was not able to add it to a -new- Datastore...
But then I realised the USB thinghy IS the Datastore. So it was allready completely set up.
Thanks!
Thank you so much for posting this. It was not showing up in the datastores unless you did this via the CLI. The GUI way never allows you to set the name so it never gets past the point of letting the "FINISH" happen.
I don't know you, but I love you. Thanks for fixing my datastore