 While evaluating Backup solutions in my Homelab I recently came across a relatively new vendor, NAKIVO, that caught my attention. NAKIVO, founded in 2012, is currently the fastest growing VM-Backup company and its product is highly optimized for virtualized platforms. I was looking for solution that is easy to deploy and does not require much resources.
NAKIVO Backup & Replication is mainly fround in the SMB market today, but they have some great enterprise grade features like multi-tenancy and a customizable user interface in the latest release.
Why NAKIVO
As of today I'm using NAKIVO for about 2 month which gave me a good understanding of how their software works and why they definitely deserve a spot in shortlists. The following points are my personal highlights:
- Ease of use - From downloading to the first backup it took me about 20 minutes, without reading any documentation. The Web Interface self-explaining and easy to understand, without being overloaded with functions.
- Performance - Backup and Web Interface performance is great.
- KB References - When something goes wrong, error messages are provided with a KB reference on how to troubleshoot and fix the issue.
- Virtual Appliance - NAKIVO Backup & Replication is available for Windows, Linux and as a Virtual Appliance, removing the need to maintain it on OS level. This is typically my first feature request when I need to implement new software. No one wants a Windows-based management software when the platform is 100% based on Linux.
- NAS Integration - Many small companies are using an inexpensive NAS as backup storage. Implementing the backup solution into the NAS is a great idea. NAKIVO Backup & Replication can be installed directly onto a Synology or Western Digital NAS.
- Global Deduplication - Virtual Machine backups are deduplicated across the entire repository. During the Backup, blocks are compared in 4MB chunks by the transporter. Identical block are discarded and only referenced in the backup repository.
- Screenshot Verification - A backup is worthless when the restore does not work. Backup verification is a very important but also very often ignored. NAKIVO can verify the backup automatically by booting it and taking a screenshot.
- Pricing - The pricing is very attractive. For up to 6 sockets, pricing starts at $199 per socket. The unrestricted Enterprise version costs $599 per socket.
Free and NFR Licenses
Beside buying it, you can download a free version of NAKIVO Backup & Replication. The free version has the same features as the paid version, but is limited to 2 Virtual Machines. IT professionals (VMUG members, VMware vExpert, VCP, VSP, VTSP, or VCI) can also receive a free 2-Socket Not For Resale (NFR) license of NAKIVO Backup & Replication for one year.
Installation and Configuration
The Windows-based installation package does not require any additional components like databases. The installation is a no-brainer. Same with the virtual appliance which can be deployed easily with the vSphere Web Client.
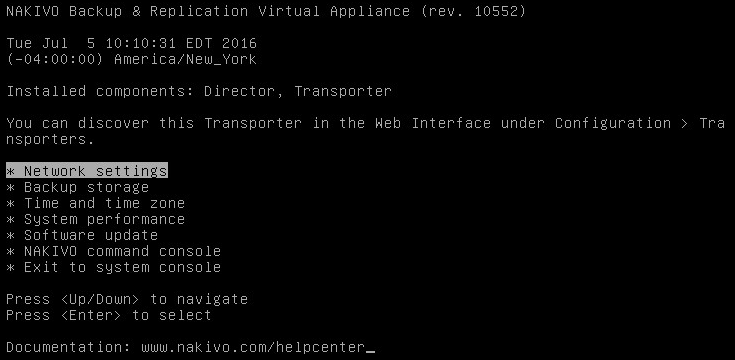
The Virtual Appliance requires basic network and timezone configuration which must be done with the virtual machine console. No Linux knowledge is required.
Any further configuration is identical on both, the Virtual Appliance and the software running on Linux/Windows and can be done with the Web Interface which is available at https://[ADDRESS]:4443. The Web Interface (Director) guides through the basic configuration that is required to setup the first backup job.
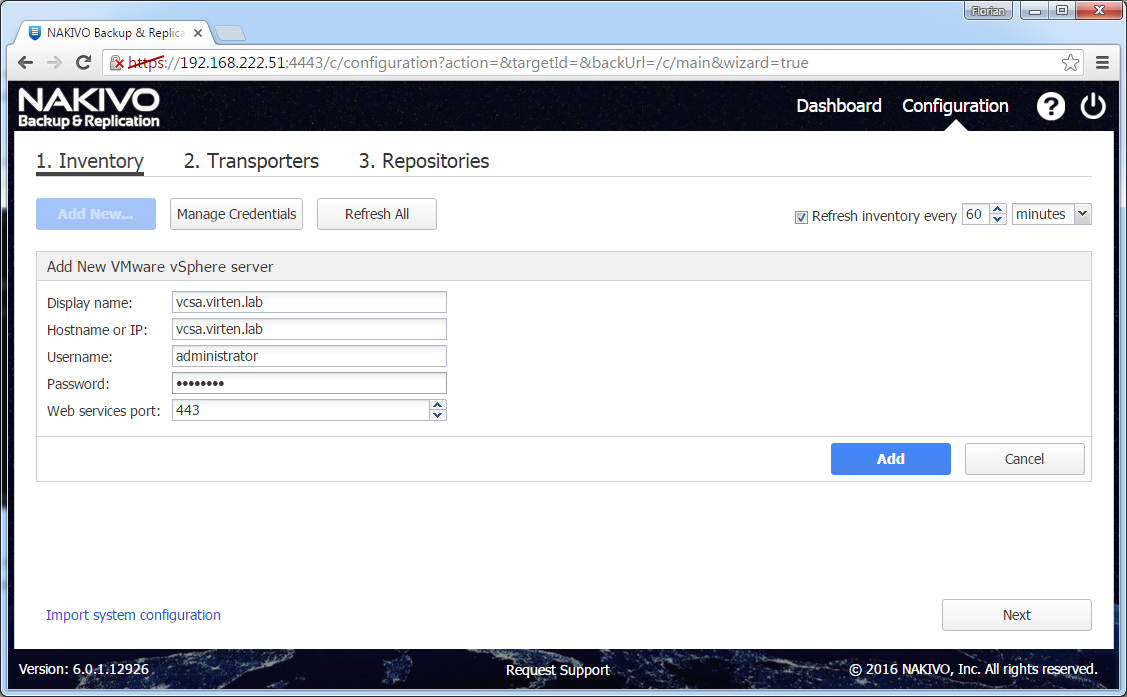
1. Inventory - Add the vCenter Server as inventory target. The NAKIVO management server will locally cache the entire vCenter inventory making further configuration very fast. The inventory is refreshed every 60 minutes automatically (configurable and manually triggerable) which is important to known when you want to create a backup job for a freshly created Virtual Machine.
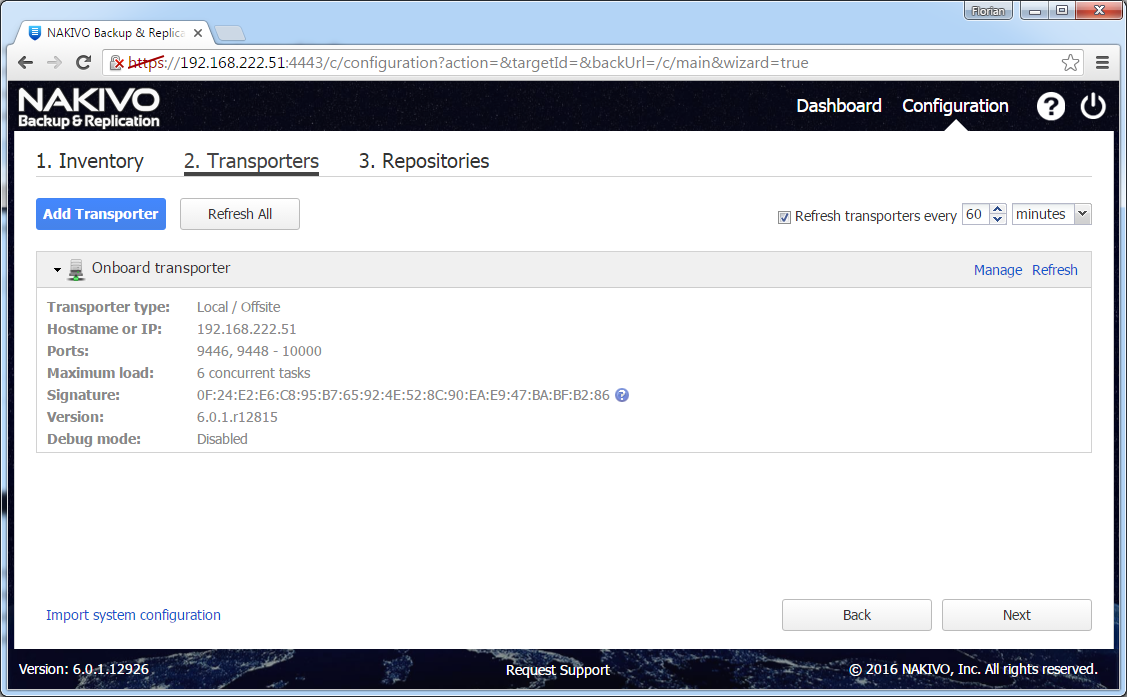
2. Transporter - The Transporter is the component that does all of the work: it performs backup, replication, and recovery, as well as data compression, deduplication, and encryption. An instance of the Transporter (Onboard Transporter) is included in each installation to enable backup, replication and recovery out of the box. The Onboard Transporter is automatically configured, nothing to do here.
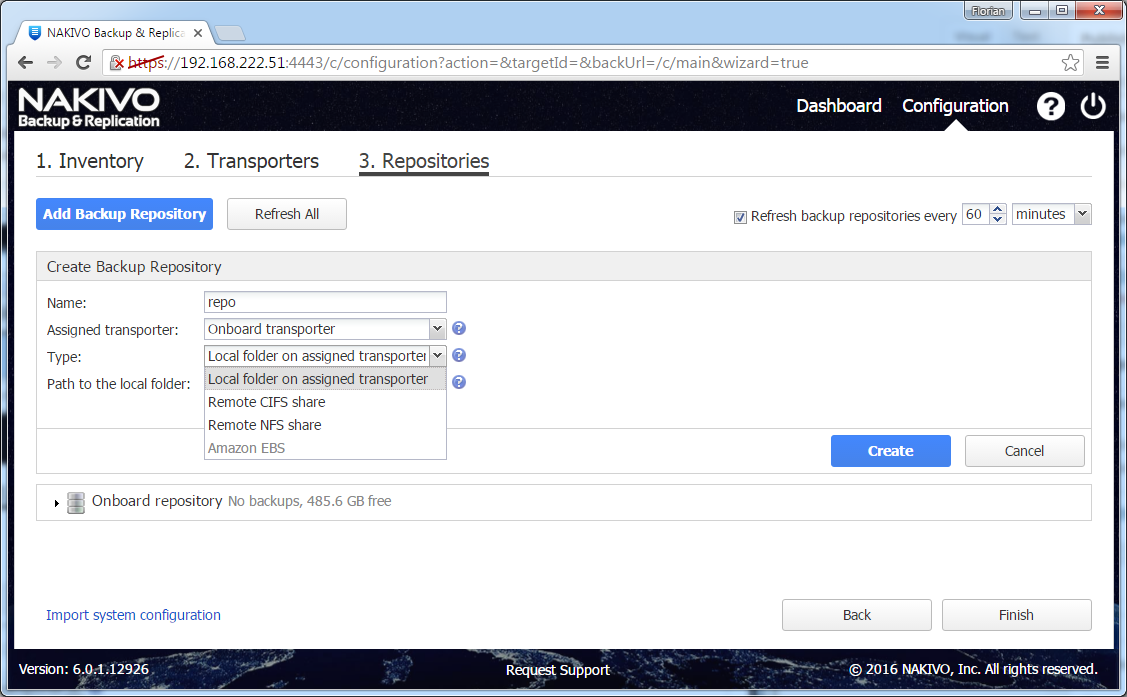
3. Repositories - A Backup Repository is a folder used by NAKIVO Backup & Replication to store VM backups. The Virtual Appliance comes with a preconfigured 520GB disk as backup storage. The capacity can be increased by adding additional disks to the Virtual Appliance, or by configuring a remote CIFS or NFS share as backup target.
Create the first Backup Job
After the initial configuration you are redirected to the job creating wizard to configure the first backup job.
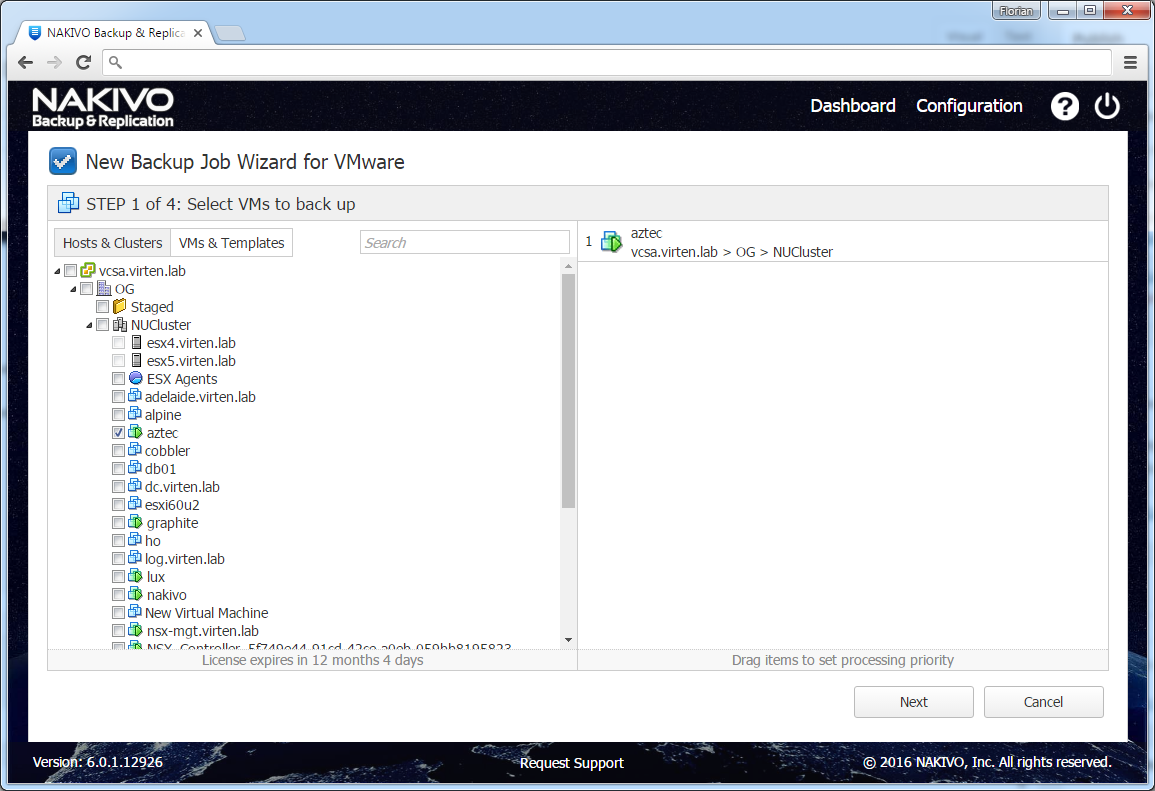
Step 1: Select VMs to backup. Virtual Machines can be grouped with the following objects. Any VM added to the object later are automatically added to the backup job.
- vCenter Server
- Datacenter
- Cluster
- ESXi Hosts (When not in a Cluster)
- VM Folders
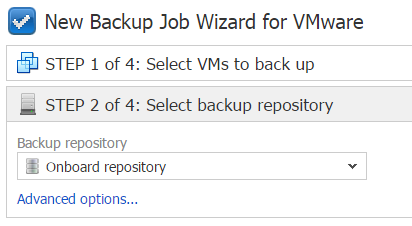
Step 2: Select the backup repository used by the job.
Step 3: Specify job schedule. Backup jobs can be configured to run daily, weekly, monthly, yearly or periodically (eg. every hour). You can also disable automatically backups and create an on demand job, which requires to start the backup job with the Web Client or the API. 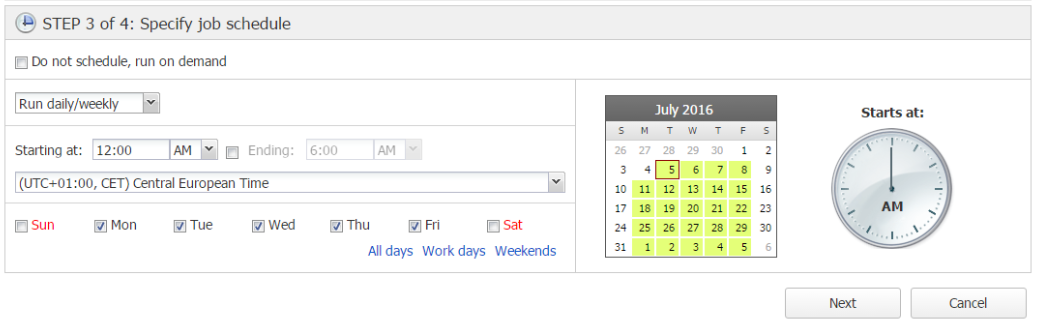
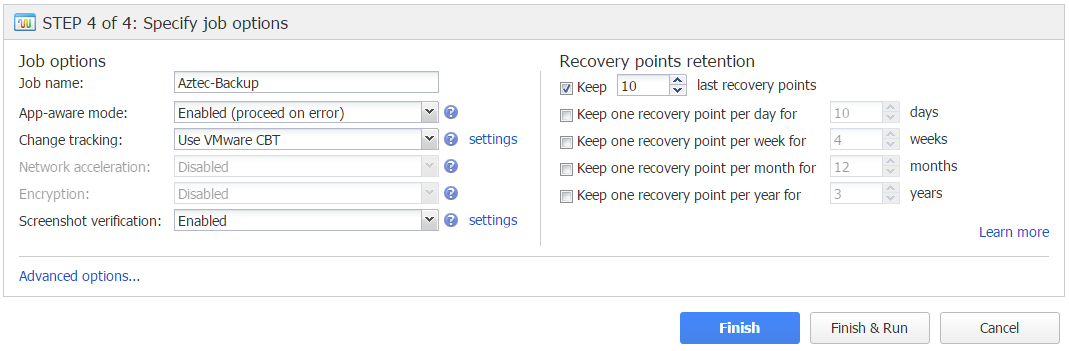
Step 4: Specify a retention policy and job options. Like with most VMware based backup products, backups are incremental forever. You can specify the number of recovery points or configure a Grandfather-father-son backup rotation. I've also enabled Screenshot verification here, which is disabled by default.
Run Backup Job
Start the Backup by using the "Run Job" button. 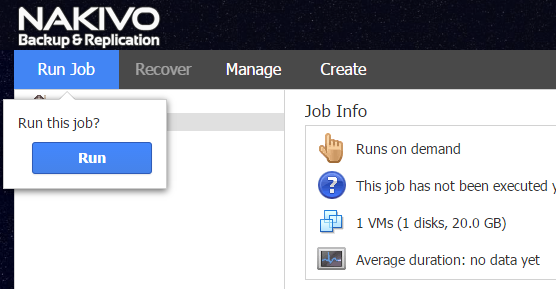
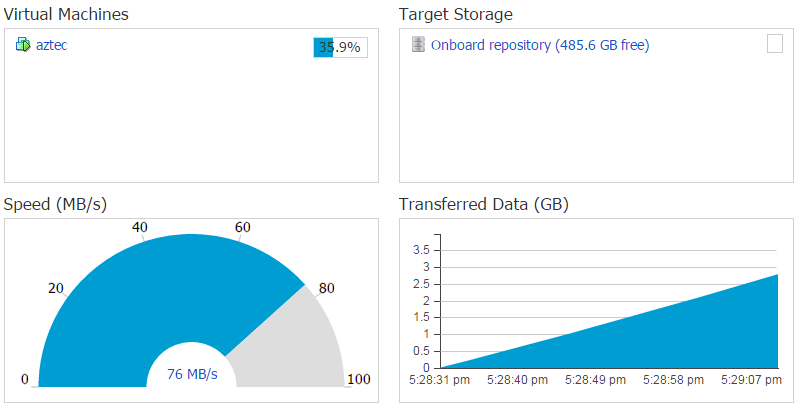
While the backup is running, you can monitor the progress.
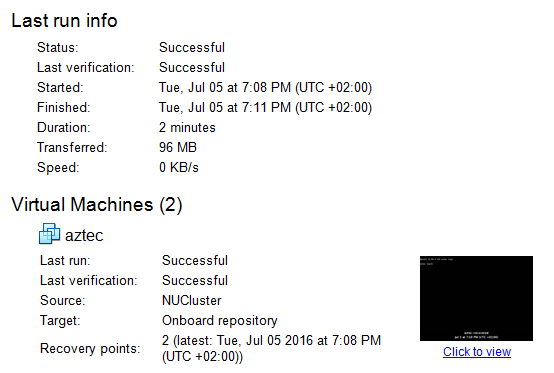
When Screenshot verification is enabled, a rehearsal restore is done with the Flash VM Boot feature in order to make a screenshot of the Virtual Machine. It's less the screenshot itself to have a proof of the restore, but the software testing the integrity of the backup image itself. The screenshot is included in the report E-Mail and not visible from the Web Interface.
Restore with Flash VM Boot
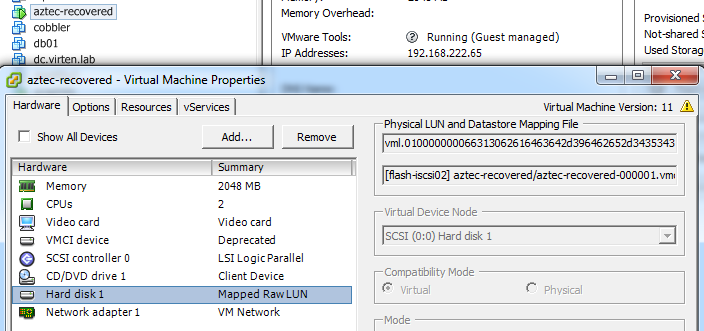
Now as I have a verified backup, its time to delete the virtual machine and try to bring it back. Flash VM Boot enables you to start Virtual Machines directly from the backup repository. This allows you to recover a VM within seconds. Flash VM Boot can be used to verify VM backups, run disaster recovery tests, access files or test software updates without affecting the live machine. Flash VM Boot registers the Virtual Machine in a datastore and uses a Raw Device Mapping to access the Virtual Disk in the backup repository.
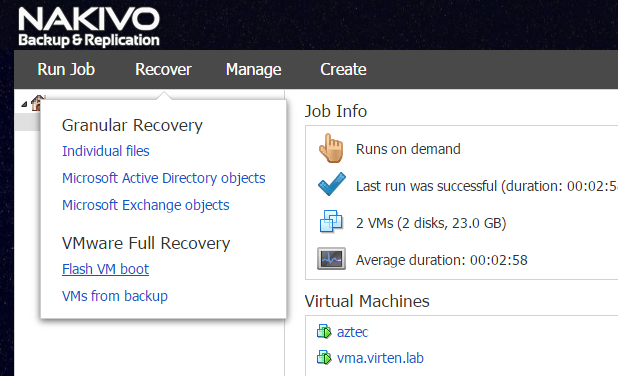
In the Web Interface, select Recover > Flash VM boot which brings up the restore wizard.
Select the Virtual Machine to restore, and the recovery point. The default is to use the latest recovery point which makes sense for most cases.
Specify VM location and additional options, for example when you want to generate a new MAC address.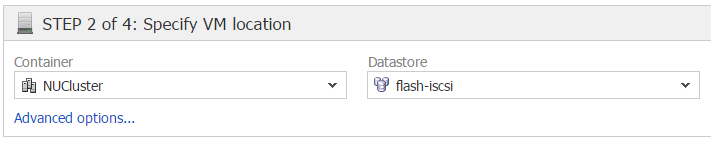
It takes about 20-30 seconds to restore and boot the virtual machine. As mentioned, the backup repository is not mounted as datastore but the virtual disk is mapped as Raw Device LUN from the Transporter. While you can use the virtual machine now, the VM is locked to the Transporter. To persist the Virtual Machine and get it back to the original datastore, a small downtime is required.
Persisting the recovered Virtual Machine requires a small workaround:
- Refresh the Inventory in Configuration
- Create a new replication job for the recovered Virtual Machine
- Run the initial replication job
- Run the job again to sync the delta created during the initial replication
- To ensure zero data loss, power off the VM and run the replication job for a last time
- Delete the VM created by Flash VM Boot
- Power on the VM created by the replication job
Command Line
NAKIVO Backup & Replication has a CLI that allows basic functions to be used from the command line. The command line tool is available for all versions, the Linux and the Windows-based.
Windows: C:\Program Files\NAKIVO Backup & Replication\cli.bat
Linux: /opt/nakivo/director/cli.bat
root@nakivo:~# /opt/nakivo/director/bin/cli.sh --job-list --host 192.168.222.51 --port 4443 --username admin --password admin
ID     | Name                       | State          | Last run
3      | VMware backup job          | On demand      | Successful
root@nakivo:~# /opt/nakivo/director/bin/cli.sh --job-start 3 --host 192.168.222.51 --port 4443 --username admin --password admin
OK
root@nakivo:~# /opt/nakivo/director/bin/cli.sh --job-info 3 --host 192.168.222.51 --port 4443 --username admin --password admin
ID     | Name                       | State          | Last run
3      | VMware backup job          | Running, 6.0%  | Successful
Error Handling
When something goes wrong during backup or restore jobs, error messages are provided with a KB reference on how to troubleshoot and fix the issue. In this example, I had a problem with the iSCSI vmkernel port which could not communicate with the Transporter. The linked KB entry (KB0042) explained the issue and solution very well.
This backup solution is actually pretty nice...